Material Swap
Change the fabric or finish of a product photo with Material Swap. Paint up to 4 regions and give each one a material, such as denim, leather, knit or a print.On this page
Material Swap changes what chosen parts of a product are made of, such as a shoe's canvas upper to corduroy or a jacket's body to leather. It keeps the product's shape, seams and construction, and changes only the color, texture and pattern of the parts you paint. Use it to show a product in new fabrics or prints for a store listing, a line sheet or a mockup without a new sample or photo shoot.
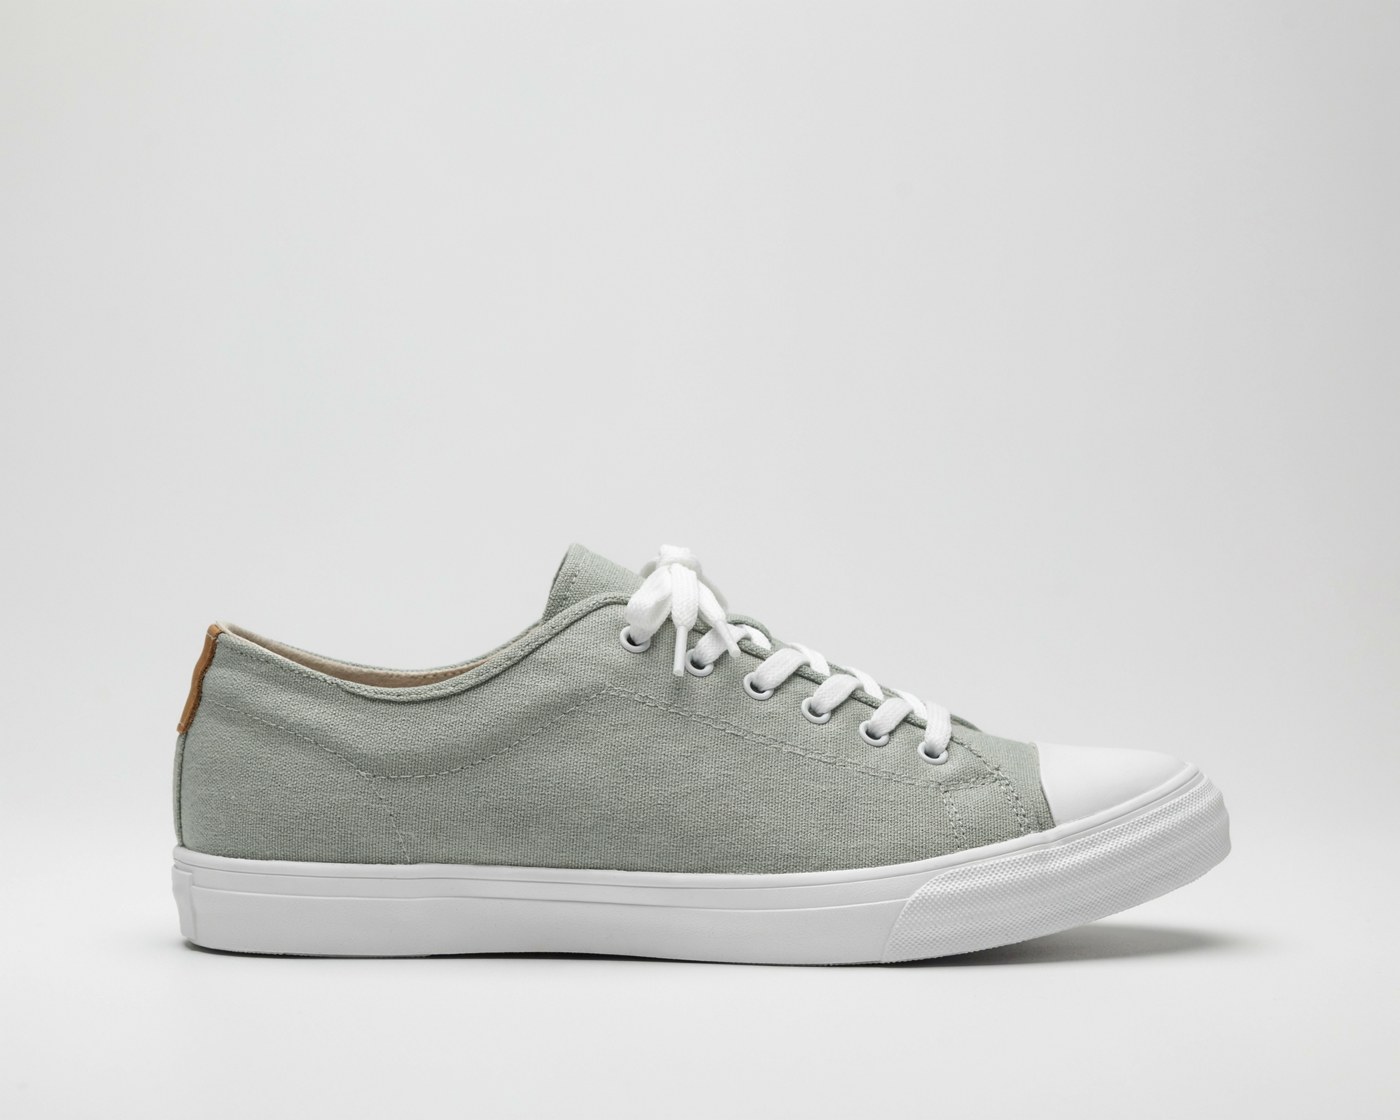
Before: the original product photo, with a canvas upper.
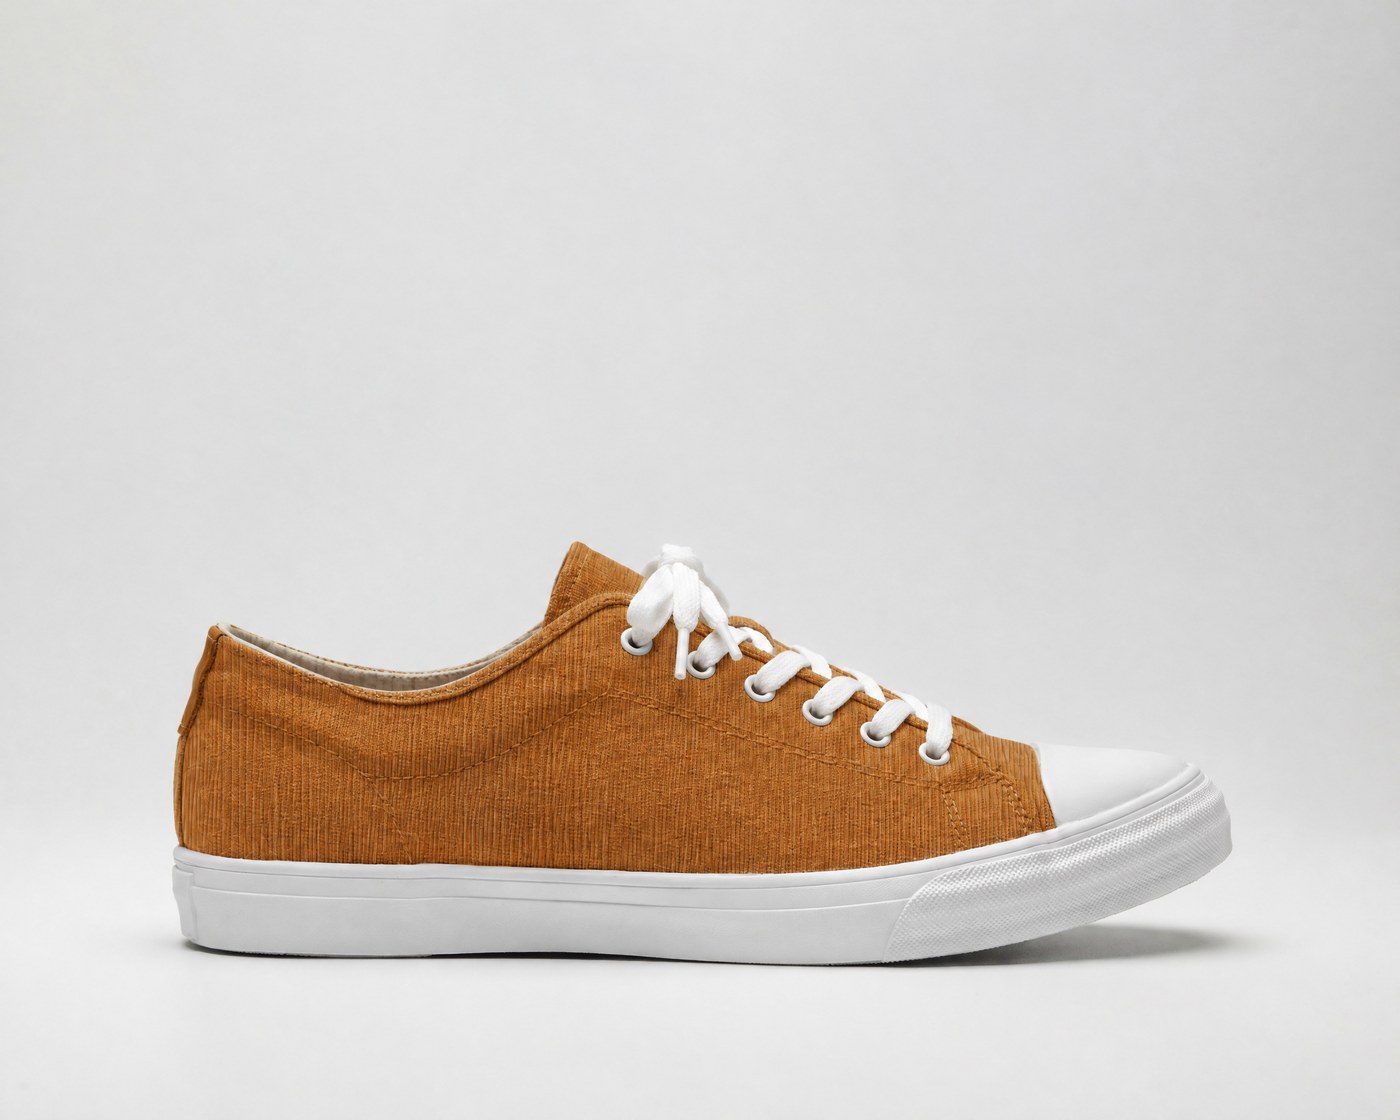
After: region 1 (the upper) set to Corduroy. The laces, sole and toe cap stay the same.
Material Swap is a premium app. It needs a paid plan or bought credits. See Plans and Credits.
To change only the color, not the material, use Colorways.
Swap a material
- Open the app: select Search in the sidebar (or press Ctrl+K, Cmd+K on a Mac), type Material Swap and open it.
- Under Product photos, add a clear photo of the product. You can add up to 6 photos.
- Paint the first part you want to change, such as the upper of a shoe. See Paint a region.
- Pick a material for that region. See Choose a material.
- To change another part, click Add region, paint it and pick its material. Each photo can have up to 4 regions.
- Optional: change Quality or Image shape. See Settings.
- Click Generate. The button shows the cost.
Results appear in Assets.
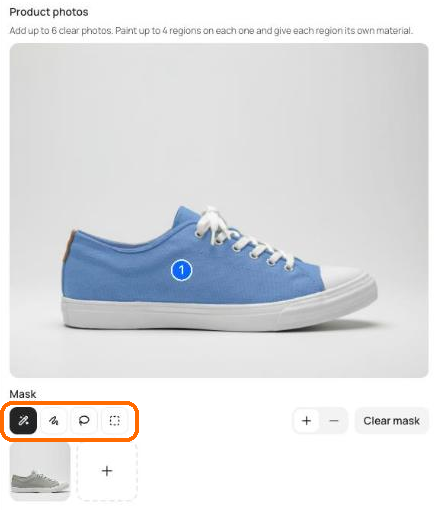
Each painted region shows its number on the photo.
Paint a region
A region is the part of the photo that gets one material. Use the tools under Mask:
- Magic wand: click a part to select it, such as one panel of a shoe. Click more parts to add them to the same region.
- Brush: paint over the area. Set Brush size to match the detail.
- Lasso: draw around the area.
- Rectangle: drag a box.
Use + (Add to mask) to add to the region and − (Remove from mask) to take away from it. Hold Option (Alt on Windows) to switch to removing for a moment. Clear mask starts the region over.
A region can hold several separate areas. For example, select both sleeves of a jacket into one region so they get the same material. Two regions can also use the same material.
Choose a material
Each region has its own material. Select a region in the Material regions list, then pick a material:
- A preset: choose a group from the menu, then click a swatch. Hover over a swatch to see its name.
- Your own material: under Your own material, upload or choose an image of a fabric or surface, such as a photo of your brand's print. Use a flat, evenly lit close-up so only the material shows.
Only the swatch's color, texture and pattern are used. The product keeps its shape, construction and seams.
| Group | Materials |
|---|---|
| Cotton & linen | Cotton poplin, Linen, Chambray, Cotton jersey |
| Denim & workwear | Denim, Light-wash denim, Corduroy, Cotton canvas |
| Leather & suede | Leather, Patent leather, Croc emboss |
| Knitwear | Cable knit, Ribbed knit, Chunky wool, Fleece, Waffle knit, French terry |
| Silk & drape | Satin, Silk charmeuse, Velvet, Chiffon |
| Sheer & lace | Lace, Organza |
| Metallic & embellished | Metallic, Lamé, Foil coated, Beaded |
| Prints | Floral print, Plaid, Stripe, Gingham, Camouflage |
| Animal print | Leopard, Snow leopard, Cheetah, Tiger, Zebra, Giraffe, Snakeskin, Dalmatian, Cow print, Tortoiseshell |
| Technical | Ripstop nylon, Mesh, Neoprene, Softshell |
Each region in the list shows whether it's Painted and which material it has. To delete a region, click the × on its row.
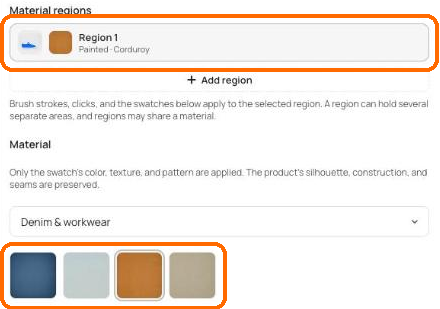
The swatch you click applies to the selected region.
Change several photos
Add up to 6 photos of the same product, such as the front, side and back. Select each photo's thumbnail and paint its regions. Each photo needs at least one painted region, and every region needs a material.
If something isn't ready when you click Generate, Material Swap tells you what's missing, such as "Paint every material region on every photo," "Pick a material for every region" or "Open every photo once so its size is known."
Settings
| Setting | Options | Default |
|---|---|---|
| Quality | Low, Medium, High | Medium |
| Image shape | Original, 1:1, 3:4, 4:3, 16:9, 9:16 | Original |
| Add to Collection | Save every result into a collection | None |
Original keeps your photo's framing. A different shape extends the scene to fill the new shape, so part of the image is newly created.
Tips for better results
- Use a sharp, evenly lit photo on a plain background. Clean edges give a clean swap.
- Paint only the part that changes. Leave out laces, zippers, trims and soles unless you want them changed too.
- Pick a material that suits the product's shape. A stiff material such as leather or neoprene reads best on structured parts. Drapey ones such as satin or chiffon suit soft parts.
- Use your own material for exact brand prints and fabrics. Crop the image to the material alone, without folds, shadows or labels.
- Check the edges and nearby parts before you publish. Make sure logos and trims stayed sharp and only the painted parts changed.
In this topic: product images
- Apps and Workflows: choose the right app
- Remove Backgrounds and Objects: cut out the product or clean up the photo
- Colorways: show the product in new colors
- Material Swap (this page): show it in new fabrics and finishes
- Upscale: enlarge it for print and store listings
- Ad Resizer: resize the finished ad for each placement
- Troubleshooting: fix common problems
Related
Material Swap re-renders up to 4 masked regions in new materials in one request.