> For the complete documentation index, see [llms.txt](https://docs.ideogram.ai/llms.txt). Markdown versions of documentation pages are available by appending `.md` to page URLs; this page is available as [Markdown](https://docs.ideogram.ai/create/image-settings.md).

# Image Settings

Understand Ideogram aspect ratio, resolution, image count, quality, Magic Prompt, seed and background settings, including what changes when you switch models.

Each model in the Image app shows only the settings it supports. The defaults work well, so change them only when you need to. Settings marked as being under **Advanced settings** sit in a collapsed row near the bottom of the panel; select it to open.

## What changes when I switch models?

The Image app shares your prompt between models and carries over your image-count choice. It carries over an aspect ratio only when the destination model supports that shape. Other options, such as a style preset or quality choice, belong to the individual model. Check its panel after switching rather than assuming every setting transferred.

These are working drafts in the current app session, not a promise that settings will follow you after a reload or onto another device. For a completed run, use [Recreate](/create/create.md#copy-prompt-reuse-prompt-or-recreate) to restore the supported inputs and settings.

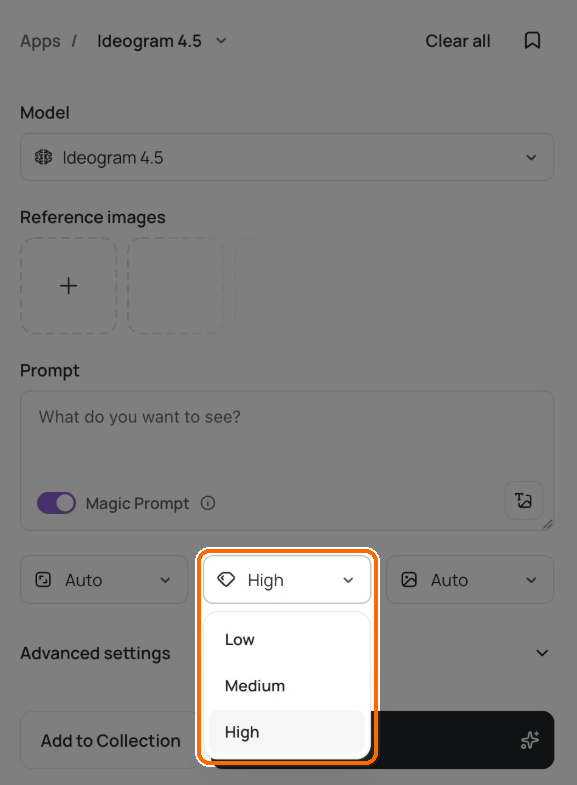
<figure><img src="https://1799634369-files.gitbook.io/~/files/v0/b/gitbook-x-prod.appspot.com/o/spaces%2FzjhNby3LLsIikYuvxAJP%2Fuploads%2Fgit-blob-d593d48e00af5a4873e20e1dbe3b0abae8ae32ab%2Fimage-settings-1.png?alt=media" alt="Image app on Ideogram 4.5 with the Magic Prompt toggle on and the Quality menu open, showing Low, Medium and High, highlighted"><figcaption><p>Each model shows only its own settings. Here, Ideogram 4.5 offers Low, Medium and High quality.</p></figcaption></figure>

## Aspect ratio and size

**Aspect ratio** sets the shape of the image. On some models a **Resolution** menu appears after you pick a ratio, with labels such as "1K (1024 × 1024)" or "2K (2048 × 2048)".

| Model        | Aspect ratios                                                                                                                | Default |
| ------------ | ---------------------------------------------------------------------------------------------------------------------------- | ------- |
| Auto         | Auto, 1:1, 4:3, 3:4, 3:2, 2:3, 16:9, 9:16                                                                                    | Auto    |
| Ideogram 4.5 | Auto, or a ratio from the Square, Landscape and Portrait groups, then Resolution 1K or 2K                                    | Auto    |
| Ideogram 4.0 | Auto, or 1:1, 5:4, 4:3, 3:2, 8:5, 16:9, 2:1, 12:5, 22:9, 23:9, 8:3, 3:1 and their portrait mirrors, then Resolution 1K or 2K | Auto    |
| Ideogram 3.0 | 1:1, 4:5, 5:4, 3:4, 4:3, 2:3, 3:2, 10:16, 16:10, 9:16, 16:9, 1:2, 2:1, 1:3, 3:1. No Auto and no Resolution menu              | 1:1     |

On Ideogram 4.0, the widest ratios (12:5, 22:9, 23:9, 8:3 and their mirrors) come in 2K only. Ideogram 4.5 offers the same ratios, but 3:1 and 1:3 also come in 2K only.

Common shapes: **1:1** for profile pictures, logos and stickers; **4:5** for Instagram and Facebook feed posts; **9:16** for Instagram Stories, Reels, TikTok and YouTube Shorts; **16:9** for YouTube thumbnails and presentations; **2:3** for Pinterest pins, posters and book covers; **3:1** for banners and website headers.

The Transparent and partner models have their own lists; see [Models](/create/models.md).

### Why can't I see Resolution?

On Ideogram 4.0 and 4.5, the **Resolution** choice appears after you select a fixed aspect ratio. While the ratio is **Auto**, the model decides the output shape and that separate menu is hidden. On Ideogram 4.5 with reference images, **Size** replaces both controls.

### Size on Ideogram 4.5 with reference images

When you attach reference images to Ideogram 4.5, a **Size** menu replaces Aspect ratio and Resolution:

* **Auto**: "Picks a size from your images and prompt."
* **Source image size**: "Keeps the first image's own width and height."
* **Custom**: enter **Width** and **Height**. Each side must be a multiple of 32 and at least 256 px. The total area can't exceed 4,194,304 pixels (2048 × 2048), and the aspect ratio can't exceed 6:1 or 1:6.

The area limit is different from a 2048-pixel limit on each side. For example, **3072 × 1024** is within the area limit and has a 3:1 ratio. Invalid dimensions must be corrected before generating. Use **Source image size** when retaining the first reference's dimensions is your aim.

## Number of images

Choose **Auto** or 1 to 8 images per run. More images cost more credits, and the **Generate** button shows the total. Every image model has this setting, and Auto is the default. On the Auto model, your last choice is kept for next time.

What Auto gives you depends on the model:

* Auto model: 4 images, or 2 when you attach references
* Ideogram models and P-Image-Ideogram: 4
* GPT Image, Nano Banana and Z-Image: 1

## Quality

**Quality** trades speed and cost against detail. The cost on the **Generate** button changes with your choice.

| Model                                         | Options                                                                             | Default on paid plans |
| --------------------------------------------- | ----------------------------------------------------------------------------------- | --------------------- |
| Ideogram 4.5                                  | Very low, Low, Medium, High. Very low appears only when you attach reference images | High                  |
| Ideogram 4.0, 3.0 and both Transparent models | Turbo, Default, Quality                                                             | Default               |
| GPT Image 2.5                                 | Auto, Low, Medium, High                                                             | Auto                  |
| P-Image-Ideogram                              | Very Low, Low, Medium, High                                                         | Medium                |

On a free plan, Ideogram models start at the cheapest option: Turbo, or Low on Ideogram 4.5. Auto and the other partner models have no Quality setting.

## Magic Prompt

**Magic Prompt** "Enhances your prompt to improve image variety and richness. It can also translate your prompt into English." It's an on/off toggle, and it starts on. Turn it off when you want the model to follow your exact words.

Magic Prompt appears on Ideogram 4.5, 4.0, 3.0 and 3.0 Transparent. On Ideogram 4.5 it hides when you attach reference images, because the prompt then works as an edit instruction. Ideogram 4.0 Transparent has **Prompt upsampling** (Auto, On or Off) under **Advanced settings** instead. Auto and the partner models have no Magic Prompt; P-Image-Ideogram has its own **Prompt upsampling** switch under **Advanced settings**.

Ideogram 4.5 and 4.0 also accept JSON prompts. See [JSON Prompting](/prompting/json-prompting.md).

Take the prompt *Photo of cupcake and strawberries.* Magic Prompt expanded it into a longer prompt that added frosting, sprinkles and a rustic, sunlit background:

<div><figure><img src="https://1799634369-files.gitbook.io/~/files/v0/b/gitbook-x-prod.appspot.com/o/spaces%2FzjhNby3LLsIikYuvxAJP%2Fuploads%2FxArbjXW2Puk0yppN8aI3%2FCupcake%20OFF.png?alt=media&amp;token=6a65b17c-2e30-4a4a-bd83-06c7c501aeb6" alt="Plain photo of a cupcake and strawberries" width="375"><figcaption><p>Magic Prompt off.</p></figcaption></figure> <figure><img src="https://1799634369-files.gitbook.io/~/files/v0/b/gitbook-x-prod.appspot.com/o/spaces%2FzjhNby3LLsIikYuvxAJP%2Fuploads%2FzcUHxECHYSf8DbP1PcSF%2FCupcake%20ON.png?alt=media&amp;token=ae061257-04f8-4bed-a09e-0022cecf872b" alt="Cupcake with frosting and sprinkles beside fresh strawberries in warm, rustic light" width="375"><figcaption><p>Magic Prompt on.</p></figcaption></figure></div>

## Background

On **Ideogram 4.5** and **GPT Image 2.5**, open **Advanced settings** to find **Background**:

* **Auto** (default): leaves the background choice to the model.
* **Transparent**: keeps an alpha channel, so the result can have a clear background.
* **Opaque**: fills the background in.

This setting works with or without reference images. Download as PNG or WEBP to keep transparency. Ideogram 4.0 and 3.0 use separate Transparent models instead. See [Transparent Backgrounds](/create/transparent-backgrounds.md).

## Seed

The seed is the number a run starts from. Keep the seed, model and settings fixed when comparing prompt changes so you change fewer inputs at once. A seed isn't a saved copy of an image and doesn't guarantee identical output or layout.

Find **Seed** under **Advanced settings** on every image model. The field shows "Random" when empty, which means each run gets a new seed.

### Set a seed

1. Open **Advanced settings**.
2. Enter digits only in **Seed**, up to 2147483647.

To fill in a random seed instead, select the dice button (**New random seed**).

The dice button fills in one specific number. That number stays in the field for subsequent runs until you change or clear it. To request a fresh random seed on every run, clear the field so it reads **Random** again. A matching seed alone doesn't guarantee identical output across different models or settings.

{% hint style="warning" %}
Switching models, or changing a key idea in the prompt (say, "photo" to "painting"), gives a different image even with the same seed.
{% endhint %}

## Collection

**Add to Collection** saves every image from your next runs into a collection. Every image model has this setting, and no collection is picked by default.

### Save new images to a collection

1. Select **Add to Collection**.
2. Choose a collection. The button then shows the collection's name.

To stop saving to it, select the **x** on the button.

{% hint style="info" %}
There's no public/private setting in the Image app. On Plus, Pro, Team and Enterprise, new images stay private until you publish one. On the free plan and the legacy Basic plan, everything you generate is public. To publish an image:

1. Open the image.
2. Select **More options**.
3. Select **Manage**.
4. Select **Publish to community**.
   {% endhint %}

## Ideogram 3.0 settings

These settings appear on Ideogram 3.0, under **Advanced settings**. Custom models built on Ideogram 3.0 have them too, except the **Style** menu. Custom models built on another available base use that base's controls instead.

### Negative prompt

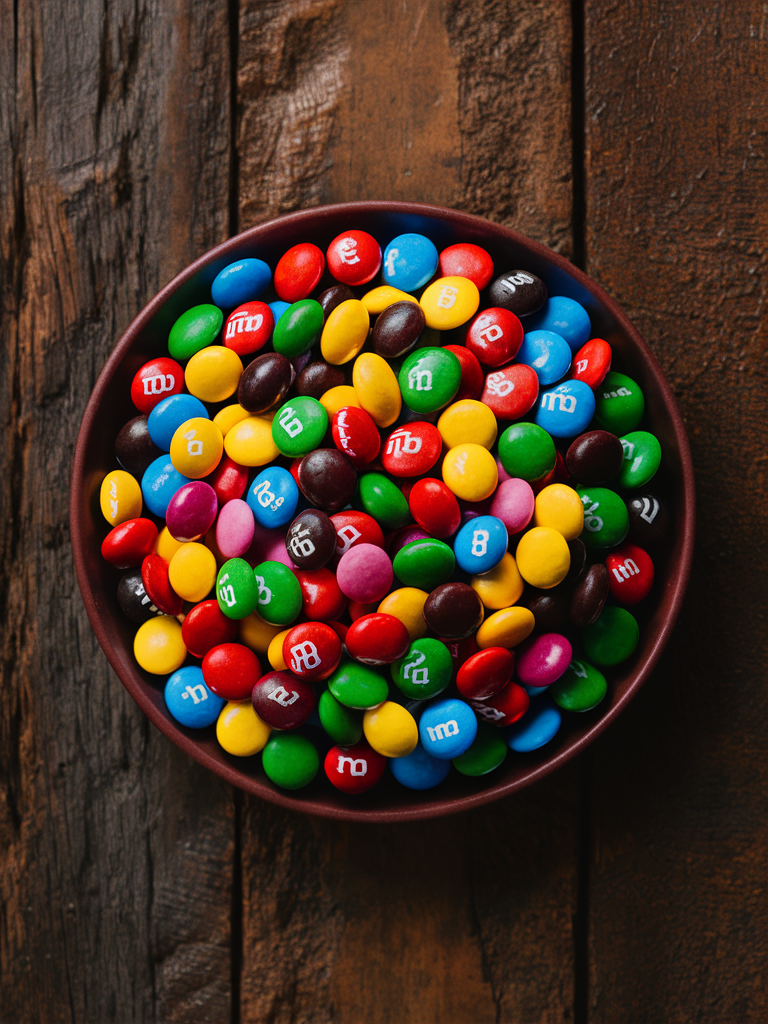
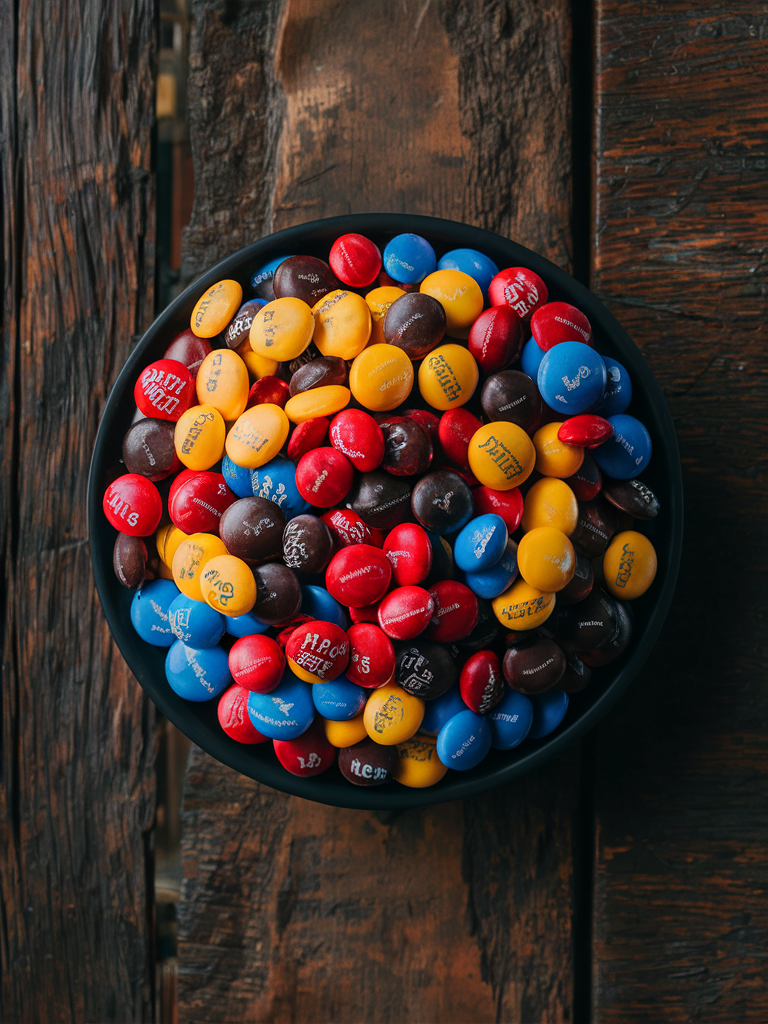
**Negative prompt** ("Things to avoid") lists what you don't want in the image. Separate items with commas, for example `green, green candies`. The field has its own **Describe** button.

<div><figure><img src="https://1799634369-files.gitbook.io/~/files/v0/b/gitbook-x-prod.appspot.com/o/spaces%2FzjhNby3LLsIikYuvxAJP%2Fuploads%2F1JbUNnLkmvBsMCDrzDIA%2Fimage.png?alt=media&amp;token=4a3d8c99-d5c4-464e-935e-c6165f289643" alt="Colorful candies in every color on a wooden table"><figcaption><p>No negative prompt.</p></figcaption></figure> <figure><img src="https://1799634369-files.gitbook.io/~/files/v0/b/gitbook-x-prod.appspot.com/o/spaces%2FzjhNby3LLsIikYuvxAJP%2Fuploads%2FWXmqqXYiFB49UZLekUkB%2Fimage.png?alt=media&amp;token=8efb2b98-5163-499f-a1dc-bef7aa636728" alt="The same candies with no green ones"><figcaption><p>Negative prompt: green, green color, green candies.</p></figcaption></figure></div>

Avoid contradicting the main prompt with the negative prompt. If you ask for a classical guitar, strings can still appear even when you list them as something to avoid. Try a positive description of what should be visible instead. See [Fix Common Problems](/prompting/fix-common-problems.md).

### Style

Three controls shape the look of an Ideogram 3.0 image.

**Style** sets the overall type:

* **Auto** (default): picks a style from your prompt
* **General**: fits most uses, including art and abstract work
* **Realistic**: lifelike photos with true colors, textures and light
* **Design**: clean, vector-like images such as logos and posters

**Style preset** opens **Style presets**: "Distinct, prescriptive aesthetics that define the image's look even with short prompts." Choose **None** or one of 62 presets.

**Style reference images** take up to 10 of your own images (JPEG, PNG or WebP, up to 25 MB each) and copy their look. Pick images that share a look and mood for a steady style, or mix different ones to see what the model blends. A gradient image among them pulls the colors toward it.

Presets and style reference images work only with the Auto or General style; with Realistic or Design you'll see "Available with the Auto or General style." You can use a preset or style references, not both: "Style references replace the style preset."

#### Apply a style preset

1. Choose **Ideogram 3.0** in the **Model** picker.
2. Open **Advanced settings**.
3. Set **Style** to **Auto** or **General**.
4. Select **Style preset** to open **Style presets**.
5. Choose a preset.

#### Add style reference images

1. Choose **Ideogram 3.0** in the **Model** picker.
2. Open **Advanced settings**.
3. Set **Style** to **Auto** or **General**.
4. Add up to 10 images in **Style reference images**.

{% hint style="success" %}
For a preset or style references to come through clearly, turn Magic Prompt off and keep style words out of your prompt. Short prompts work best.
{% endhint %}

### Color palette

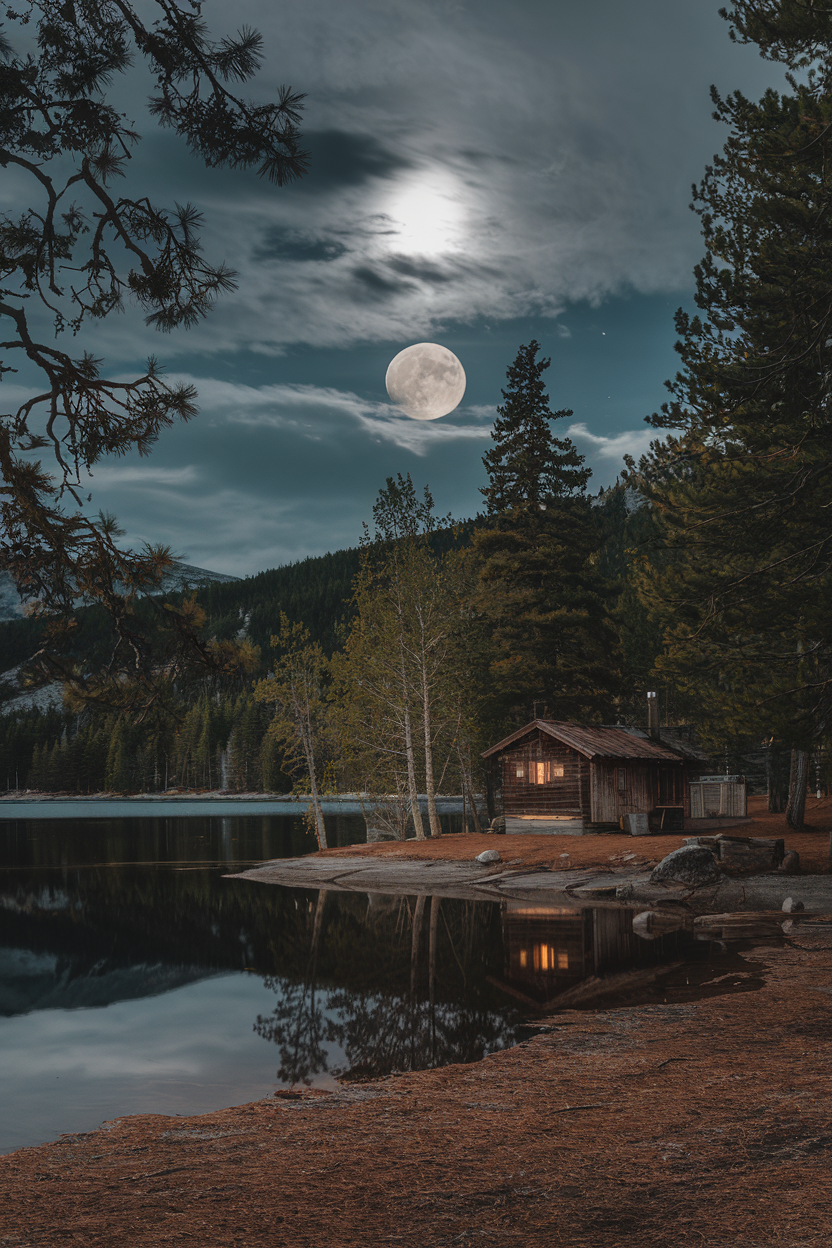
**Color palette** steers the colors of the image. Treat it as a direction, not an exact color match; it works best alongside color words in your prompt.

Choose **None**, a preset (**Ember**, **Fresh**, **Jungle**, **Magic**, **Melon**, **Mosaic**, **Pastel** or **Ultramarine**) or **Custom**.

Custom palettes need a Plus, Pro, Team or Enterprise plan. On other plans the option shows as **Custom (Plus)** and can't be picked.

#### Use a custom palette

1. Choose **Ideogram 3.0** in the **Model** picker.
2. Open **Advanced settings**.
3. Set **Color palette** to **Custom**. A **Palette colors** field appears.
4. Type up to 8 hex codes in **Palette colors**, separated by spaces, such as `#FF5733 #0133FF #DE3357`.

<div><figure><img src="https://1799634369-files.gitbook.io/~/files/v0/b/gitbook-x-prod.appspot.com/o/spaces%2FzjhNby3LLsIikYuvxAJP%2Fuploads%2FDmickR7KKoRDyEUbm2jg%2Fimage.png?alt=media&amp;token=a7732947-3122-4a58-a2ef-3b42c004f916" alt="Moon rising over a lakeside cabin among pines in natural night tones"><figcaption><p>No palette.</p></figcaption></figure> <figure><img src="https://1799634369-files.gitbook.io/~/files/v0/b/gitbook-x-prod.appspot.com/o/spaces%2FzjhNby3LLsIikYuvxAJP%2Fuploads%2FmExrgqoe4nbAMNaCFkIV%2Fimage.png?alt=media&amp;token=48b07af2-9473-4f1f-95de-d937a73410a8" alt="The same lakeside scene in deep ultramarine blues"><figcaption><p>Ultramarine.</p></figcaption></figure></div>

## In this topic: creating images

1. [Create Images](/create/create.md): make your first image
2. [Models](/create/models.md): pick the model for the job
3. **Image Settings** (this page): set size, quality and other options
4. [Prompting Basics](/prompting/prompting.md): write a prompt that works
5. [Fix Common Problems](/prompting/fix-common-problems.md): fix results that come out wrong