# Welcome to Ideogram


Ideogram (*pronounced "eye-dee-oh-gram"*) is a free-to-use AI tool that turns your ideas into stunning images, in a matter of seconds. Ideogram excels at creating captivating designs, realistic images, innovative logos and posters. With unique capabilities like text rendering in images, we aim to inspire creativity and help every user bring their imagination to life.

Ideogram 4.0 is the newest generation model for prompt fidelity, clearer in-image text, reliable editing, style control, and production-ready visual assets.

**Have a question? Check if it's been covered in our** [**Frequently Asked Questions**](/frequently-asked-questions)**.**

***

## Why Ideogram?


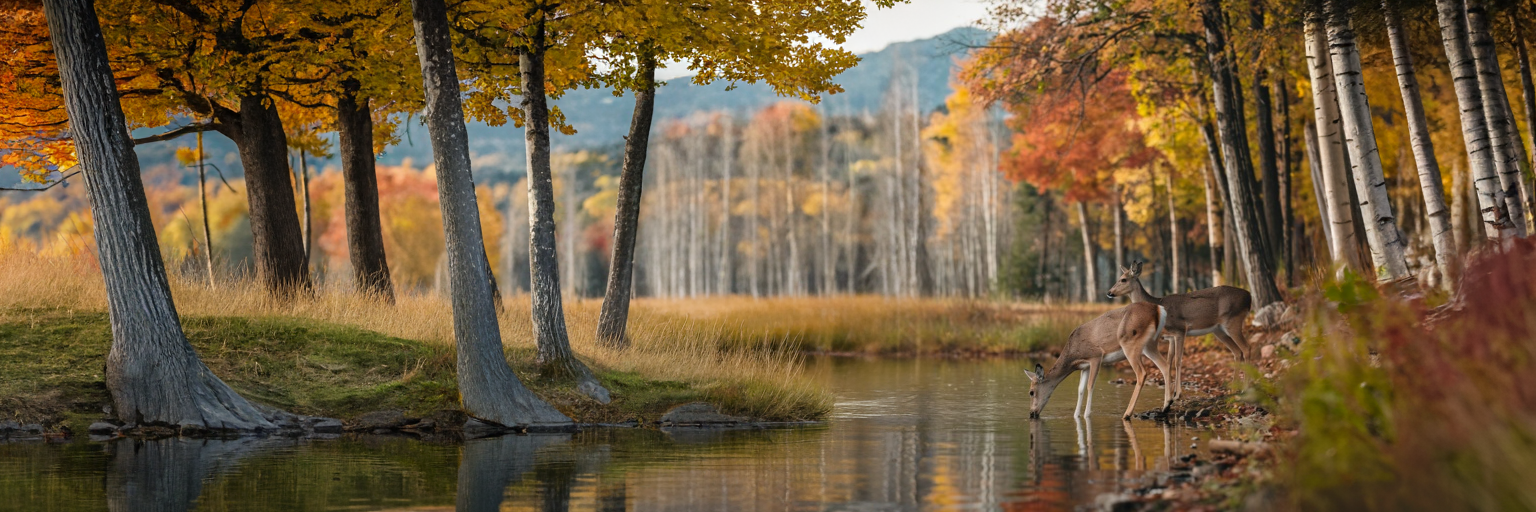
<table data-card-size="large" data-view="cards"><thead><tr><th></th><th data-hidden data-card-cover data-type="files"></th><th data-hidden data-card-target data-type="content-ref"></th></tr></thead><tbody><tr><td><h3><strong>Ideogram 4.0</strong></h3><p>Prompt fidelity, crystal-clear type, reliable editing, and production-ready image workflows across the app, API, MCP, and open weights.</p></td><td><a href="/files/l9IFLnuhgUC1MUZFUFQ9">/files/l9IFLnuhgUC1MUZFUFQ9</a></td><td><a href="/pages/9Z7qU3sfpD8iFc7O9yCU">/pages/9Z7qU3sfpD8iFc7O9yCU</a></td></tr><tr><td><h3><strong>Background Control</strong></h3><p>Remove a background for a transparent cutout, or replace it with a generated scene from a prompt.</p></td><td><a href="/files/1LpqiLyrpJs93jcGl0lG">/files/1LpqiLyrpJs93jcGl0lG</a></td><td><a href="/pages/oY4GxDySCzMYo3EFlQpj">/pages/oY4GxDySCzMYo3EFlQpj</a></td></tr><tr><td><h3><strong>Typography</strong></h3><p>Ideogram excels at integrating text into images for logos, branding, POD, or design layouts.</p></td><td><a href="/files/Je0y7F3qcJIEbPohNKuo">/files/Je0y7F3qcJIEbPohNKuo</a></td><td><a href="/pages/Rp7PvgJHX9bp6P0WeTaT">/pages/Rp7PvgJHX9bp6P0WeTaT</a></td></tr><tr><td><h3><strong>Custom Models</strong></h3><p>Train on-brand image models from your approved assets so generations follow your style, art direction, typography, and visual identity.</p></td><td><a href="/files/ZF6M57yNFCN1CuFIEB6A">/files/ZF6M57yNFCN1CuFIEB6A</a></td><td><a href="/pages/XU4sf1YGubgCqE0U8cfW">/pages/XU4sf1YGubgCqE0U8cfW</a></td></tr></tbody></table>

## A few other features

* [**Magic Prompt**](/using-ideogram/generation-settings/magic-prompt)**:** Transforms a brief idea into a rich, detailed prompt, ensuring striking visuals.
* [**Custom Models**](/using-ideogram/features-and-tools/reference-features#custom-models): Train models on approved brand, subject, or style assets where your plan and account support them.
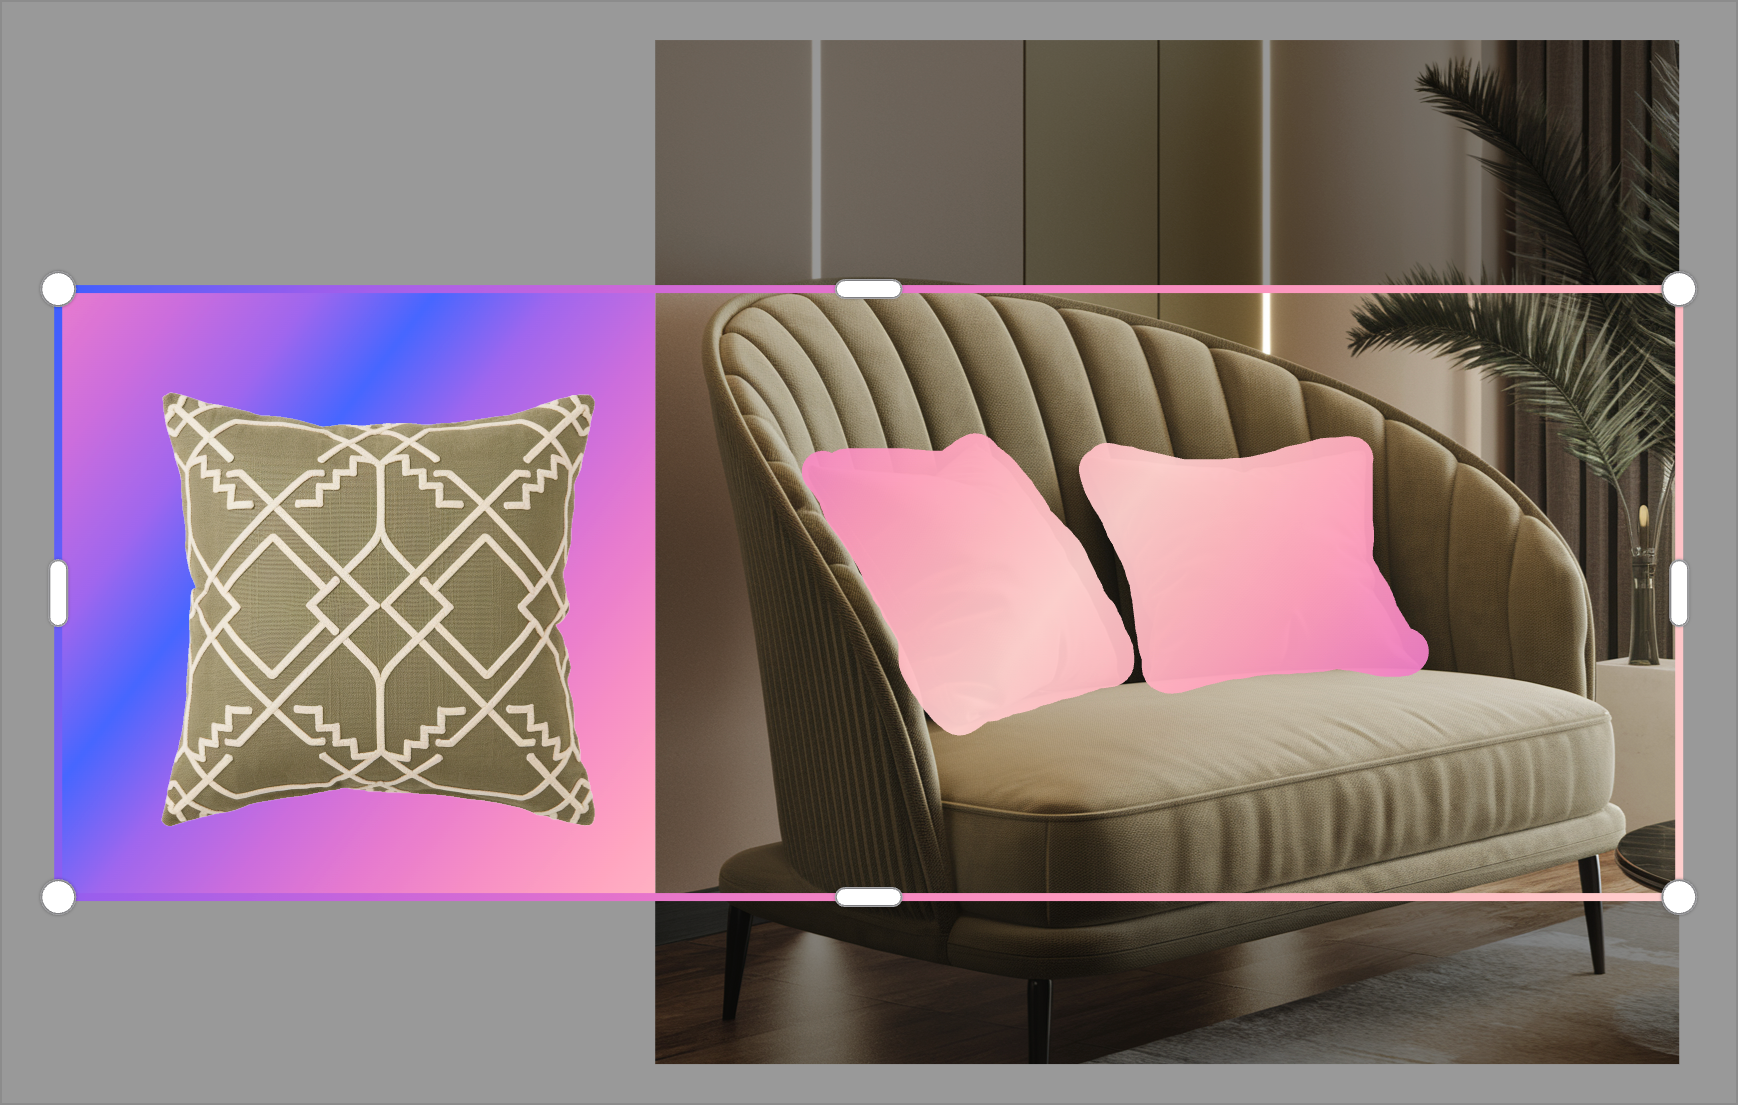
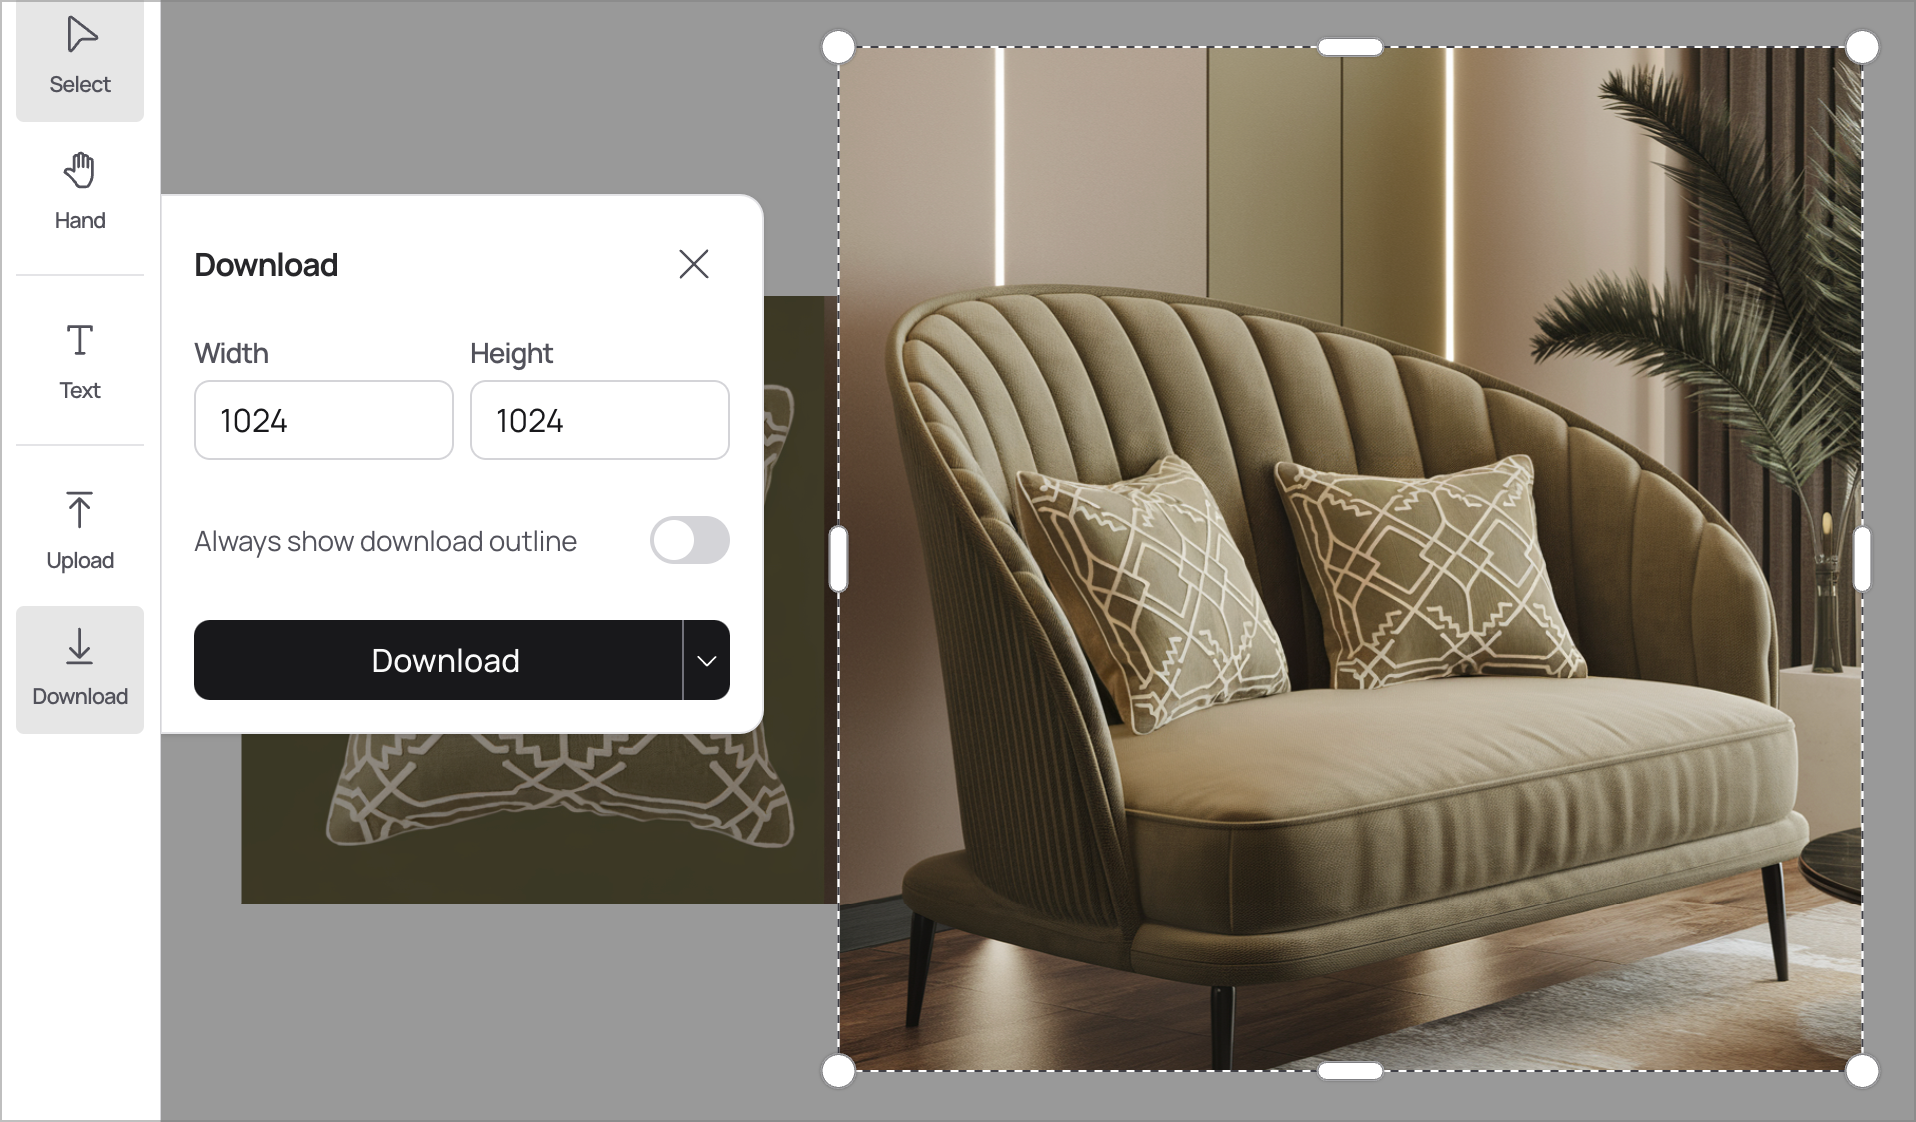
* [**Background Control**](/using-ideogram/features-and-tools/replace-or-remove-background): Remove or replace backgrounds to isolate subjects or craft new scenes.
* [**Aspect Ratios**](/using-ideogram/generation-settings/aspect-ratio-and-dimensions): Choose from many presets (vertical, square, horizontal) between 1:3 and 3:1.

And much more to discover!

## Ways to use Ideogram

* [**App**](https://ideogram.ai/): Hands-on image creation and editing.
* [**API**](https://developer.ideogram.ai): Product and workflow integration.
* [**MCP**](https://ideogram.ai/features/mcp/): MCP lets assistants and internal agents use Ideogram inside their workflows, including generating, editing, reframing, upscaling, removing backgrounds, and organizing visual assets.

## Dive deeper into Ideogram

* [Quick Start Guide](/quick-start-guide)
* [Prompting Guide](/using-ideogram/getting-started/prompting-guide)
* [Explore Settings](/using-ideogram/generation-settings)
* [Discover All Features](/using-ideogram/features-and-tools)

## Ready to create?

<a href="https://ideogram.ai/" class="button primary">Try Ideogram</a>

Or download the official Ideogram iOS app on your iPhone or iPad.

​[​![Download on the App Store](https://files.gitbook.com/v0/b/gitbook-x-prod.appspot.com/o/spaces%2FzjhNby3LLsIikYuvxAJP%2Fuploads%2FddR66f8L3y7Sb8AkeVaQ%2FDownload_on_the_App_Store_Badge_US-UK_RGB_blk_092917.svg?alt=media\&token=7ec43861-4aa0-4067-89ab-6986d68081dc)​](https://apps.apple.com/us/app/ideogram-ai-image-generator/id6476790495)​

***

## **We're hiring!**

We're on a mission to develop generative media models to help people become more creative. If our mission resonates with you, then we’d love to hear from you. We're hiring for roles in AI research, engineering, and data operations. Join us to build the future of AI for creativity. Please apply at [Ideogram Jobs](https://ideogram.ai/careers?utm_source=v2).


# Quick Start Guide

This Quick Start Guide will walk you through the essentials of using Ideogram — from signing up to generating and downloading your first image.

{% stepper %}
{% step %}

### Sign up

Visit [ideogram.ai](https://ideogram.ai/) and click on **"Continue with Google"** or **"Continue with Apple"** to create your free account.

{% hint style="danger" %}
**Important:** Your chosen authentication method and associated email address are permanent and cannot be changed later.
{% endhint %}

***

{% endstep %}

{% step %}

### Choose a username

You’ll be then prompted to choose a unique username. This will be your public handle on Ideogram. People will be able to see your public or pinned images at ideogram.ai/@username, where “username” will be replaced by your chosen name.

{% hint style="danger" %}
**Important:** Usernames are permanent and cannot be changed later.
{% endhint %}

***

{% endstep %}

{% step %}

### Write your prompt

On the main page, locate the prompt box at the top. Enter a description of the image you want to generate. For example:

> *A serene landscape with mountains during sunset.*

You can enhance your prompt by specifying styles, colors, or other details by yourself or turn on [**Magic Prompt**](/using-ideogram/generation-settings/magic-prompt) and the AI will do it automatically for you.

{% hint style="success" %}
**Tip:** For inspiration, click on any image you like from other users to see the prompt they used.
{% endhint %}

***

{% endstep %}

{% step %}

### Customize generation settings

Adjust a few settings located at the bottom of the prompt box:

* **Model**: Choose the model you want (*each has a different price in credits*)
* **Style**: Choose from options like \*Realistic\*, \*General\*, \*Design\*, etc.
* **Aspect Ratio**: Select the desired image dimensions.
* **Magic Prompt**: Enhance your prompt automatically for more detailed results.
* **Color Palette**: Define a specific color scheme.

These settings are optional; you can proceed with the defaults if preferred.

{% hint style="success" %}
Tip: Try different models and styles.
{% endhint %}

***

{% endstep %}

{% step %}

### Generate the image

Click the arrow-up submit button in the prompt box. Ideogram will process your prompt and display your generated images within seconds.

{% hint style="success" %}
**Tip:** Experiment with different prompts and settings to explore various creative possibilities.
{% endhint %}

***

{% endstep %}

{% step %}

### Review your sesults

Click any thumbnail to view it larger and to open the **detail panel** (right side on desktop, bottom on mobile).

From here you can like, remix, upscale, pin and access more features and information about the image.

***

{% endstep %}

{% step %}

### Download or share your image

Hover over your preferred image or look at the top of the **detail panel** and click the **Download** icon/button. In the download menu, choose the file type and size you want.

Available file types can include JPEG, PNG, or WebP depending on the image and your plan. Size options can include a small download, the original size, or available upscale sizes. Some premium file types and sizes may require a paid subscription. For transparent outputs, JPEG is disabled because it does not preserve transparency.

To share your image, click the **Share** icon/button to explore your options.

***

{% endstep %}

{% step %}

### Explore

You're all set — now it's time to explore!

Here are a few things you can try next, even with a free account:

* **Browse featured images**\
  Check out the top creations of the hour, day, week, or month on the homepage.
* **Follow creators you like**\
  Click on usernames to follow your favorite artists and see their latest works.
* **Try community remixes**\
  Remix public images you like and experiment with new styles and prompts.
* **Read more in the documentation**\
  Want better typography, cleaner styles, or write better prompts? This documentation contains plenty of useful information, tips, and tricks.

Take your time, try new things, and enjoy discovering what you can create with Ideogram!

***

{% endstep %}
{% endstepper %}

<a href="https://ideogram.ai/" class="button primary">Try Ideogram Now</a>


# Frequently Asked Questions

### General Usage

<details>

<summary>How can I start using Ideogram to generate AI images?</summary>

Sign up for a free account at [ideogram.ai](https://ideogram.ai/) and start generating images in your browser.

For more information, see [**Signup and Registration**](/using-ideogram/getting-started/signup-and-registration) and [**Generating Images**](/using-ideogram/getting-started/generating-images).

</details>

<details>

<summary>How much does Ideogram cost to use?</summary>

Plan availability, prices, included credits, and feature access are subject to change. See [**Available Plans**](/plans-and-pricing/available-plans) and the live pricing page at [ideogram.ai/pricing](https://ideogram.ai/pricing).

</details>

<details>

<summary>Can I use Ideogram to generate images for commercial use?</summary>

Ideogram does not claim ownership of your generated outputs or restrict your rights in them. You are responsible for making sure your content does not violate laws, third-party rights, or Ideogram terms. Review the [Terms of Service](https://ideogram.ai/legal/tos).

</details>

<details>

<summary>When do Slow credits reset?</summary>

Credit reset behavior can vary by plan and current product policy. Check the plan and credit information shown in your account, or see [**Available Plans**](/plans-and-pricing/available-plans).

</details>

<details>

<summary>How do I get access to the Ideogram API?</summary>

Read [**Ideogram API**](/plans-and-pricing/ideogram-api) for detailed instructions. To access the dashboard and setup a key:

1. Log in to Ideogram.
2. Open [ideogram.ai/manage-api](https://ideogram.ai/manage-api) or the **API Dashboard** on the left sidebar.
3. Read through and accept the [Developer API Agreement](https://ideogram.ai/legal/api-tos) pop-up.
4. Add a payment method by clicking the banner at the top of the screen or through **Billing > Billing information**.
5. Create an API key in **API Keys > Create key** and follow the on-screen instructions.
6. Use [developer.ideogram.ai](https://developer.ideogram.ai) for endpoint details.

Useful links:

* API pricing: [ideogram.ai/features/api-pricing](https://ideogram.ai/features/api-pricing)
* API docs: [developer.ideogram.ai](https://developer.ideogram.ai)
* API status: [status.ideogram.ai](https://status.ideogram.ai/)

</details>

<details>

<summary>What is the priority queue?</summary>

The priority queue processes eligible generations ahead of slow-queue generations. Priority generation uses priority credits. See [**Available Plans**](/plans-and-pricing/available-plans) for the credit overview.

</details>

<details>

<summary>What happens when I run out of priority credits?</summary>

If your account has no priority credits remaining, eligible generations may move to the slow queue or require a top-up, upgrade, or later retry depending on your plan and current product state.

</details>

<details>

<summary>Can I choose between generating in the slow queue or using priority credits?</summary>

Queue controls can vary by plan and product state. Review the generation options shown in your account before submitting.

</details>

<details>

<summary>Which credits do the Reference and Edit image tools use?</summary>

**Reference** and **Edit image** generations use **priority credits** if you're on a paid plan. On the Free plan, these tools run on **slow credits**.

See [**Available Plans**](/plans-and-pricing/available-plans) for the credit system overview.

</details>

<details>

<summary>Can other people see the images I generate?</summary>

Images are public by default unless you choose private generation where it is available. See [**Private Generations**](/using-ideogram/generation-settings/private-generations)**.**

</details>

<details>

<summary>How do I correct text in my image?</summary>

See [**Text and Typography**](/using-ideogram/getting-started/prompting-guide/2-prompting-fundamentals/text-and-typography) for prompting and editing guidance.

</details>

<details>

<summary>How can I download images in PNG format?</summary>

Open the image, click **Download** <img src="/files/nN8jAfO9DGfnzvDrPrAX" alt="Download icon" data-size="line">, and choose PNG from the file type selector if it is available for your image and plan. Some file types and download sizes may require a paid subscription.

**Use Ideogram's Download controls instead the browser right-click menu to control the selected file type and size.**

</details>

<details>

<summary>How can I download images in SVG format?</summary>

**SVG downloads are not currently supported in Ideogram.** Use the available bitmap formats in the Download menu, such as JPEG, PNG, or WebP. We'll update this page if SVG or vector export becomes available.

</details>

<details>

<summary>Can I remove the background on my generated images?</summary>

Yes. Use our [**Background Remover App**](/using-ideogram/features-and-tools/background-remover-app) for the dedicated app workflow, or [**Replace or Remove Background**](/using-ideogram/features-and-tools/replace-or-remove-background) tool for background actions from image workflows.

</details>

***

### Account Management

<details>

<summary>I'm having trouble logging into my account.</summary>

**For Single Sign-On and Social Logins:**

1. Use the same sign-on method you registered with, such as Google or Apple.
2. If you forgot your password, continue with the password reset options provided by the third-party provider.
3. Refresh your browser cache and cookies, or try an incognito/private browser window.
4. Try a different browser or device.
5. If billing or account access is still affected, [contact support here](/legal-and-support/support).

**For Email and Password logins:**

1. Make sure you're logging in with the same email address. You can double-check previous invoices for this information.
2. If you forgot your password, enter your email address and continue with our **Forgot Password?** option to receive a password reset email.
3. Refresh your browser cache and cookies, or try an incognito/private browser window.
4. Try a different browser or device.
5. If billing or account access is still affected, [contact support here](/legal-and-support/support).

</details>

<details>

<summary>How can I change my profile picture on Ideogram?</summary>

Go to **My Images** in the Library section and click on one of your images. Click on the **...** menu and choose the **Set as profile picture** action in the drop-down.

</details>

<details>

<summary>How can I change my username or email?</summary>

At this time, we do not support email changes or username changes. You can change the optional name that appears on your profile by clicking on your profile icon at the bottom and selecting **Edit Profile**.

</details>

<details>

<summary>How do I reset my password?</summary>

**For Single Sign-On and Social Logins:**

1. Continue with the password reset options provided by the third-party provider.
2. If billing or account access is still affected, [contact support here](/legal-and-support/support).

**For Email and Password logins:**

1. If you forgot your password, enter your email address and continue with our **Forgot Password?** option to receive a password reset email.
2. If billing or account access is still affected, [contact support here](/legal-and-support/support).

</details>

<details>

<summary>I deleted my account but changed my mind. How do I recover it?</summary>

**Account deletion is permanent.** Deleted accounts and associated data are not recoverable.

</details>

***

### Subscription and Billing

<details>

<summary>How do I upgrade my free account to a paid plan?</summary>

Log in and visit [ideogram.ai/pricing](https://ideogram.ai/pricing) or use the **Upgrade plan** banner in your account settings. Choose the plan and billing frequency through the options on-screen and double-check during checkout. To change plans later, see [**Switching or Downgrading Plans**](/plans-and-pricing/billing-and-subscriptions/switching-or-downgrading-plans).

</details>

<details>

<summary>How do I cancel my subscription plan?</summary>

Click **Manage Subscription** in the profile picture menu, then **Manage billing** or **Modify plan**, and continue with **Cancel subscription**. Cancellations must be made at least 5 days before your renewal date. See [**Cancelling Your Subscription**](/plans-and-pricing/billing-and-subscriptions/cancelling-your-subscription) for step-by-step instructions, or [**Troubleshooting Billing Issues**](/plans-and-pricing/billing-and-subscriptions/troubleshooting-billing-issues) if something didn't work.

</details>

<details>

<summary>What happens to my private images if I cancel my subscription plan?</summary>

Private images remain private according to current private-generation behavior, but creating new private images may require an eligible paid plan. See [Private Generations](/using-ideogram/generation-settings/private-generations).

</details>

<details>

<summary>Do unused Priority credits roll over?</summary>

Credit expiration and rollover behavior can vary by plan, top-up type, and current product policy. **Review the credit information shown in your account and the live pricing page at** [**ideogram.ai/pricing**](https://ideogram.ai/pricing)**.**

</details>

<details>

<summary>Can I get a refund on my subscription payment?</summary>

Subscription payments are non-refundable, per Ideogram's [Terms of Service](https://ideogram.ai/legal/tos). Cancelling stops future charges while keeping your benefits until the end of the paid period. See [**Refunds**](/plans-and-pricing/billing-and-subscriptions/refunds), including what to do about billing errors such as duplicate charges.

</details>

<details>

<summary>Where can I update billing details and view invoices?</summary>

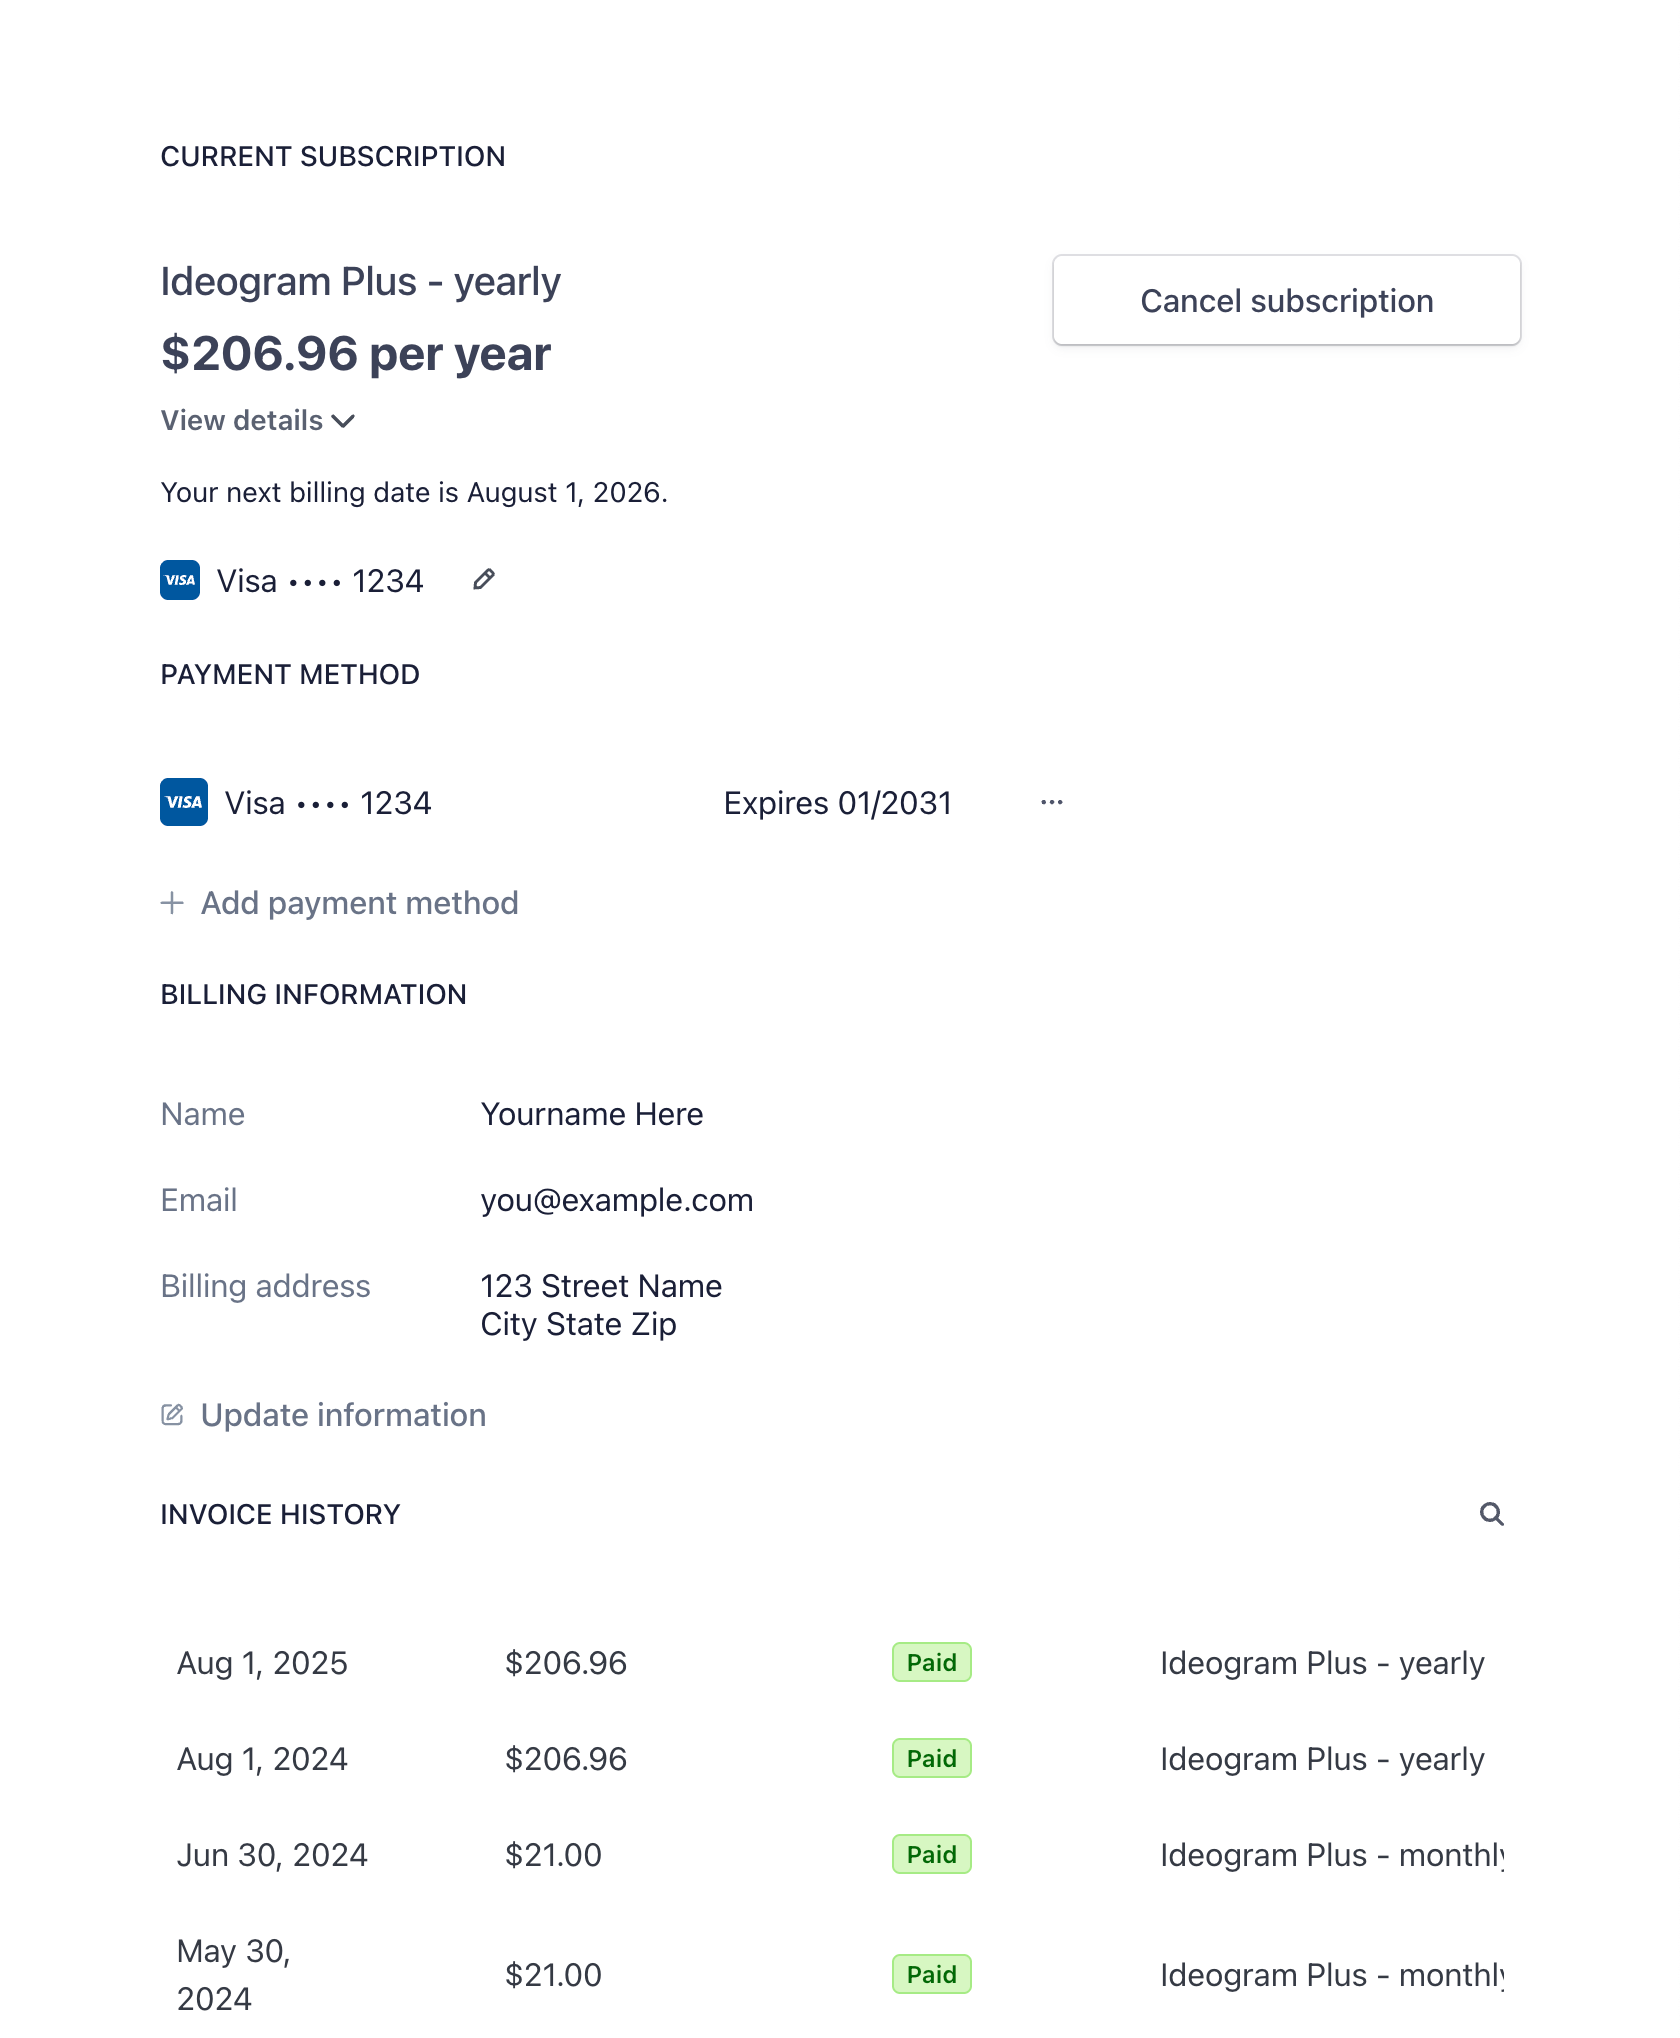
Click **Manage Subscription** in the profile picture menu, then **Manage billing**. See [**Invoices, Receipts, and Tax Details**](/plans-and-pricing/billing-and-subscriptions/invoices-receipts-and-tax-details), including how to add a company name or VAT/tax ID to your invoices.

</details>

<details>

<summary>I have a specific subscription question. How do I contact support?</summary>

For specific questions or issues with your subscription, reach out to <support@ideogram.ai>.

</details>


# Table of Contents

* [Welcome to Ideogram](/)
* [Quick Start Guide](/quick-start-guide)
* [Frequently Asked Questions](/frequently-asked-questions)
* Table of Contents *(you are here)*

***

### Using Ideogram

* Getting Started
  * [Signup & Registration](/using-ideogram/getting-started/signup-and-registration)
  * [Generating Images](/using-ideogram/getting-started/generating-images)
  * [The Basics, Step‑by‑Step](/using-ideogram/getting-started/the-basics-step-by-step)
  * [Downloading Images](/using-ideogram/getting-started/downloading-images)
  * [Sharing Images](/using-ideogram/getting-started/sharing-images)
* Account Settings
  * [User Management](/using-ideogram/account-settings)
  * [Managing Your Subscription](/using-ideogram/account-settings)
* Prompting Guide
  * [In a Nutshell](/using-ideogram/getting-started/prompting-guide/in-a-nutshell)
  * [What is Prompting](/using-ideogram/getting-started/prompting-guide/1-what-is-prompting)
  * [Prompting Fundamentals](/using-ideogram/getting-started/prompting-guide/2-prompting-fundamentals)
    * [Text and Typography](/using-ideogram/getting-started/prompting-guide/2-prompting-fundamentals/text-and-typography)
  * [Prompt Structure](/using-ideogram/getting-started/prompting-guide/3-prompt-structure)
  * [Handling Negatives](/using-ideogram/getting-started/prompting-guide/4-handling-negatives)
  * [Common Pitfalls & Fixes](/using-ideogram/getting-started/prompting-guide/5-common-pitfalls-and-fixes)
    * [Importance of Precision](/using-ideogram/getting-started/prompting-guide/5-common-pitfalls-and-fixes/importance-of-precision)
  * [Prompt Iteration & Refinement](/using-ideogram/getting-started/prompting-guide/6-prompt-iteration-and-refinement)
  * [Creative Tools in Ideogram](/using-ideogram/getting-started/prompting-guide/7-creative-tools-in-ideogram)
    * [Using Magic Prompt](/using-ideogram/getting-started/prompting-guide/7-creative-tools-in-ideogram/using-magic-prompt)
  * [Troubleshooting](/using-ideogram/getting-started/prompting-guide/8-troubleshooting)
  * Prompting References
    * [Describing Skin Tones](/using-ideogram/getting-started/prompting-guide/9-prompting-references/describing-skin-tones)
    * [Describing Body Type](/using-ideogram/getting-started/prompting-guide/9-prompting-references/describing-body-type)
    * [Memory Colors for Naming Color Nuances](/using-ideogram/getting-started/prompting-guide/9-prompting-references/memory-colors-for-naming-color-nuances)
    * [Angle of View and Perspective](/using-ideogram/getting-started/prompting-guide/9-prompting-references/angle-of-view-and-perspective)
    * [Describing Age and Life Stage](/using-ideogram/getting-started/prompting-guide/9-prompting-references/describing-age-and-life-stage)
* Generation Settings
  * [Aspect Ratios & Resolutions](/using-ideogram/generation-settings/aspect-ratio-and-dimensions)
  * [Available Models](/using-ideogram/generation-settings/available-models)
  * [Color Palette](/using-ideogram/generation-settings/color-palette)
  * [Magic Prompt](/using-ideogram/generation-settings/magic-prompt)
  * [Negative Prompt](/using-ideogram/generation-settings/negative-prompt)
  * [Private Generations](/using-ideogram/generation-settings/private-generations)
  * [Render Speed](/using-ideogram/generation-settings/render-speed)
  * [Seed Number](/using-ideogram/generation-settings/seed-number)
  * [Style](/using-ideogram/features-and-tools/reference-features/style-reference/styles-in-older-models)
  * [Tile](/using-ideogram/generation-settings/tile)
* Features & Tools
  * [Batch Generation](/using-ideogram/features-and-tools/batch-generation)
  * [Describe](/using-ideogram/features-and-tools/describe)
  * [Remix](/using-ideogram/features-and-tools/remix)
  * [Replace/Remove Background](/using-ideogram/features-and-tools/replace-or-remove-background)
  * [Search](/using-ideogram/features-and-tools/search)
  * [Upscale](/using-ideogram/features-and-tools/upscale)
* Canvas & Editing
  * Canvas
    * [Canvas Overview](/canvas-and-editing/canvas/canvas-overview)
    * [Extend](/canvas-and-editing/canvas/extend)
    * [Generate & Remix](/canvas-and-editing/canvas/generate-and-remix)
    * [Magic Fill](/canvas-and-editing/canvas/magic-fill)
    * [Text Tool](/canvas-and-editing/canvas/text-tool)
  * [Editor](/canvas-and-editing/editor)
  * [Image Upload](/canvas-and-editing/image-upload)
* Community & Social
  * [Creator Titles](/community-and-social/creator-titles)
  * [Muting Other Users](/community-and-social/muting-other-users)

***

### Plans and Pricing

* [Available Plans](/plans-and-pricing/available-plans)
* [Team Plan](/plans-and-pricing/team-plan)
* [Ideogram API](/plans-and-pricing/ideogram-api)
  * [Playground](/plans-and-pricing/ideogram-api/playground)

***

### Legal & Support

* [Support](/legal-and-support/support)
* [Privacy Policy](https://ideogram.ai/legal/privacy)
* [Terms of Service](https://ideogram.ai/legal/tos)

***

### About Ideogram

* [Company](/about-ideogram/company)
* [Blog Posts](/about-ideogram/blog-posts)
* [Website](https://ideogram.ai/)
* [iOS App](https://apps.apple.com/app/id6476790495)
* External Links
  * [Discord](https://discord.gg/ideogram)
  * [X - (Twitter)](https://x.com/ideogram_ai)
  * [Instagram](https://www.instagram.com/ideogram.ai/)
  * [Ideogram Creators Club](https://ideogram.ai/features/creators-club)
  * [Careers](https://jobs.ashbyhq.com/ideogram)

***


# Getting Started


# Signup and Registration

Experience the magic of turning a text description into visual form in a matter of seconds, using Ideogram!

## 1. Signup

To generate images on Ideogram, you will need to first create an account.

To do this, go to [<mark style="color:blue;">Ideogram.ai</mark>](https://ideogram.ai) and choose a sign-up method. We offer sign-ups using a Google or Apple account or email and password. When you click “Continue with Google” or “Continue with Apple,” you will be redirected to the respective login page and then back to Ideogram.

**Be sure to select the correct Google or Apple account or email address when signing up, as it cannot be changed later.**

<figure><img src="/files/wntkm9lOZs22Txu1jMWZ" alt="The registration page where you sign up for ideogram.ai" width="375"><figcaption><p>The registration page where you sign up for ideogram.ai</p></figcaption></figure>

## 2. Pick a username

Once you log in, you will be prompted to choose a username that will be associated with your account and will be visible to other Ideogram users.

**The username must be unique, only contain alphanumeric characters and underscore, and be between 3 and 16 characters.** Please note that your Google or Apple account's profile picture will be used as your Ideogram profile picture by default, but you can change your picture to any of your own generations later.

**Be sure to choose a username you like, as you won't be able to change it later**. Once you've chosen a username, you're ready to experience the magic of text-to-image!

<figure><img src="/files/z4uR0gsVj5YiulUCEhd1" alt="Username selection page to choose a unique handle on Ideogram and personal name that appears on your profile."><figcaption><p>Choose a good username, you can't change it later!</p></figcaption></figure>

## 3. Subscribe to an Ideogram plan

To get access to priority generation, private generation, image upload, and other premium features, you'll need to subscribe to one of our plans. Please visit [<mark style="color:blue;">ideogram.ai/pricing</mark>](https://ideogram.ai/pricing) for more information and to purchase a plan.

<table data-card-size="large" data-view="cards"><thead><tr><th></th><th></th><th></th></tr></thead><tbody><tr><td><h2>Free plan</h2></td><td><h3>Free</h3></td><td><ul><li><strong>10 Slow credits</strong>** per week (up to 10 prompts / 40 images per week)</li><li>2 canvases</li><li>Be inspired by Ideogram community</li><li>No access to priority queue or premium features</li><li>All generated images are public</li></ul></td></tr><tr><td><h2>Plus plan</h2></td><td><h3>$20/month</h3></td><td><ul><li><strong>1000 Priority credits</strong>* per month (up to 1000 prompts / 4,000 images per month)</li><li><strong>Unlimited Slow credits</strong>**</li><li>Private generation</li><li>Image upload for Remix and Describe</li><li>Unlimited canvases</li><li>Ideogram Editor</li><li>Download original quality in PNG</li><li>Early access to new features</li></ul></td></tr><tr><td><h2>Pro plan</h2></td><td><h3>$60/month</h3></td><td><ul><li><strong>3500 Priority credits</strong>* per month (up to 3500 prompts / 14,000 images per month)</li><li><strong>Unlimited Slow credits</strong>**</li><li><strong>Batch Generation</strong> with CSV upload</li><li>Private generation</li><li>Image upload for Remix and Describe</li><li>Unlimited canvases</li><li>Ideogram Editor</li><li>Download original quality in PNG</li><li>Early access to new features</li></ul></td></tr></tbody></table>

{% hint style="danger" %} <mark style="color:red;">Any unused Priority credits awarded through the monthly plan will expire at the end of each monthly billing cycle</mark>. However, **Priority credits** purchased as a top-up will roll over to the next month and will only be used after your monthly **Priority credits** are depleted.\
\
\* Learn more about the credit system and the differences between **Priority credits** and **Slow credits** in [this section](/plans-and-pricing/available-plans#the-credit-system).
{% endhint %}

## 4. Join Ideogram's Discord server

Our Discord server is dedicated to our growing community, product announcements, feature requests and regular community discussions. We have a channel called `questions-answers` where creators and users help each other, and another called `creativity-hub` where creators share their creations and participate in different activities. Visit [discord.gg/ideogram](https://discord.gg/ideogram) and connect with a Discord account to join our growing community.

{% hint style="info" %}
Ideogram accounts are separate from Discord accounts.
{% endhint %}


# Generating Images

Ideogram's main features allow you to browse and generate images from text. Within the user interface, you can generate images, browse and filter previously generated images, curate your user profile, manage your subscription, and more.

### Generation

To create an image in the simplest way, type the description of what you want to see in the [Prompt Box](/using-ideogram/ui-overview/ui-components/prompt-box), then click the arrow-up submit button. On mobile, tap the **+** button to open the generation panel first.

{% tabs %}
{% tab title="Desktop" %}

<figure><picture><source srcset="/files/OlqKdoeK7qAXv7v3Ddha" media="(prefers-color-scheme: dark)"><img src="/files/zkPfMWaXeOOj37rMpY1C" alt="Ideogram desktop home page with the prompt box and settings buttons under the heading What will you create, above a grid of community images"></picture><figcaption><p>The Ideogram user interface on desktop platforms.</p></figcaption></figure>

At the top of the screen, click the input text box to type a description of what you want Ideogram to generate, then click the arrow-up submit button to start the process.
{% endtab %}

{% tab title="iOS app / Mobile" %}

<figure><picture><source srcset="/files/r2VaEH7EY2dNAJZWlpxx" media="(prefers-color-scheme: dark)"><img src="/files/WpSc5ASxni7tsrGaBJXH" alt="Ideogram mobile home page with a prompt box, Apps and Community sections, and a bottom navigation bar" width="320"></picture><figcaption><p>The Ideogram user interface on mobile platforms.</p></figcaption></figure>

At the bottom of the screen, tap the **+** button to open the generation panel and type a description of what you want Ideogram to generate. Tap the arrow-up submit button to start the generation.
{% endtab %}
{% endtabs %}

{% hint style="info" %}
Prompts and generations are visible to everyone on Ideogram unless you choose to generate privately where [Private Generations](/using-ideogram/generation-settings/private-generations) are available.
{% endhint %}

Choose the number of images using the buttons below your prompt. Many image-generation flows support 1-4 outputs. Feel free to play around with the other settings as well, allowing you to customize aspect ratio, resolution, model used, and more. **Credit usage scales with the number of output images and selected model/render speed.**

After waiting a few seconds, your completed generation appears in the image grid. **Congratulations on generating your first image or set of images!** Next, we'll go through all of the actions you can take using your new generation!

<figure><picture><source srcset="/files/zaVafd7dWf5cC7gY2fnN" media="(prefers-color-scheme: dark)"><img src="/files/0pISFH5anqkouoGLqjTc" alt="A preview of your images are available in high-quality when generation is complete."></picture><figcaption><p>A preview is available in high-quality when generation is complete. Everyone loves a cute cat!</p></figcaption></figure>

### Generation actions

When you click on one of the generated images, an information panel will appear—on the right side if you’re on a desktop computer, or pop-up from below if you’re on a mobile device—offering several additional actions.

{% tabs %}
{% tab title="Desktop View" %}

<figure><img src="/files/W8GGLkpmyKOjOqrG56My" alt="Generated cat image open in detailed view with a right-side panel showing the prompt and buttons for Edit, Remix, Upscale, and Remove BG"><figcaption></figcaption></figure>
{% endtab %}

{% tab title="Mobile View" %}

<div align="center"><figure><picture><source srcset="/files/TwlWqxokeCt9WLw117Q0" media="(prefers-color-scheme: dark)"><img src="/files/1AETiV4rtZgusyHNYwXC" alt="Mobile view of the options available for generated images." width="319"></picture><figcaption></figcaption></figure></div>
{% endtab %}
{% endtabs %}

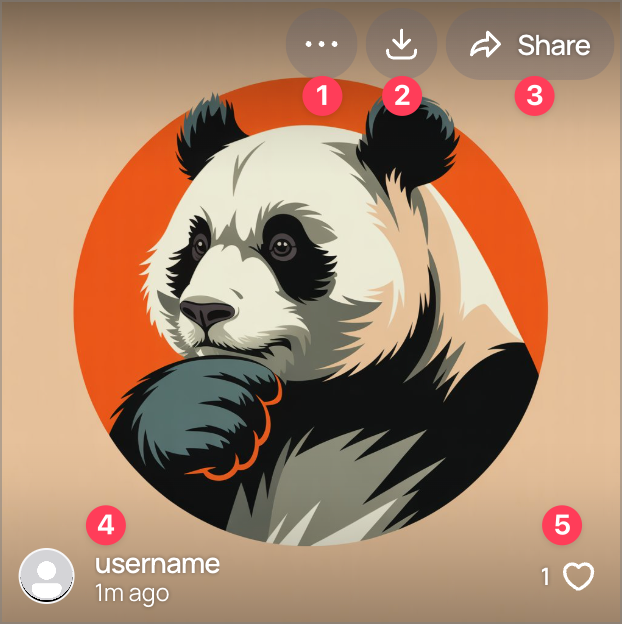
From this panel, you can take all sorts of actions. For example, you can **Pin** the image to your profile, **Share** your image, **Download** your image, make the image **public** or **private** ([Subscription](/plans-and-pricing/available-plans)), **Retry** generating images with the same prompt and options, and more! The list goes on and on. **Don't worry, we'll go through the other actions further down the page.**

As a quick peek, clicking on the **More** icon <picture><source srcset="/files/DWOCdWuHaPBzJrjuAqYP" media="(prefers-color-scheme: dark)"><img src="/files/tTYSFk9L2gZga2UbTKcA" alt="More options icon" data-size="line"></picture> will give you access to every available action with respect to your currently open image.

<figure><img src="/files/ES0nwkUfSMrbLoCzNJdD" alt="Expanded More menu listing image actions from Copy image and Retry down to Report and Delete" width="106"><figcaption></figcaption></figure>

Here's a comprehensive list of all the actions you can take with an image. **Please note that some of these require a subscription or certain permissions.**

You can:

* <picture><source srcset="/files/kYSuor1i04XKBPPBsMgP" media="(prefers-color-scheme: dark)"><img src="/files/EUzFuvwHZL6xwuCWPbzA" alt="Use prompt icon" data-size="line"></picture> Use the same **Prompt** or **Magic Prompt** again for next generation.
* <picture><source srcset="/files/AFqelt9lwboXU7e4jZig" media="(prefers-color-scheme: dark)"><img src="/files/LSVWTBnZAE4oN8jzwfH3" alt="Retry icon" data-size="line"></picture> **Retry** another generation with the same prompt and options.
* <picture><source srcset="/files/kkfIkegKFAbHEmZnpxvw" media="(prefers-color-scheme: dark)"><img src="/files/9TQV75wiPGhMCp75R5x1" alt="Remix icon" data-size="line"></picture> **Remix** your image.
* <picture><source srcset="/files/I1fdagKHh2qXs5wjXtLE" media="(prefers-color-scheme: dark)"><img src="/files/0p6UTffSyVnO6evXiXuD" alt="Style reference icon" data-size="line"></picture> Use the image as a **Style reference**
* <picture><source srcset="/files/gtYEPNafvfjfIpYoQc5W" media="(prefers-color-scheme: dark)"><img src="/files/INW0KeXwK7qjoBwqMqo8" alt="Describe image icon" data-size="line"></picture> **Describe** your image.
* <picture><source srcset="/files/ETWEDZJ7m34LCRDix8Kt" media="(prefers-color-scheme: dark)"><img src="/files/TMDW6dISdasyhS6QsGIL" alt="Upscale icon" data-size="line"></picture> **Upscale** your image up to 2x ([Subscription](/plans-and-pricing/available-plans)).
* <picture><source srcset="/files/m9PRTCFj1IlmdpI802Po" media="(prefers-color-scheme: dark)"><img src="/files/heSFrVsRDc7Ezjedb7QO" alt="Replace background icon" data-size="line"></picture> **Replace** the **background** in the image ([Subscription](/plans-and-pricing/available-plans)).
* <picture><source srcset="/files/z5wHH0QWi5pZWCyUX7Ys" media="(prefers-color-scheme: dark)"><img src="/files/0OMdQSw2LI35JoPN0lVV" alt="Remove background icon" data-size="line"></picture> **Remove** the **background** of the image ([Subscription](/plans-and-pricing/available-plans)).
* <picture><source srcset="/files/fks9PPjBDAPR3PMQLlL0" media="(prefers-color-scheme: dark)"><img src="/files/dnCAloR9yOHrNsTDVxmr" alt="Open in Canvas icon" data-size="line"></picture> **Open** the image **in Canvas.**
* <picture><source srcset="/files/2mOg760Jgoxc6TQ9MWou" media="(prefers-color-scheme: dark)"><img src="/files/Qqi48ZJQjfrAWQV3hwnc" alt="Edit icon" data-size="line"></picture> **Edit** your image with the **Editor** ([Subscription](/plans-and-pricing/available-plans)).
* <picture><source srcset="/files/F7NPst0xXs0uNW8iAVBy" media="(prefers-color-scheme: dark)"><img src="/files/PF86xihG1kQokRH4q08g" alt="Visibility eye icon" data-size="line"></picture> **Make** a generation **private** or **public** ([Subscription](/plans-and-pricing/available-plans))
* <picture><source srcset="/files/B6bu7RNCV138bCCjGFFB" media="(prefers-color-scheme: dark)"><img src="/files/dBTXtJDa5SQuBSS68z2M" alt="Profile photo smiley icon" data-size="line"></picture> **Set** the image as your **profile photo.**
  * Note that you can only do this with your own generations.
* <picture><source srcset="/files/eXeGzEZbDIut2wmG2PYu" media="(prefers-color-scheme: dark)"><img src="/files/nN8jAfO9DGfnzvDrPrAX" alt="Download icon" data-size="line"></picture> **Download** the image.
  * If you have Ideogram Basic/Plus/Pro/Team, this will download an uncompressed PNG file
  * With the free plan, this will download a slightly compressed JPG file.
* <picture><source srcset="/files/pDyfl8vCP0FrBCjtiJAs" media="(prefers-color-scheme: dark)"><img src="/files/n4FiXTPCKztZRufeQ7ao" alt="Share link icon" data-size="line"></picture> **Share** a link to your image.
* <picture><source srcset="/files/nFZEyNmssP1NJueIYpyK" media="(prefers-color-scheme: dark)"><img src="/files/7pfswwJLGDWvH1Ejq1l6" alt="Report flag icon" data-size="line"></picture> **Report** the image.
* <picture><source srcset="/files/6u0XcJMKUazUIbe7NfM6" media="(prefers-color-scheme: dark)"><img src="/files/WagkjkNhBEee2FWtWMYc" alt="Delete trash icon" data-size="line"></picture> **Delete** the image (all images from the generation set) ([Subscription](/plans-and-pricing/available-plans)).

## What's next?

Now that you've generated your first image, you're well on your way to maximize the features that Ideogram offers! In the next chapter, we'll be walking through a step-by-step guide on how to further improve your images with cool details. Feel free to continue when you're ready!


# The Basics

Let's try to generate some more images together. **In this guide, we'll be experimenting with details like angles, additional image elements, text and more!** This guide will help you understand how to prompt on Ideogram, step by step with corresponding output examples.

For this guide, the prompts provided will always be written in the following format:

**Prompt:**\
\&#xNAN;*A rough pencil sketch featuring a boy with sandy hair and blue eyes, wearing a&#x20;*~~*<mark style="color:purple;">hoodie</mark>*~~ *<mark style="color:green;">checked shirt</mark> and jeans, playing with a friendly Golden Retriever, in a park on a sunny day.*

* The <mark style="color:green;">text in green</mark> means this text is new or was added to a prompt previously used.
* ~~<mark style="color:purple;">Strikethrough purple text</mark>~~ means this text has been removed or replaced from a prompt previously used.

Please note that we'll be referencing this format throughout the rest of our documentation, but **you can write prompts in Ideogram without any formatting!**

{% hint style="warning" %}
For all of the examples below, we'll use the following settings:\
• [Magic Prompt](/using-ideogram/generation-settings/magic-prompt): OFF (AUTO for Ideogram 4.0)\
• [Aspect ratio](/using-ideogram/generation-settings/aspect-ratio-and-dimensions): 1:1\
• [Model](/using-ideogram/generation-settings/available-models): 2.0 (unless otherwise stated)\
• [Style](/using-ideogram/features-and-tools/reference-features/style-reference/styles-in-older-models): Realistic (unless otherwise stated)
{% endhint %}

## 1. A very basic prompt

Let's start with a very basic prompt. This way, we can see what the model generates and build on that step-by-step.

**Prompt:**\
\&#xNAN;*A boy with blond hair on a grey background.*

<figure><img src="/files/b9AZlTXypL4SeTeiaw7H" alt="Photorealistic portrait of a blond boy in a navy suit and patterned bow tie against a plain grey studio background"><figcaption></figcaption></figure>

Nothing complicated here. The image of a boy and a grey background as requested. Now let's add more details...

## 2. Adding details

Next, let's add some specific details like eye color, and maybe he's wearing a wearing a denim jacket over a light blue shirt, and how about a more interesting background.

**Prompt:**\
\&#xNAN;*A boy with blond hair <mark style="color:green;">and blue eyes,</mark>* ~~*<mark style="color:purple;">on a grey background.</mark>*~~ *<mark style="color:green;">wearing a denim jacket and a checked shirt, against a backdrop of wooden planks.</mark>*

<div align="center" data-full-width="false"><figure><img src="/files/ysLbp2Xt1SZLtU3z7bOW" alt="Blond, blue-eyed boy in a denim jacket over a checked shirt, facing the camera in front of a rustic wooden plank wall"><figcaption></figcaption></figure></div>

Nice! Now let's try to make it a bit more dynamic...

## 3. A point of view

Let's play around with the perspective of the image! Maybe changing the angle or the point of view would produce a more interesting image? We're all about experimentation here!

**Prompt:**\
\&#xNAN;*A boy with blond hair and blue eyes, wearing a denim jacket and a checked shirt, <mark style="color:green;">seen partially in profile</mark>, against a backdrop of wooden planks.*

<figure><img src="/files/gOtUuYoKHRiBCw0b2oj6" alt="The same blond boy in a denim jacket seen partially in profile, smiling and looking to the side against wooden planks"><figcaption></figcaption></figure>

Wow! Almost a studio photo, but it still looks very natural!

{% hint style="info" %}
Note: there are also other terms used to achieve this pose, such as <mark style="color:green;">three-quarter pose</mark>, or <mark style="color:green;">slightly turned to the left</mark>, etc.
{% endhint %}

## 4. Adding Elements

Let's add a few elements to make the overall image more attractive?

**Prompt:**\
\&#xNAN;*A boy with blond hair and blue eyes, wearing a denim jacket, a checked shirt <mark style="color:green;">and jeans, sitting cross-legged on the floor, beside a friendly dog. Between them both there is a house plant in a pot. The entire scene is set</mark> against a backdrop of wooden planks.*

<figure><img src="/files/Hzb8fY5II7UlnQFlY567" alt="Boy in a denim jacket sitting cross-legged beside a black-and-white dog, with a potted plant between them, on a wooden plank backdrop"><figcaption></figcaption></figure>

I'd love to point out how effectively the model has rendered the requested elements and their precise positioning within the image composition. Now, let’s try adding details that will liven up the mood!

## 5. Make a lively scene

**Prompt:**\
\&#xNAN;*A boy with blond hair and blue eyes, wearing* ~~*<mark style="color:purple;">a denim jacket,</mark>*~~*&#x20;a checked shirt and jeans, <mark style="color:green;">playing with a friendly Golden Retriever, in a park on a sunny day</mark>.*

<figure><img src="/files/NScbCbWCR9MvErY5bpdq" alt="Blond boy in a checked shirt and jeans playing on sunlit grass next to a Golden Retriever in a park"><figcaption></figcaption></figure>

Super cute, now the boy we were working with originally has a fluffy buddy to pose with! Adding other elements and an environment really helps make your images feel alive and natural.

## 6. Using available options

As you may have noticed from previous sections, Ideogram provides several options for generating images. [Aspect ratio](/using-ideogram/generation-settings/aspect-ratio-and-dimensions), [Style](/using-ideogram/features-and-tools/reference-features/style-reference/styles-in-older-models), [Color palette](/using-ideogram/generation-settings/color-palette) and other features are invaluable for creating unique and diverse visuals.

Let’s explore some of these possibilities to create various outputs.

<table data-view="cards"><thead><tr><th></th><th></th><th data-hidden data-card-cover data-type="files"></th></tr></thead><tbody><tr><td><img src="/files/wPzO6Jo672BIaFD3prVF" alt="Soft pastel watercolor painting of the blond boy walking through a park beside a Golden Retriever" data-size="original"></td><td><p><strong>Prompt:</strong></p><p><em><mark style="color:green;">Washed-out soft watercolor painting featuring</mark> a boy with blond hair and blue eyes, wearing a checked shirt and jeans, playing with a friendly Golden Retriever, in a park on a sunny day.</em><br><strong>Model</strong>: 2.0<br><strong>Style</strong>: General<br><strong>Aspect ratio</strong>: 4:5<br><strong>Color Palette</strong>: Pastel</p></td><td></td></tr><tr><td><img src="/files/PCrjZb5jdVfy4sG8Illn" alt="Anime-style illustration of the boy in a yellow checked shirt running across a park lawn petting a fluffy dog under a blue sky" data-size="original"></td><td><p><strong>Prompt:</strong></p><p><em><mark style="color:green;">An anime illustration featuring</mark> a boy with blond hair and blue eyes, wearing a checked shirt and jeans, playing with a friendly Golden Retriever, in a park on a sunny day.</em><br><strong>Model</strong>: 2.0<br><strong>Style</strong>: Anime<br><strong>Aspect ratio</strong>: 4:5<br><strong>Color Palette</strong>: None</p></td><td></td></tr><tr><td><img src="/files/yCqgPc5ERg2XAJQEV34b" alt="Cartoon-like 3D render of a big-eyed boy in a blue checked shirt standing on grass next to a playful puppy" data-size="original"></td><td><p><strong>Prompt:</strong></p><p><em><mark style="color:green;">A cartoon-like 3D</mark> boy with sandy hair and blue eyes, wearing a checked shirt and jeans, playing with a friendly Golden Retriever, in a paper-art park on a sunny day.</em><br><strong>Model</strong>: 2.0<br><strong>Style</strong>: 3D<br><strong>Aspect ratio</strong>: 4:5<br><strong>Color Palette</strong>: None</p></td><td></td></tr></tbody></table>

{% hint style="info" %}
**Difference between v1.0 styles and v2.0 styles.**

**In v1.0, the styles are really just words added at the end of the prompt** to specify the style you want, nothing more. So if you select 'illustration', it is the very same as if you've added the word 'illustration' at the end of your prompt. This works even better if you describe the style you want in the context of the prompt rather than a simple word at the end of it.

**In v2.0, the different styles utilize slightly different models to generate the images.** It is as though you are using a model better suited to the style you want, rather than relying on a generic AI model.

For more information, refer to the [Style](/using-ideogram/features-and-tools/reference-features/style-reference/styles-in-older-models) section of this documentation.
{% endhint %}

## 7. Add some text

Let's say you want to make a cover for a children book, give it a title and also add the author's name.

**Prompt:**\
\&#xNAN;*Washed-out soft watercolor painting featuring a boy with blond hair and blue eyes, wearing a checked shirt and jeans, playing with a friendly Golden Retriever, in a park on a sunny day. <mark style="color:green;">At the top of the image, the book title is: "Michael and his dog" in a fun painted typography. At the bottom, the author's name: "John Johnson".</mark>*

**Model**: 2.0\
**Style**: General\
**Aspect ratio**: 3:4\
**Color Palette**: None

<figure><img src="/files/7GB3RFNqdDg51BkVbrhp" alt="Watercolor book cover of the boy and Golden Retriever in a park, titled Michael and his dog with author name John Johnson below"><figcaption></figcaption></figure>

## 8. Other examples

Here are some other subjects:

<table data-view="cards"><thead><tr><th></th><th></th><th></th></tr></thead><tbody><tr><td><img src="/files/jU5HT8iD2iLnNgadowAM" alt="Minimalist line-art logo of a crowned cat sitting beside a small palace, with the wordmark PetPalace underneath" data-size="original"></td><td><p><strong>Prompt:</strong></p><p><em>A sleek and modern illustration of a logo for "PetPalace" featuring a minimalist stylized image of a regal cat wearing a crown, sitting next to a luxurious palace.</em></p></td><td><strong>Model</strong>: 2.0<br><strong>Style</strong>: Design<br><strong>Aspect ratio</strong>: 1:1<br><strong>Color Palette</strong>: None</td></tr><tr><td><img src="/files/OCuY6kF26xStXBrcbvev" alt="Close-up photo of a beer can with an anchor logo reading Mariner&#x27;s Brew, next to a full glass of beer on a pub counter" data-size="original"></td><td><p><strong>Prompt:</strong></p><p><em>Close up photo of a beer can with a big modern sailor's anchor inspired logo named "Mariner's Brew" in big letters, a full glass of beer in the background, on the counter of an Irish pub, dynamic view, studio photography, food photography.</em></p></td><td><strong>Model</strong>: 2.0<br><strong>Style</strong>: General<br><strong>Aspect ratio</strong>: 1:1<br><strong>Color Palette</strong>: None</td></tr><tr><td><img src="/files/YaJbNvOY5FJwIjOGzguK" alt="White cat in a hat, sunglasses, and suit playing saxophone on a dark stage, with a neon sign reading Cool Cat Jazz behind it" data-size="original"></td><td><p><strong>Prompt:</strong></p><p><em>A cool cat with wearing a hat and sunglasses playing the saxophone with his paws on the stage of a jazz club, a neon sign in the background saying: "Cool Cat Jazz". Intense atmosphere, dark ambience, dark tones, jazz club genre, 40's and 50's look.</em></p></td><td><strong>Model</strong>: 2.0<br><strong>Style</strong>: Realistic<br><strong>Aspect ratio</strong>: 1:1<br><strong>Color Palette</strong>: Ultramarine</td></tr></tbody></table>

{% hint style="info" %}
Please note: **Text enclosed in quotes “ ” helps the AI understand that it needs to render the text in the image.**
{% endhint %}

## What's next?

As you've seen, **great results come from building your prompt gradually**. We started simple and continued layering in details, perspective, elements, style, and text step by step. Each addition shapes the final image in a meaningful way, and small changes can have a big impact.

Now that you're familiar with the basics, here are some great next steps to deepen your skills:

* Experiment with [Magic Prompt](/using-ideogram/generation-settings/magic-prompt) to see how Ideogram can enhance your prompts automatically
* Explore the full range of **styles, models, and color palettes** available
* Try [reference features](/using-ideogram/features-and-tools/reference-features/style-reference) to guide the AI using existing images
* Dive into more advanced prompting techniques through experimentation and interacting with the community at [discord.gg/ideogram](https://discord.gg/ideogram).

The next section will go over even more specific details of prompting the Ideogram models. The tips will come straight from our developers so you can be sure you're making the most out of the model. However, if you feel comfortable at this point or want to do your own unguided exploration, feel free to get started! **The best way to improve is simply to keep experimenting** — every generation teaches you something new!


# Prompting Guide


# Quick Summary

## Ideogram prompting in a nutshell

This guide covers everything you need to write effective prompts for Ideogram! I wanted to go over all of the available models, from the basics of **natural language prompting used for Ideogram 2.0 and 3.0** to the full **structured JSON format introduced in Ideogram 4.0**.

Whether you're just getting started or looking to unlock the full precision of Ideogram's latest model, this guide walks you through it step by step.

***

## Natural language

**Ideogram can understand plain, everyday language.** No need to use weights, parameters, or technical syntax—just describe what you want as clearly as possible, the way you’d describe something to a person.

***

## Be clear and visually grounded

The more your prompt describes things that can actually be seen—like shapes, colors, materials, lighting, and background—the better the AI can understand and render them.

**Focus on:**

* The main subject (who or what is it?)
* What it’s doing (pose or action)
* Where it is (setting or background)
* How it looks (style, color, emotion, lighting)

Example: *“A watercolor painting of a fox curled up in snow under a pine tree, with soft blue shadows and falling snowflakes.”*

***

## Use a structure

You don’t need perfect grammar, but to get the best results, structure your prompt using a clear format. [Section 3](/using-ideogram/getting-started/prompting-guide/3-prompt-structure) walks you through each part, but here's the general idea:

* **Image summary**: A concise phrase describing the type of image
* **Main subject**: Who or what the image is about
* **Pose or action**: What the subject is doing
* **Secondary elements**: Anything else around the main subject
* **Setting & background**: Where it’s taking place
* **Lighting & atmosphere**: How the scene feels
* **Framing & composition**: Camera angle or layout (optional)

Here’s a complete structure that works well:

> *\[Image summary]. \[Main subject details], \[Pose or action], \[Secondary elements], \[Setting & Background], \[Lighting & Atmosphere], \[Framing & Composition]*

For example:

> *A watercolor painting of a girl flying a kite on a hill at sunset, wearing a red dress, wind blowing through her hair, with trees in the background and soft golden lighting.*

No need to use every part—keep it short when exploring, and add more parts/details when you need control.

***

## For maximum control: use JSON in Ideogram 4.0

Ideogram 4.0 was trained on structured JSON captions. If you need precise layout control, exact color palettes, or precise text placement, JSON prompting gives you capabilities that plain text simply can't match. **See Section 4 for the full guide.**

[Magic Prompt](/using-ideogram/getting-started/prompting-guide/7-creative-tools-in-ideogram/using-magic-prompt) can also expand a natural language text prompt into a full JSON caption automatically — so you can get JSON-quality results without writing JSON yourself.

***

## Main ideas come first

Ideogram tends to give slightly more importance to parts placed earlier in the prompt. This is where to write the subject.

***

## Generating text in images

If you want text in your image, describe it near the beginning of the prompt — this leads to better results with fewer errors. Use quotes `" "` around the desired text. The longer and more complex the text, the more likely it is to produce errors. **For pixel-perfect text placement, consider using JSON prompting with Ideogram 4.0** (Section 4).

***

## Handle negatives

* Don’t say *“no people,” “man without a beard,” “no background”* or *“without trees.”*
* Instead, say exactly what you want (*“empty street,” “clean-shaven man,” “a plain white background,” or “desert landscape”*).

***

## Be specific and detailed, but not overloaded

Ideogram generally performs best with plain-text prompts **under approximately 150 words** (around 200 tokens). If the prompt is longer, the AI may begin to misinterpret or ignore the content beyond that point.

***

## Experiment, iterate, tweak

If something looks off, tweak one thing at a time:

* Reword key phrases, try synonyms or analog concepts
* Emphasize or remove a detail
* Use a different style
* Change the aspect ratio to change framing

**Prompting is a creative process**—experiment, learn, and have fun.

***

## Use creative tools

* **Magic Prompt**: Enhances and expands your original prompt, and can automatically generate a full JSON caption for Ideogram 4.0.
* **Reference Style**: Applies the visual style from an image (generated or uploaded) to the image you are generating.
* **Random Style**: Same as Reference Style but with a random image. Perfect for wild visual explorations.
* **Remix**: Adjust and tweaks existing images using similar or different prompts.

Combine all of these for surprising, creative outcomes.

***

{% hint style="success" %}
That’s it! :tada: Once you’re comfortable, the full guide below can help you go deeper and get even better results. But for now, just start prompting and see what happens. **Have fun!**
{% endhint %}

<a href="https://ideogram.ai/" class="button primary">Try Ideogram</a>


# 1. What is Prompting?

## Prompting? :thinking:

Prompting is the process of providing a description or instruction to an AI model to generate a specific output. In the context of Ideogram, you write a textual description of the image you want to create, and the AI generates an image based on that description.

For example:

> *“A serene landscape with rolling hills under a starry night sky.”*

This prompt guides the AI to produce an image matching the described scene.

A good prompt can be short or detailed, precise or poetic, depending on your goals. You'll learn how to choose the best approach based on the type of image you want.

***

## Why prompting matters

Prompting is how you describe to a text-to-image AI exactly what you want to see. The words you choose directly influence the result—whether you're aiming for something precise or exploring a creative idea. A clear, well-structured prompt helps the AI produce accurate and visually appealing images.

**This guide teaches you effective prompting techniques, balancing clarity and creativity to get the best results possible.**

***

## Why structure and wording matter

Text-to-image AI models like Ideogram don’t interpret meaning intuitively like people do. They follow your instructions literally and try to visually represent every word in your prompt. Because of this, your prompt’s wording and structure significantly affect image quality.

**A clear prompt structure helps Ideogram:**

* Understand the main subject clearly.
* Focus on important visual attributes.
* Separate foreground from background elements.
* Accurately apply artistic style, lighting, and atmosphere.

***

Prompting with Ideogram is both a skill and a creative process. Whether you’re aiming for a specific visual or simply exploring artistic ideas, writing clear, thoughtful prompts gives you more control over the results.

As you’ve seen throughout our documentation, even small changes in structure, wording, or strategy can make a big difference. With practice, experimentation, and the right tools, you’ll learn how to shape the AI’s output to better match your intent—or discover something unexpectedly brilliant along the way.

<a href="https://ideogram.ai/" class="button primary">Try Ideogram</a>


# 2. Prompting Fundamentals

This section covers the key concepts that will help you write effective prompts for Ideogram. Whether you're aiming to generate the exact image you have in mind or to explore more creative, open-ended interpretations, these fundamentals apply to both prompting styles.

## You can use natural language :speaking\_head:

Ideogram 2.0 and 3.0 use **plain natural language** to interpret prompts. There are **no hidden parameters, weights, or coded instructions** you can embed in the prompt—everything must be described the way you would say it to another person.

This means:

* You **can’t assign weights** to parts of a prompt (e.g., `::1` or `(important)`
* You **can’t use hex codes or RGB values** for colors (e.g., `#E4BC73` ). Describe them instead with ordinary words (e.g., *“deep red,” “pale blue,” “golden-yellow”*). You can still influence the color in the image to be generated with the **Color** function.
  * You can use hex codes when writing JSON prompts with Ideogram 4.0, but we'll get to that later!
* You **can’t use technical flags or shortcuts** like `--ar` or `--v` or `--style`

**Positioning still matters**: things written earlier in the prompt tend to be given more importance. So place the most important subject or idea near the beginning whenever possible.

If you’re coming from other text-to-image tools, this may feel simpler. We want everyone to be able to get started with image generation tools! That simplicity is what makes Ideogram especially good at interpreting well-structured, natural descriptions.

**You can write your prompt in your preferred language**: Ideogram generally understands prompts in any language, but for the most reliable results—especially when including text—write in English. Non-Latin scripts (e.g. Arabic, Chinese, Cyrillic) often render incorrectly, but we're always working to improve! Using [Magic Prompt](/using-ideogram/getting-started/prompting-guide/7-creative-tools-in-ideogram/using-magic-prompt) will automatically translate your prompt into English.

While short, tag-like prompts (such as *“a man in the forest, fire, dramatic, painting”*) may work in some cases, **Ideogram responds better to natural, sentence-style prompting.** Full sentences or clearly structured phrases help the AI understand context, relationships, and composition more reliably. Ordinary grammar, punctuation, and descriptive flow help the model understand context, relationships, and visual intent more accurately.

***

## How Ideogram interprets prompts

When you write a prompt, Ideogram doesn’t guess what you mean like a person might—it tries to visually represent every word. It reads your words literally, and each one affects what appears in the image.

> *A tall man in a red coat walking through a snowy forest.*

Ideogram will try to include all of those elements: the height, the red coat, walking action, snow, and the forest.

The clearer and more specific your wording, the better chance the AI has of generating an image that matches what you imagined.

***

## The importance of visual grounding

Visual grounding refers to including concrete, observable details in your prompts—such as colors, shapes, objects, and settings—that the AI can accurately render.

For example, instead of saying:

> *A beautiful scene.*

Provide specific details:

> *A sunset over the ocean with orange and pink hues reflecting on the water.*

This specificity helps the AI generate more accurate and visually coherent images.

Even when you’re being creative or poetic, including some visually grounded elements gives Ideogram a stronger base to work from.

***

## Prompt length and clarity

The length of your prompt affects how Ideogram interprets your request. Longer prompts can give you more control and precision, but only if they’re well structured. Short prompts, on the other hand, leave more room for artistic or unexpected outcomes.

{% hint style="info" %}
Prompt adherence is influenced by the clarity and specificity of your prompt. Longer, well-structured prompts with detailed descriptions can guide Ideogram to produce images that closely match your vision. However, overly complex or ambiguous prompts may lead to unexpected results.
{% endhint %}

### When to use a short prompt

Short prompts are useful when you want to explore creative or poetic ideas without strict control over the result. They often work best when paired with tools like [Magic Prompt](/using-ideogram/getting-started/prompting-guide/7-creative-tools-in-ideogram/using-magic-prompt) or [Random Style](/using-ideogram/features-and-tools/reference-features/style-reference).

* **Short and creative:**

  > *A woman drifting through a quiet dream, shapes and colors shifting gently around her.*

This kind of prompt leaves much up to the AI’s interpretation. You might get surreal, abstract, or symbolic results—great for inspiration or exploration.

### When to use a longer prompt

Longer prompts help when you want to control multiple parts of the image: the subject, background, lighting, mood, or style. They’re ideal when you already have a specific result in mind.

* **Visually grounded and detailed:**

  > *A red fox standing beneath bright autumn trees, surrounded by golden leaves falling onto a quiet forest floor.*

### Tips for using longer prompts effectively:

* Break the prompt into logical pieces: subject, details, background, atmosphere.
* Put the most important ideas near the beginning.
* **Avoid using too many unrelated concepts—this can confuse the AI.**

### About the number of words:

Ideogram supports prompts up to **approximately 150 – 160 words (around 200 tokens)**. Prompts longer than this may be ignored or generate less accurate results. Make every word count, and always lead with what matters most.

{% hint style="info" %}
**Tip:** Prompt length isn’t tied to prompting style. You can write short or long prompts whether you're using visually grounded, abstract, or hybrid language.

* Use **short prompts** when you want looser interpretation, to spark creative exploration or want to use Magic Prompt.
* Use **longer prompts** when you want to guide specific elements like subject, background, style, or lighting.

Start simple, lead with what's most important, and build up detail only as needed.
{% endhint %}

***

## **Visually grounded vs. abstract prompts**

Ideogram responds well to both visually grounded and abstract prompts—but not in the same way. The way you phrase your prompt has a major impact on the kind of image you get, and how closely it matches your intent.

### **Visually grounded prompts**

These prompts focus on what can literally be seen in the image: the subject, setting, lighting, style, colors, and composition. They’re best when you have a specific image in mind and want the AI to render it as clearly and accurately as possible.

> * *A stone lighthouse standing on a rocky cliff in heavy fog, its beam shining across calm gray waves at dusk.*
> * *A woman sitting in a dark room beside a table, reading a book under the warm glow of a single candle.*

Visually grounded prompts tend to produce **more consistent and accurate results**, **stronger prompt adherence**, and **better layout control**, especially when generating images that include text.

### **Abstract or poetic prompts**

These prompts use figurative language, emotion, or symbolism to guide the image in a more open-ended way. They’re ideal for **creative exploration**, **unexpected results**, or **evoking a feeling rather than a scene**.

> * *A lighthouse fading into the mist, its light barely reaching the waves as the sea swallows the horizon.*
> * *A woman reading by candlelight, her face half-shadowed, as time seems to pause around her.*

Ideogram handles abstract prompts surprisingly well—especially when they include **some visual or emotional anchors**. The results may be unpredictable, but often striking.

### **Hybrid prompts**

You can also blend both approaches: use a clear visual structure with a poetic tone, or add symbolic elements to an otherwise grounded prompt.

> * *A watercolor of a ballerina mid-spin on a quiet stage—like a moment of silence captured in motion.*
> * *A detailed ink sketch of an old lighthouse on a cliff. The sea below vanishes into mist like a forgotten memory.*
> * *A portrait of a young woman in a red cloak, standing still. The forest behind her blurs into colors like wet paint on glass.*

This style is especially useful when:

* You want a **specific subject** but an open-ended or expressive background.
* You want **artistic interpretation** while keeping a core idea intact.
* You want to inspire **variation in mood or atmosphere** while locking down style or composition.

Use hybrid prompts when you want the best of both worlds: direction *and* discovery.


# Text and Typography

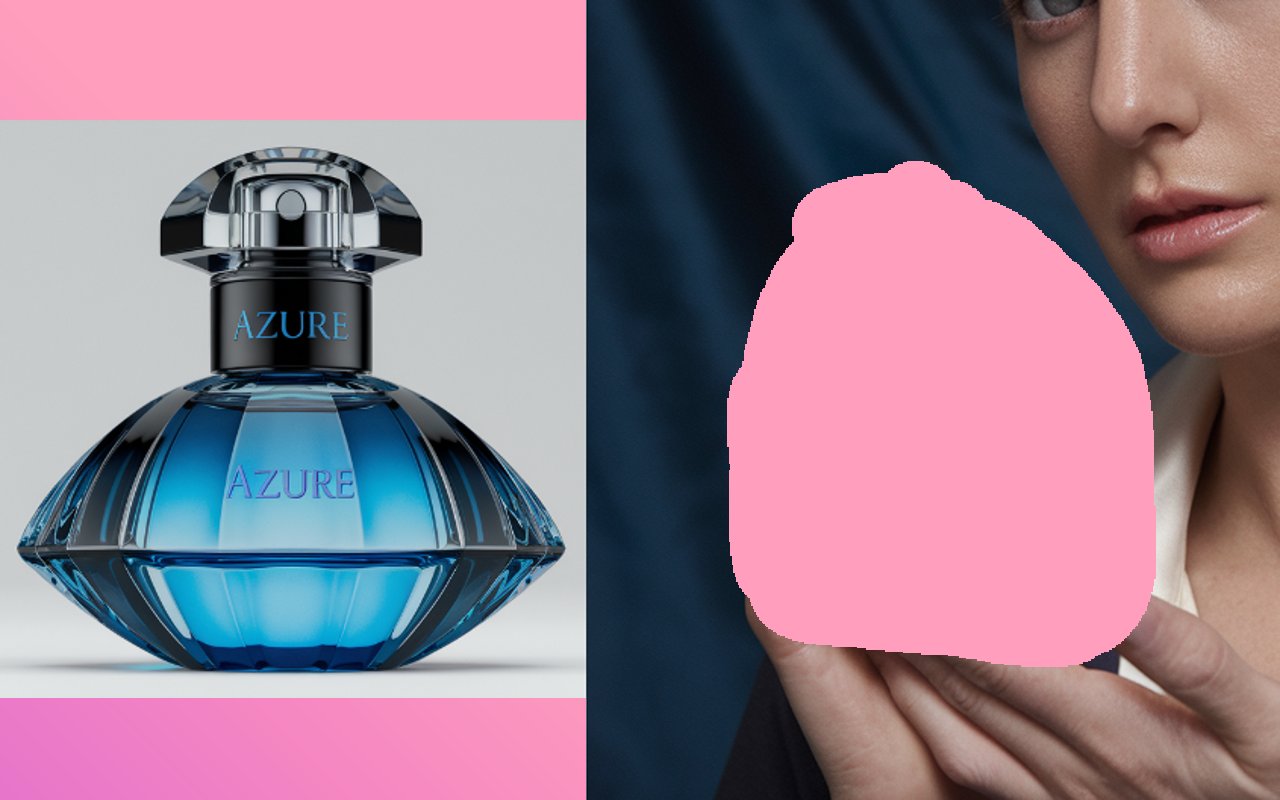
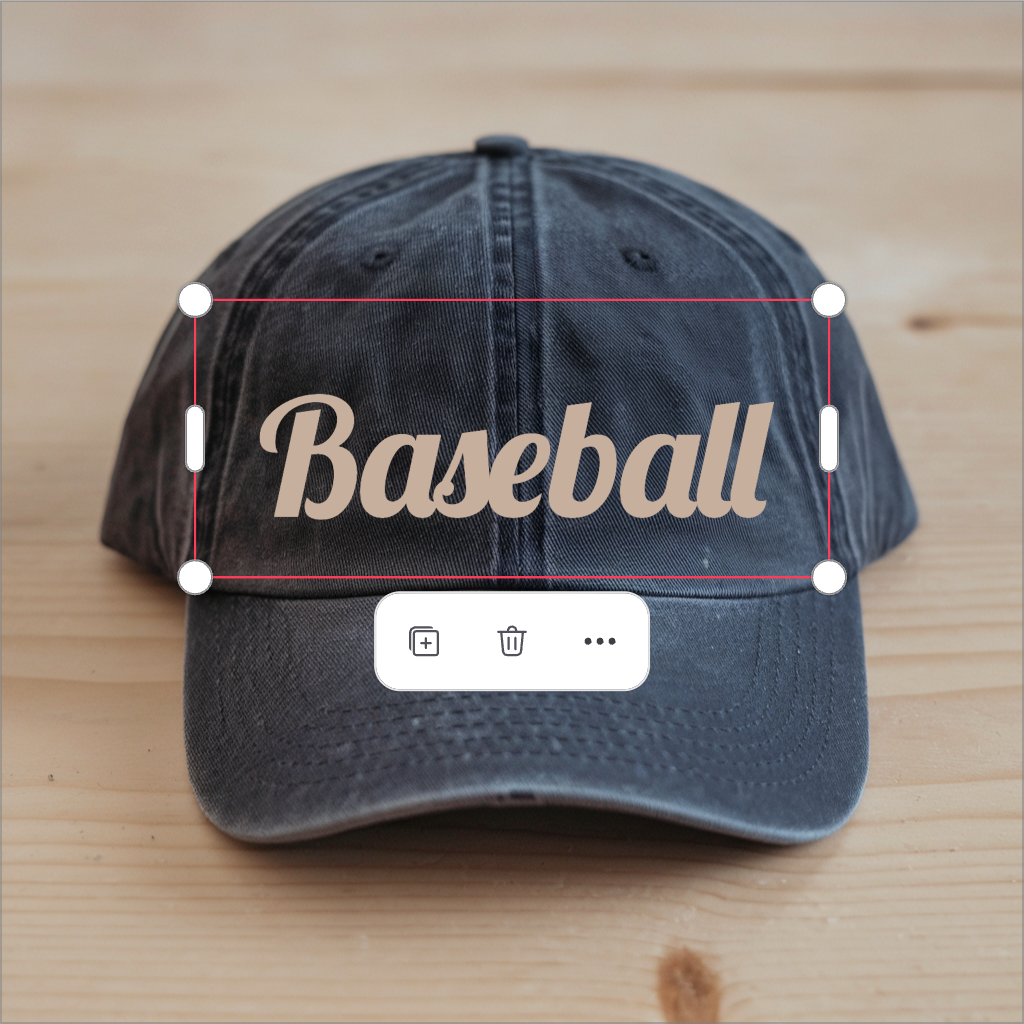
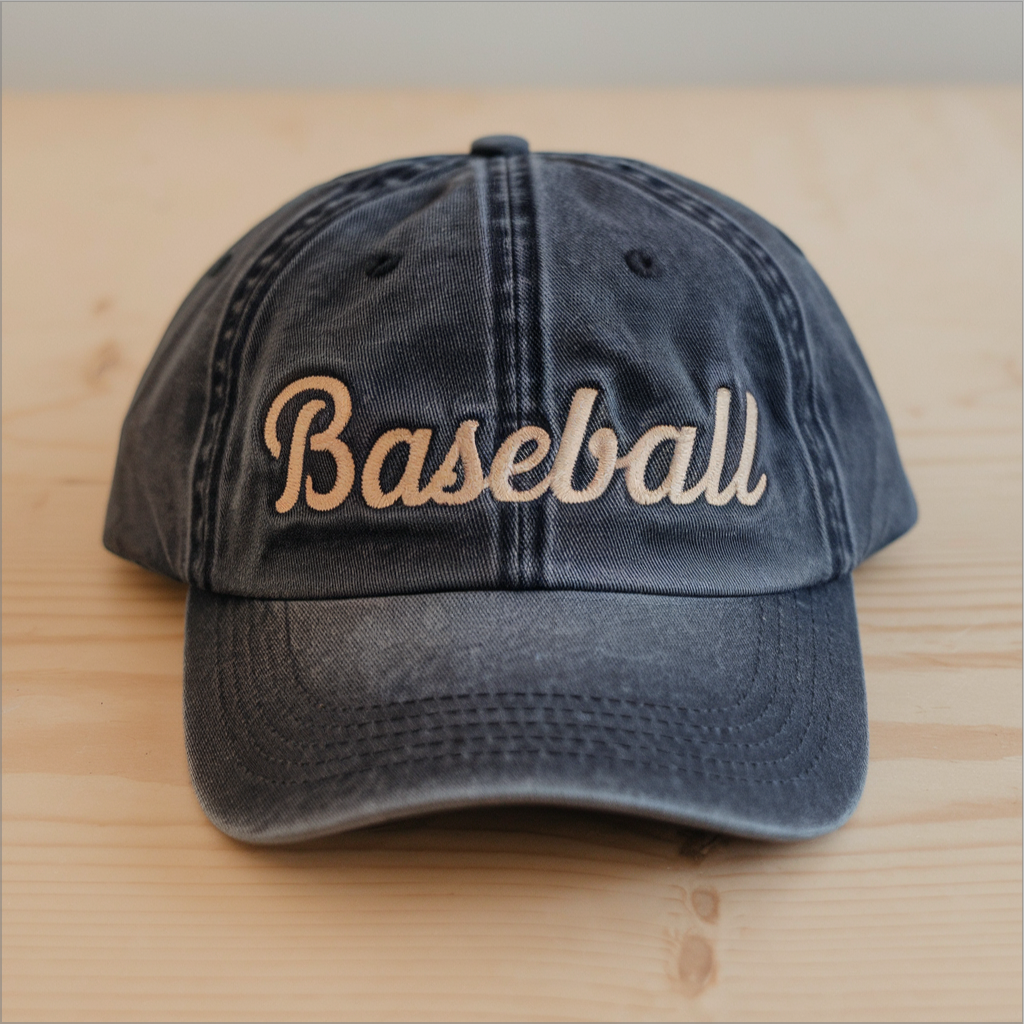
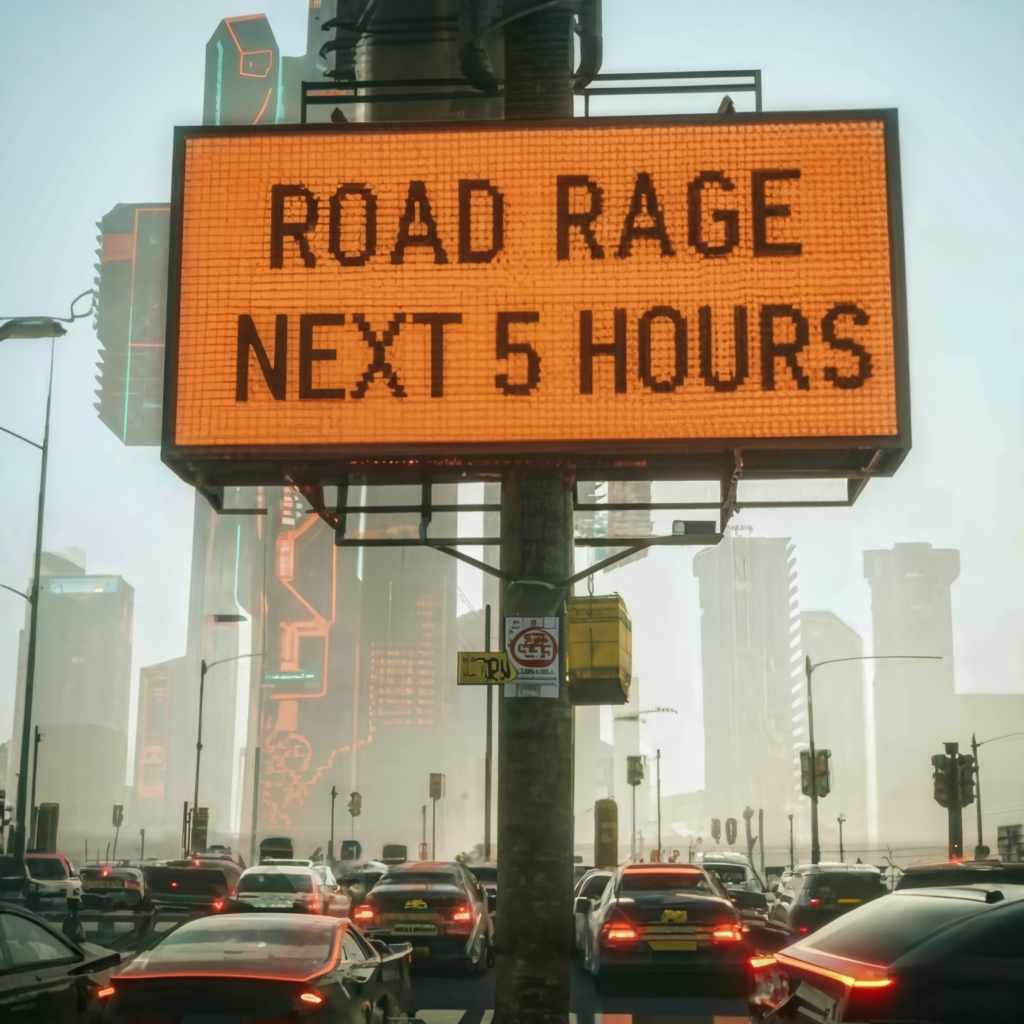
**Ideogram excels in the generation and integration of text into an image.** Whether as an overlay (e.g. a meme), as a typographic design (e.g. a t-shirt design) or as an integral part of various image elements (e.g. the name of a bottle of perfume), it's easy to get good results, often on the very first try.

To do this, all you need to do is write your prompt using complete sentences and punctuation, and indicate the text to be written by putting it in quotation marks and describing the context.

Here's an example:

**Prompt**:\
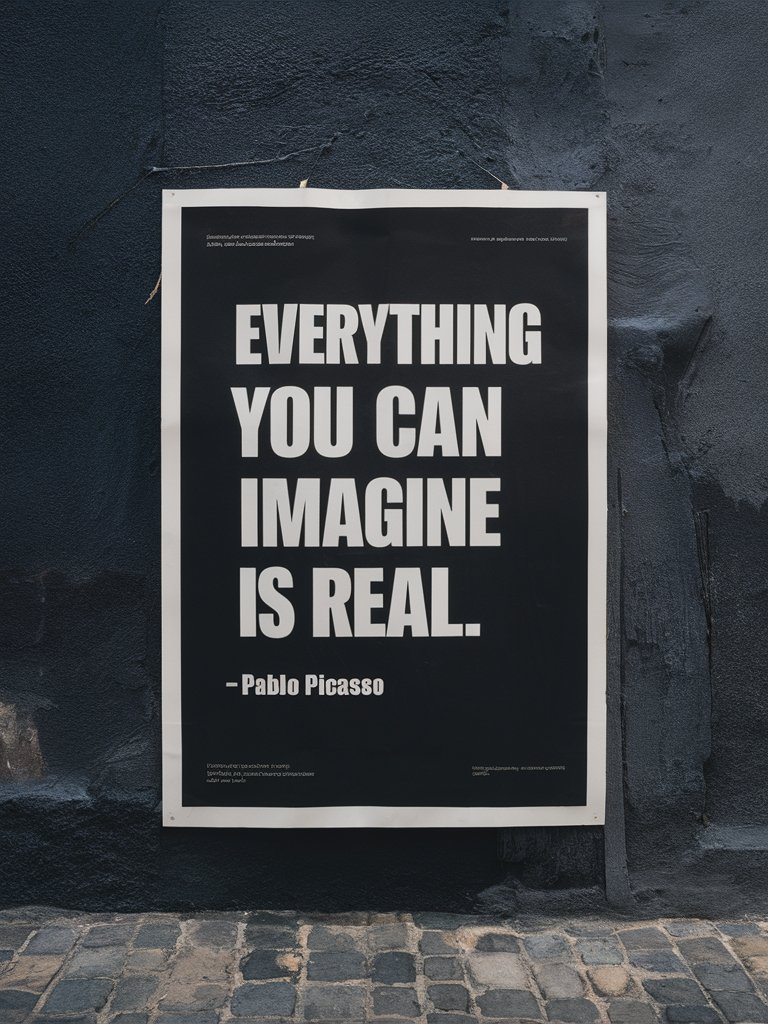
\&#xNAN;*A poster on a wall with text that reads: "Everything you can imagine is real. – Pablo Picasso"*

<figure><img src="/files/XG8GMD5PPcTfs6JvnvPt" alt="Black poster taped to a dark wall reading Everything You Can Imagine Is Real – Pablo Picasso in bold white capitals" width="375"><figcaption><p>The AI generated the requested text on a poster, on a wall.</p></figcaption></figure>

{% hint style="info" %}
In the image above, the AI has decided on the style and type of wall and poster that will be generated, as well as other visual aspects. Of course, you can describe these or any other elements you'd like to appear in the image yourself in the prompt, and the AI will generate them accordingly.
{% endhint %}

{% hint style="warning" %}
For the time being, text that you would like to be written using a non-Latin alphabet or accented Latin characters may have some difficulty being generated correctly, if at all.
{% endhint %}

With **Ideogram 4.0**, text rendering has improved further, and you can use JSON prompting for pixel-precise text placement with bounding boxes. Read more about that \[INSERT LINK]

## Tips and limitations for text

For plain-text prompts, the previous tips still apply:

> * *On the wall behind the artist, the phrase “Inspire Daily” is painted in large brush strokes across a mural, at the back of a vibrant and creative studio.*
> * *A vintage poster design with the words “Ride Free” curving along the bottom in retro lettering, featuring a smiling woman on a bicycle on a countryside road.*

**To achieve the best results:**

* **Use Visually Grounded Prompts**: Clearly describe the text's appearance, placement, and style within the image.
* **Position Text Early in the Prompt**: Mention the desired text near the beginning of your prompt to get better results.
* **Enclose Text in Quotation Marks**: Use quotation marks to specify the exact text you want to appear in the image.
* **Break longer text into chunks.**\
  If you're trying to generate more than one line of text, split the content into sections with specific placement instructions.
* **Reduce visual complexity if possible.**\
  The more intricate the rest of the scene, the harder it is for the AI to cleanly render text.

That said, there are a few **limitations to keep in mind:**

* **Text length matters.**\
  The longer the text you want to include, the higher the chance of spelling errors, distortions, or incomplete words. Think of it like taking a group photo: the more people in the shot, the greater the chance someone will blink. Short, punchy phrases work best.
* **Not suitable for layouts with full textual content**\
  Ideogram is not designed to generate complete, text-heavy documents. It can insert titles or short blocks of text, but long passages should be added afterward in a graphic editor.
* **Foreign language support is limited.**\
  Text rendering is most accurate in **English**. Non-Latin scripts often produce unpredictable results.

If precise, readable text is important to your design, consider using Ideogram to generate the visual concept and then add the text manually using graphic editing tools afterward.

## Various types of text renderings

As you will see in the examples below, Ideogram can easily integrate text in just about any situation.

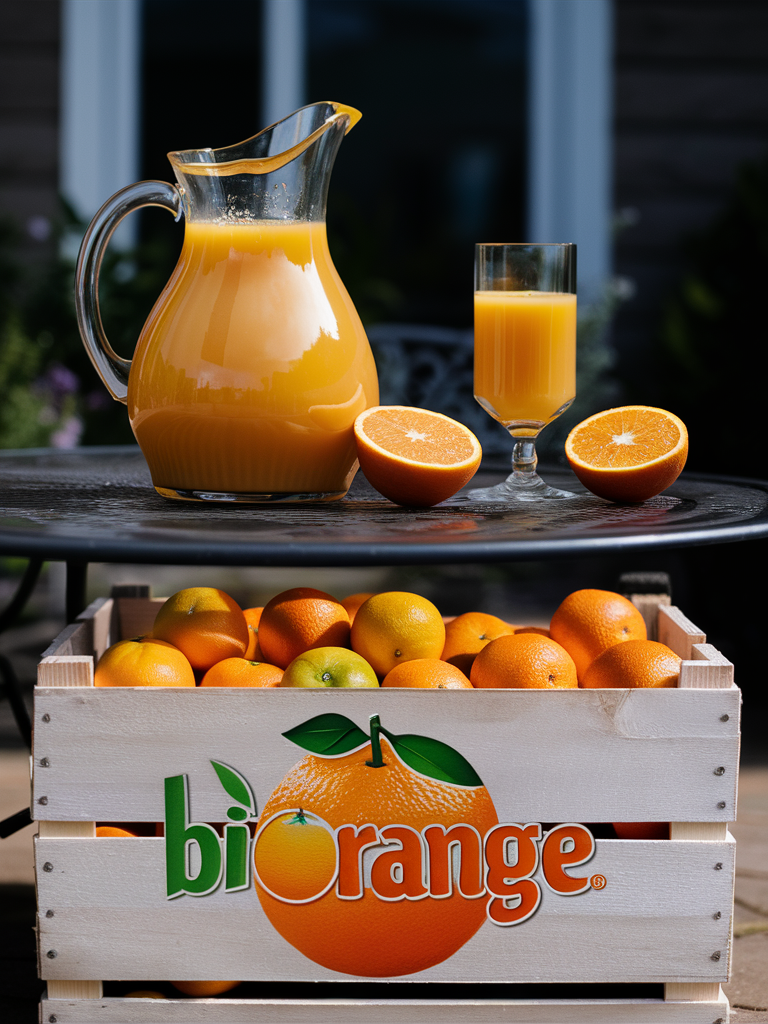
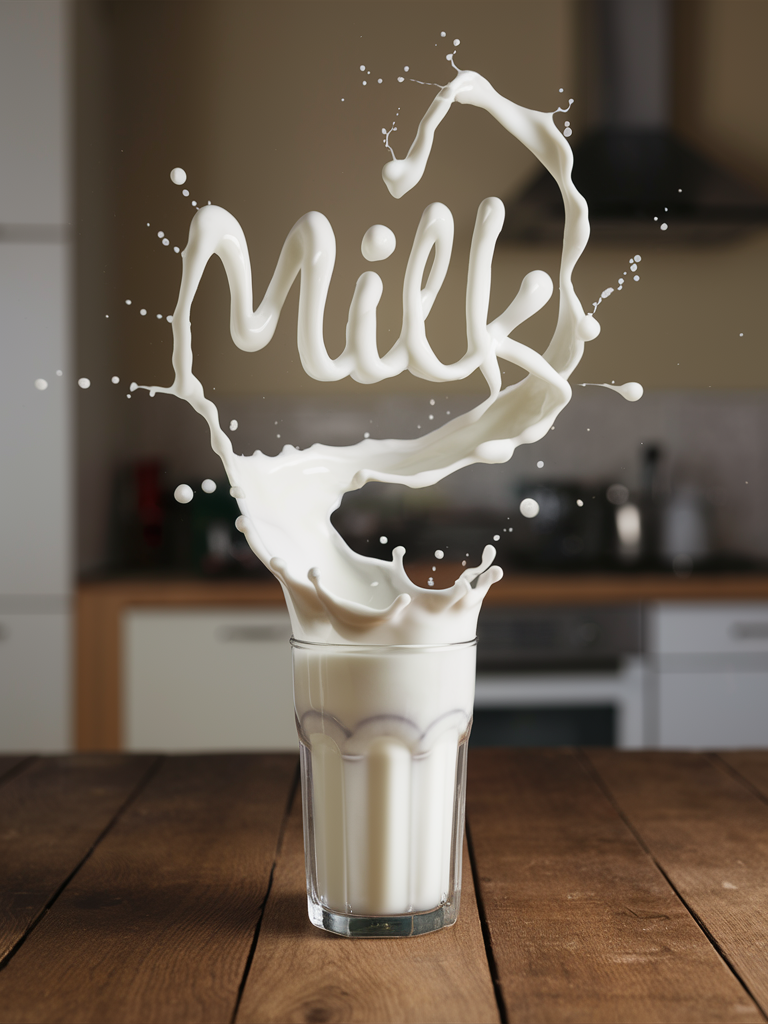
<table data-card-size="large" data-view="cards"><thead><tr><th></th><th></th><th></th></tr></thead><tbody><tr><td><strong>Simple text</strong></td><td><img src="/files/fALBD8e3W41zzivslxA1" alt="Three black diamonds on a grey panel beside bold white text on black reading Keep it simple, experience minimalism" data-size="original"></td><td><strong>Prompt</strong>:<br><em>A striking image split in three, where on the left part, a minimalist set of three black geometric forms are arranged vertically on a light grey background. The center and right parts are united as a black background, a block of geometric text emphasizes the essence of minimalism: "Keep it simple, experience minimalism."</em></td></tr><tr><td><strong>Text as logo</strong></td><td><img src="/files/xLRGsxifiUY0xupodcOV" alt="Jug and glass of orange juice on a patio table above a wooden crate of oranges printed with a Biorange logo" data-size="original"></td><td><strong>Prompt</strong>:<br><em>A striking photograph in which a jug of orange juice is placed on a patio table with a glass of orange juice next to it and a few oranges placed neatly on the table some cut in half. At the bottom of the image, the side of a wooden crate full of oranges shows the brand logo, which consists of a big orange in the background of the word 'Biorange' in stylish juicy/liquid lettering, which forms the logo for the orange juice brand. The background is blurred and a little dark, but it looks as though the photo was taken outside, in the garden of a house, on a sunny day.</em></td></tr><tr><td><strong>Text formed by objects</strong></td><td><img src="/files/uWNVx3lJ2jCyoArshQOJ" alt="Milk splashing out of a glass and forming the word Milk in swirly liquid lettering above a wooden kitchen table" data-size="original"></td><td><strong>Prompt</strong>:<br><em>A striking photograph in which a glass of milk is placed on a wooden table. A splash of milk comes out of the glass, forming the word "Milk" in a swirly manner just above the glass. The background is blurred but looks like a homely kitchen.</em></td></tr><tr><td><strong>Text as part of an object</strong></td><td><img src="/files/RRld5l5MDtuQyvZzQWlO" alt="Close-up of a red baseball cap with an embroidered snarling red panda emblem above the team name Red Panda in white script" data-size="original"></td><td><strong>Prompt:</strong><br><em>A close-up detailed product photo of a vibrant and energetic baseball cap, featuring a stylish red panda embroidered emblem that exudes vitality. The cap is embroidered with the team's name, "Red Panda," displayed boldly in white bold script font below the sleek red panda design. The dynamic perspective and intense focus on the cap create a sense of high-spirited enthusiasm and team spirit.</em></td></tr><tr><td><strong>Text as design</strong></td><td><img src="/files/wMD4Z7iCzeGPDxbATKGK" alt="Whimsical lettering reading Summer Lifestyle amid palm trees, a beach umbrella, cocktail and beach ball on a dark background" data-size="original"></td><td><strong>Prompt</strong>:<br><em>A vibrant and playful illustration of "Summer Lifestyle" set against a dark backdrop. The words are rendered in a whimsical, multi-colored font with splashes of pink, yellow, and green, perfectly capturing the essence of the season. Surrounding the text, a tropical paradise unfolds with palm trees swaying gently, a surfboard catching a wave, and a beach umbrella providing shade. A cocktail glass filled with a refreshing drink and a slice of lemon sits on the sand, while a beach ball and sunny skies complete the scene. The overall design exudes a laid-back, beach-themed vibe, with the bright colors and tropical motifs emphasizing the fun and carefree spirit of summer.</em></td></tr><tr><td><strong>Text as logo or design</strong></td><td><img src="/files/zGhrOH5K9o3cjHFU9ovT" alt="Woman&#x27;s silhouette with hair drawn as flowing script reading Take Care of Your Hair Naturally, above the words Herbal Shampoo" data-size="original"></td><td><p><strong>Prompt</strong>:</p><p><em>A captivating vintage-style calligraphy artwork featuring a woman's silhouette with intricately crafted hair, made up of elegant script that reads "Take care of your hair naturally." The brand name "Herbal Shampoo" is gracefully written in a fine sans-serif font below the main text, with the word shampoo being smaller, adding a touch of elegance to the design. The soft off-white background enhances the rich, vintage feel of the piece, while the seamless flow of the text emphasizes the message and the silhouette's feminine grace.</em></p></td></tr></tbody></table>

{% hint style="info" %}
Note how, in the examples above, there was no need to use [Style Tags](/using-ideogram/features-and-tools/reference-features/style-reference/styles-in-older-models), not even the Typography one. Everything was indicated in the prompt.
{% endhint %}

## Fonts and styles

You may find times when you would like to use a particular font or typographic style. At this time, it's not currently possible to specify a typeface by name. That said, it is possible to **describe certain stylistic properties** in order to obtain a satisfactory result.

<table data-card-size="large" data-view="cards"><thead><tr><th></th><th></th><th></th></tr></thead><tbody><tr><td><img src="/files/WO6YRTTEmphslndMzz31" alt="The word Welcome in a heavy bold sans-serif typeface, black on a white background" data-size="original"></td><td><strong>Prompt</strong>:<br><em>The word "Welcome" written in <mark style="color:green;">bold sans-serif</mark> typeface, in black on white background.</em></td><td></td></tr><tr><td><img src="/files/ebmnsELi0W8RRPjZgMLl" alt="The word Welcome in an ultra thin sans-serif typeface, black on a white background" data-size="original"></td><td><strong>Prompt</strong>:<br><em>The word "Welcome" written in <mark style="color:green;">ultra thin sans-serif</mark> typeface, in black on white background.</em></td><td></td></tr><tr><td><img src="/files/VE1Kr027yE3tAqSlhvCa" alt="The word Welcome in a classic serif typeface, black on a white background" data-size="original"></td><td><strong>Prompt</strong>:<br><em>The word "Welcome" written in <mark style="color:green;">serif</mark> typeface, in black on white background.</em></td><td></td></tr><tr><td><img src="/files/zDCWa2Ce2vCgbTsdUiVp" alt="The word welcome in lowercase thin rounded Bauhaus-style letters, black on an off-white background" data-size="original"></td><td><strong>Prompt:</strong><br><em>The word "Welcome" written in <mark style="color:green;">thin rounded bauhaus style</mark> typeface, in black on a white background.</em></td><td></td></tr><tr><td><img src="/files/3vEejfV5lAy1Xe0FDZd9" alt="The word Welcome in a thin formal script with long swirling flourishes above and below, black on an off-white background" data-size="original"></td><td><strong>Prompt</strong>:<br><em>The word "Welcome" written in <mark style="color:green;">thin and refined formal script</mark> typeface <mark style="color:green;">with flourishes</mark>, in black on a white background.</em></td><td></td></tr><tr><td><img src="/files/vbOPagV9AXIcSPFUWFKG" alt="The word Welcome in a bulbous, wavy 1960s hippie-style typeface, black on a cream background" data-size="original"></td><td><strong>Prompt</strong>:<br><em>The word "Welcome" written in <mark style="color:green;">an elongated and artistic 1960's hippie-style</mark> typeface, in black on white background.</em></td><td></td></tr></tbody></table>

As you can see in the examples provided, the AI will also do its best to find an appropriate font style or typography for the image it needs to render. The result will be even better if you activate the [Magic Prompt](/using-ideogram/generation-settings/magic-prompt) function. Here are two examples:

<table data-card-size="large" data-view="cards"><thead><tr><th></th><th></th><th></th></tr></thead><tbody><tr><td><img src="/files/TckIPa3lxGoQcvKJnRVa" alt="Birthday card of a rabbit in a chef hat and pink apron offering a candlelit cake under glittery Happy Birthday lettering" data-size="original"></td><td><strong>Prompt</strong>:<br><em>A fun whimsical birthday card design featuring a rabbit offering a cake and the text: "Happy Birthday"</em></td><td><strong>Magic Prompt</strong>:<br><em>A delightful and whimsical birthday card illustration featuring an adorable rabbit, wearing a cute chef's hat and apron, proudly offering a sumptuous cake with lit candles on it. The rabbit's eyes sparkle with joy and the background is a pastel-colored dreamy garden with fluffy clouds and blooming flowers. The text 'Happy Birthday' is written in a playful, cursive font, adding a touch of cheerfulness to the overall design.</em></td></tr><tr><td><img src="/files/DVZglaoHPKYaC84GWjvH" alt="Night cyberpunk cityscape with a light beam and crescent moons, the words New Horizons glowing in futuristic capitals" data-size="original"></td><td><strong>Prompt</strong>:<br><em>A cyberpunk cityscape with the word: "New Horizons"</em></td><td><strong>Magic Prompt</strong>:<br><em>An expansive and futuristic cyberpunk cityscape, with towering skyscrapers and neon lights that stretch into the night. The word "New Horizons" is prominently displayed in large, futuristic letters, signifying the beginning of a new era. The background features a holographic sky filled with multicolored clouds and a crescent moon. A few flying vehicles can be seen in the distance, adding to the bustling city atmosphere.</em></td></tr></tbody></table>

## Fonts and copyrights

**Ideogram's AI doesn't use real fonts to generate images the same way you use font in your computer.** To put it simply, the AI learns by looking at lots of different text images. It studies how different text looks and begins to understand the actual styles. Eventually, the AI figures out how to make text that matches those different styles. So, when you ask for a specific style of text, the AI makes text that looks like it's from a specific style or font, even though the AI is not loaded with that exact font.

## Errors and misspelled words or phrases

Although Ideogram excels at generating text in images, an image can sometimes contain a spelling error, a missing or extra word or letter. Depending on the nature of the error, it is possible to correct the situation in various ways.

* Simply generate your prompt again a few times and see if you get the text you want.
* Change some of the longer, more complex words for shorter synonyms.
* Use the [Editor](/canvas-and-editing/editor) to modify the text, adding or deleting parts and then remix the image.
* Use the Typographic [Style Tag](/using-ideogram/features-and-tools/reference-features/style-reference/styles-in-older-models) with version 1.0 as it helps to achieve better results.
* Upload an image containing the desired text, which will serve as a starting point and composition source for the image to be created by remixing it.

{% hint style="info" %}
It's a well-known fact that long, complex words and long sentences are harder to generate correctly than short, everyday words. Don't worry, it can be done with patience! Over time, it will get easier as the AI is updated and gets better.

It is often easier to remix an image to fix the image content itself while keeping the text right rather than trying to remix to fix the text while keeping the rest of the image.
{% endhint %}

Here's an example on how to fix text with the editor:

<table data-card-size="large" data-view="cards"><thead><tr><th></th><th></th><th></th></tr></thead><tbody><tr><td><img src="/files/HjY0JdtyUg6a1moN7Ew8" alt="Martini glass with an olive on a dark table under bold text misspelled as Got Martinii? with a doubled letter i" data-size="original"></td><td>Here's an example of an image where a word contains an error. The letter "i" in Martini has been doubled by mistake.</td><td></td></tr><tr><td><img src="/files/2TP1rrhqOndLSDSNl38p" alt="Same martini image in the editor with the extra i and question mark painted over so the text reads Got Martini" data-size="original"></td><td>In the editor, choose the background color to paint over the unwanted letter. In addition, the question mark has also been removed to be redrawn closer to the last word.</td><td></td></tr><tr><td><img src="/files/dRrxC5HAQFgdvQkZI0Ai" alt="Martini image with a rough hand-drawn question mark added after the corrected text Got Martini" data-size="original"></td><td>Now, the question mark as been redrawn. No need to be that precise but it is easier if the redrawn letters looks like what it should when remixing the modified image.</td><td></td></tr><tr><td><img src="/files/DSUTt5Kd9MvN7UaoRH8S" alt="Remixed martini poster where the text now cleanly reads Got Martini? with a smoothly integrated question mark" data-size="original"></td><td>Here's the result. The modified image has been remixed with a high level of image strength (90/100) and the roughly drawn question mark has been integrated and smoothed to fit perfectly with the text.</td><td></td></tr></tbody></table>


# 3. Prompt Structure

## Why do I need a prompt structure?

A prompt structure is simply the way you organize your words when asking the AI to create an image. It helps the AI understand exactly what you want to see — like what kind of image it should be, what’s in it, and how it should look or feel.

When your prompt is clearly structured, the AI has a much better chance of generating something that matches your idea. It’s like giving good directions — you don’t need to be an expert, but the more clearly you guide the AI, the better the results will reflect what you have in mind.

***

## The different parts of a prompt

Each part of a prompt adds structure and clarity. The examples below use three parallel image ideas that will be assembled into complete prompts in the next section.

### **3.1. Image summary**

**Purpose**: A single sentence describing the entire image, as if someone glanced at it for just two seconds. It establishes the visual form (photo, logo, painting), the main subject, and hints at the visual tone. **If you could only write one sentence, this is the part to get right.** It also works well with [Magic Prompt](/using-ideogram/getting-started/prompting-guide/7-creative-tools-in-ideogram/using-magic-prompt) to expand on.

**Examples**:

1. *A product photo of a men’s perfume bottle named “Nightlife for men” in a sleek studio setup.*
2. *A whimsical watercolor painting of a little girl playing with her bunny in a flower-filled field.*
3. *A logo design for a local football team called “Rhinos” in green, blue, and white.*

### **3.2. Main subject details**

**Purpose**: More information about the main subject — what does it look like? Color, shape, material, texture? This is also the best place to include any text you want rendered in the image. Enclose the exact wording in quotation marks `" "` and place it early in the prompt.

1. *The bottle is tall and rectangular with dark glass, a matte black cap, and silver lettering. The text “Nightlife for men” appears on the label in bold, modern font.*
2. *The girl has short brown hair, a yellow dress, and rosy cheeks. She holds a fluffy white bunny in her arms, and both are smiling.*
3. *The main graphic shows a strong, stylized rhino head viewed from a three-quarter angle, with sharp lines and a bold expression. The word “Rhinos” appears in large, blocky letters beneath the icon.*

### **3.3. Pose or action**

**Purpose**: What the main subject is doing — or how it's placed. This adds life and personality to the image, even when it’s still.

1. *The bottle stands upright with a slight reflection on the surface below.*
2. *The bunny is leaning into her, with its ears flopping gently.*
3. *The rhino’s horn points slightly forward and up, adding a sense of motion.*

### **3.4. Secondary elements**

**Purpose**: Smaller things around or near the main subject — props, accessories, ambient details — that help complete the scene without stealing the spotlight. These help make the image feel fuller.

1. *A wristwatch and a pair of sunglasses sit nearby, adding a masculine vibe.*
2. *Wildflowers, butterflies, and a toy picnic basket surround them.*
3. *Stars and shield shapes accent the logo without crowding it.*

### **3.5. Setting & background**

**Purpose**: Where the image takes place — indoors or outdoors, what time of day, what environment. The background contributes to anchor the image in a coherent visual context.

1. *The scene is set on a smooth black surface with blurred city lights in the background.*
2. *They are outdoors in a grassy meadow, under a wide blue sky.*
3. *The background is flat white, with no scene or setting.*

### **3.6. Lighting & atmosphere**

**Purpose**: How the light looks and how the image feels. This sets the mood. This sets the mood of the image and makes it feel more real or more emotional.

1. *Lighting is moody and cool, with soft blue highlights and deep shadows.*
2. *The light is soft and sunny, with warm pastel tones and a dreamy atmosphere.*
3. *The color palette is vivid, with deep blue outlines, white highlights, and green fills.*

### **3.7. Framing & composition**

**Purpose**: How the subject and elements are visually arranged within the frame — camera angle, shot type, subject placement. For non-photographic works, it still applies! E.g., how a figure is balanced in a painting or how elements are spaced in a logo. It enhances clarity, focus, and aesthetics.

1. *The bottle is centered in the frame, captured at eye level.*
2. *The girl and bunny are slightly off-center, framed from a gentle downward angle.*
3. *The logo is center-aligned with a tight, symmetrical layout.*

### **3.8. Technical Enhancers**

**Purpose**: Extra details that make the image look more polished — lens type, bokeh, brush textures, rendering style. They don't change the content, but improve how it looks. These are useful when you want a certain artistic finish.

1. *A shallow depth of field gives the image a polished, professional look.*
2. *The brush strokes are loose and textured, with light color bleeds that add charm and softness.*
3. *The lines are clean, the edges sharp, and the style is vector-based with a modern, sporty look.*

**It is not necessary to use all the parts described above**. For example, when prompting for a logo design, you might not need to add anything about any secondary elements. Your prompt can be short or detailed, depending on your goal. The more parts you include, the more control you’ll have — but sometimes, a short or abstract prompt is the best way to explore creative results.

Now that you’ve seen each part in isolation, let’s bring them together.

***

## Assembling the parts

Here’s a basic prompt template that is making use of all the parts described above:

> *\[Image summary]. \[Main subject details], \[Pose or action], \[Secondary elements], \[Setting & Background], \[Lighting & Atmosphere], \[Framing & Composition], \[Technical enhancers]*

By combining all the example parts from the example in section 3.1 - 3.8 above, we can build the following three complete prompts:

1. > *A product photo of a men’s perfume bottle named “Nightlife for men” in a sleek studio setup. The bottle is tall and rectangular with dark glass, a matte black cap, and silver lettering. The text “Nightlife for men” appears on the label in bold, modern font. The bottle stands upright with a slight reflection on the surface below. A wristwatch and a pair of sunglasses sit nearby, adding a masculine vibe. The scene is set on a smooth black surface with blurred city lights in the background. Lighting is moody and cool, with soft blue highlights and deep shadows. The bottle is centered in the frame, captured at eye level. A shallow depth of field gives the image a polished, professional look.*
2. > *A whimsical watercolor painting of a little girl playing with her bunny in a flower-filled field. The girl has short brown hair, a yellow dress, and rosy cheeks. She holds a fluffy white bunny in her arms, and both are smiling. The bunny is leaning into her, with its ears flopping gently. Wildflowers, butterflies, and a toy picnic basket surround them. They are outdoors in a grassy meadow, under a wide blue sky. The light is soft and sunny, with warm pastel tones and a dreamy atmosphere. The girl and bunny are slightly off-center, framed from a gentle downward angle. The brush strokes are loose and textured, with light color bleeds that add charm and softness.*
3. > *A logo design for a local football team called “Rhinos” in green, blue, and white. The main graphic shows a strong, stylized rhino head viewed from a three-quarter angle, with sharp lines and a bold expression. The word “Rhinos” appears in large, blocky letters beneath the icon. The rhino’s horn points slightly forward and up, adding a sense of motion. Stars and shield shapes accent the logo without crowding it. The background is flat white, with no scene or setting. The color palette is vivid, with deep blue outlines, white highlights, and green fills. The logo is center-aligned with a tight, symmetrical layout. The lines are clean, the edges sharp, and the style is vector-based with a modern, sporty look.*

{% hint style="warning" %}

> **Note:** Ideogram supports prompts **up to roughly 150-160 words or about 200 tokens** depending on the vocabulary. Anything beyond that limit may be **less effective or ignored entirely** by the AI when generating the image. To avoid losing key details, make sure the most important parts of your prompt come near the beginning. The assembled examples above approach that upper limit and are designed to give the AI strong visual and stylistic guidance while staying concise and well-structured.
> {% endhint %}

***


# 4. JSON Prompting (Ideogram 4.0)

## Why JSON prompting?

Ideogram 4.0 was trained **exclusively on structured JSON captions**. Natural language prompts still work well — but providing a JSON object that follows the caption schema gives you capabilities that go far beyond what natural language can express:

* **Exact color control**: Specify up to 16 hex colors for the whole image, and up to 5 per individual element.
* **Bounding-box layout**: Place any element precisely within the frame using normalized coordinates.
* **Precise text placement**: Define each piece of in-image text as its own element with its own position and styling.
* **Consistent, repeatable outputs**: Two runs from the same JSON prompt stay close to each other in composition — useful for design workflows.

{% hint style="info" %}
You don't have to write JSON yourself. **Magic Prompt** can automatically expand a plain-text description into a full structured JSON caption, giving you JSON-quality results from a casual prompt. See [Using Magic Prompt](/using-ideogram/getting-started/prompting-guide/7-creative-tools-in-ideogram/using-magic-prompt) for more.
{% endhint %}

**This section will be doing a deeper dive on JSON formatting and variables.** We know that this can be a bit complex for first-time users, but we'll do our best to make the details as clear as possible. We're also working on product updates that make JSON prompting more visual and easier for first-time users! Our goal is for everyone to use the power of Ideogram 4.0 and JSON prompting — whether you have previous technical experience or not :sunglasses:.

***

## When to use JSON vs. natural language

<table><thead><tr><th>Use case</th><th width="234.2109375">Recommended approach</th></tr></thead><tbody><tr><td>Quick exploration, creative ideas</td><td>Natural language</td></tr><tr><td>Expanding a short idea</td><td>Natural language + Magic Prompt</td></tr><tr><td>Design work, posters, branded graphics</td><td>JSON</td></tr><tr><td>Exact text placement (signage, logos, labels)</td><td>JSON</td></tr><tr><td>Specific color palette</td><td>JSON</td></tr><tr><td>Repeatable layouts across multiple generations</td><td>JSON</td></tr><tr><td>Photorealistic scenes where placement isn't critical</td><td>Natural language</td></tr></tbody></table>

***

## The JSON caption schema

A valid Ideogram 4.0 JSON caption has three top-level fields:

| Field                          | Required             | Description                                                |
| ------------------------------ | -------------------- | ---------------------------------------------------------- |
| `high_level_description`       | Strongly recommended | One or two sentences summarizing the full image            |
| `style_description`            | Optional             | Controls visual style, lighting, medium, and color palette |
| `compositional_deconstruction` | **Required**         | Defines the background and all individual elements         |

***

## `high_level_description`

A one- or two-sentence summary of the entire image. Think of it like the **Image summary** from Section 3.1 — if you could only say one thing, this is it.

`"high_level_description": "A medium-shot photograph of a barista pouring latte art in a cozy cafe."`

***

## `style_description`

Controls the visual style, lighting, medium, and color palette. It must contain **exactly one** of:

* `photo` — for photographic outputs
* `art_style` — for illustrations, paintings, 3D renders, graphic design, etc.

The fields `aesthetics`, `lighting`, and `medium` are also required when `style_description` is present. `color_palette` is optional.

**Key order matters** and depends on which style type you use:

| Caption type | Required key order                                               |
| ------------ | ---------------------------------------------------------------- |
| Photo        | `aesthetics`, `lighting`, `photo`, `medium`, `color_palette`     |
| Non-photo    | `aesthetics`, `lighting`, `medium`, `art_style`, `color_palette` |

| Field           | Type            | Description                                                                                                         |
| --------------- | --------------- | ------------------------------------------------------------------------------------------------------------------- |
| `aesthetics`    | string          | Aesthetic keywords (e.g. `"moody, cinematic, desaturated"`)                                                         |
| `lighting`      | string          | Lighting description (e.g. `"golden hour, rim light, dramatic shadows"`)                                            |
| `photo`         | string          | Camera/lens details for photos (e.g. `"35mm, f/1.4, bokeh"`). Use this **or** `art_style`, not both.                |
| `medium`        | string          | Medium type: `"photograph"`, `"illustration"`, `"3d_render"`, `"painting"`, `"graphic_design"`, etc.                |
| `art_style`     | string          | Art style for non-photo work (e.g. `"flat vector illustration, bold outlines"`). Use this **or** `photo`, not both. |
| `color_palette` | list of strings | Hex color codes that steer the image's dominant colors. Up to 16 entries. **Must be uppercase** `#RRGGBB`.          |

***

## `compositional_deconstruction`

This is where you describe the background and every individual element in the scene. Both `background` and `elements` are required, and `background` must come first.

| Field        | Type   | Description                                                          |
| ------------ | ------ | -------------------------------------------------------------------- |
| `background` | string | Description of the background/environment                            |
| `elements`   | list   | List of objects and text elements, each with optional bounding boxes |

***

## **Element types**

Each element in `elements` is either an object (`"obj"`) or a text element (`"text"`).

| Type     | Required key order                                                        |
| -------- | ------------------------------------------------------------------------- |
| `"obj"`  | `type`, `bbox` *(optional)*, `desc`, `color_palette` *(optional)*         |
| `"text"` | `type`, `bbox` *(optional)*, `text`, `desc`, `color_palette` *(optional)* |

| Field           | Type               | Description                                                                                                                          |
| --------------- | ------------------ | ------------------------------------------------------------------------------------------------------------------------------------ |
| `type`          | string             | `"obj"` for objects/subjects, `"text"` for in-image text                                                                             |
| `bbox`          | list of 4 integers | `[y_min, x_min, y_max, x_max]` in normalized 0–1000 coordinates (origin at top-left). Optional — omit to let the model place freely. |
| `desc`          | string             | Detailed description of the element                                                                                                  |
| `text`          | string             | *(text elements only)* The literal text to render in the image                                                                       |
| `color_palette` | list of strings    | Per-element color palette. Up to 5 uppercase `#RRGGBB` hex entries. Optional.                                                        |

{% hint style="info" %}
**Important:** Key order matters. The model was trained on captions with a consistent key order, so maintaining it improves generation quality.
{% endhint %}

***

## Bounding boxes

Bounding boxes let you specify exactly where an element appears in the frame. Coordinates use a normalized 0–1000 system where `[0, 0]` is the top-left corner of the image.

```
[y_min, x_min, y_max, x_max]
```

For example, `[0, 0, 500, 1000]` places an element in the top half of the image. `[250, 250, 750, 750]` places it roughly centered.

Bounding boxes are optional for every element — if you omit them, the model will place the element freely based on its description.

***

## Color palette tips

* Include **background colors** in the palette if you want to control the overall tone
* Include **contrast pairs** — both highlight and shadow colors — for more controlled lighting
* Use **uppercase hex only**: `#RRGGBB`, not `#rgb` or lowercase

***

## A simple JSON example (no bounding boxes)

A clean starting point — great for anyone new to JSON prompting:

**Prompt:**

```json
{
   "high_level_description":"A lone sailboat on calm water at golden hour.",
   "style_description":{
      "aesthetics":"serene, warm, golden hour",
      "lighting":"golden hour backlighting, warm atmospheric haze",
      "photo":"wide angle, f/8, long exposure",
      "medium":"photograph",
      "color_palette":[
         "#FF6B35",
         "#F7C59F",
         "#004E89",
         "#1A659E",
         "#2B2D42"
      ]
   },
   "compositional_deconstruction":{
      "background":"A calm ocean stretching to a low horizon, sky washed in orange and pink with thin wisps of cloud.",
      "elements":[
         {
            "type":"obj",
            "desc":"A single sailboat with a white triangular sail, silhouetted against the setting sun."
         }
      ]
   }
}
```

**Output:**

• [Magic Prompt](/using-ideogram/generation-settings/magic-prompt): OFF (automatically turned off when using JSON format for Ideogram 4.0)\
• [Aspect ratio](/using-ideogram/generation-settings/aspect-ratio-and-dimensions): 1:2\
• [Model](/using-ideogram/generation-settings/available-models): 4.0

<figure><img src="/files/YKzYhTqdWzNt3axFd2AQ" alt="Photograph of a lone sailboat silhouetted against a golden sunset over a calm ocean, the sun low on the horizon" width="375"><figcaption></figcaption></figure>

***

## A JSON example with Bounding Boxes

When exact placement matters — for design work, posters, or complex compositions:

```json
{
  "high_level_description": "A bold event poster for a jazz night called 'Blue Note Sessions' at The Velvet Room, Saturday August 9th.",
  "style_description": {
    "aesthetics": "moody, retro, sophisticated, 1960s jazz club aesthetic",
    "lighting": "dramatic, deep shadows, warm spotlight glow",
    "medium": "graphic_design",
    "art_style": "vintage poster design, textured paper, bold typography, muted color palette with warm accents",
    "color_palette": ["#1A1A2E", "#16213E", "#E8C97A", "#D4A843", "#F5F0E8", "#8B4513"]
  },
  "compositional_deconstruction": {
    "background": "Deep navy and near-black background with subtle aged paper texture and faint horizontal grain lines.",
    "elements": [
      {
        "type": "obj",
        "bbox": [150, 200, 650, 800],
        "desc": "A silhouetted jazz trumpeter in side profile, mid-performance, instrument raised. Warm golden spotlight illuminates from above, casting dramatic shadows. Stylized, slightly abstract illustration style."
      },
      {
        "type": "text",
        "bbox": [30, 50, 140, 950],
        "text": "BLUE NOTE SESSIONS",
        "desc": "Large bold all-caps serif headline in warm golden-yellow, spanning the full width near the top of the poster."
      },
      {
        "type": "text",
        "bbox": [660, 100, 760, 900],
        "text": "Live jazz every Saturday night",
        "desc": "Medium-weight italic serif subheading in off-white, centered beneath the main title."
      },
      {
        "type": "text",
        "bbox": [820, 200, 900, 800],
        "text": "THE VELVET ROOM",
        "desc": "Smaller all-caps sans-serif venue name in warm gold, centered near the bottom."
      },
      {
        "type": "text",
        "bbox": [900, 300, 970, 700],
        "text": "SAT · AUGUST 9",
        "desc": "Small light-weight serif date text in off-white, near the bottom of the poster."
      }
    ]
  }
}
```

**Output:**

• [Magic Prompt](/using-ideogram/generation-settings/magic-prompt): OFF (automatically turned off when using JSON format for Ideogram 4.0)\
• [Aspect ratio](/using-ideogram/generation-settings/aspect-ratio-and-dimensions): 1:2\
• [Model](/using-ideogram/generation-settings/available-models): 4.0

<figure><img src="/files/odUJVNz8Lro1192tkbU2" alt="Vintage jazz poster of a spotlit trumpeter reading Blue Note Sessions, Live jazz every Saturday night, The Velvet Room, Sat August 9" width="375"><figcaption></figcaption></figure>

***

## Using Magic Prompt to generate JSON

Don't want to write JSON by hand? Magic Prompt handles the conversion for you. It uses a language model to expand your plain-text description into a full structured JSON caption automatically, giving you the quality benefits of JSON without writing the structure yourself.

* **On Ideogram.ai**: Magic Prompt is enabled by default. Turn it on before generating, and your plain-text prompt will be expanded into a JSON caption.
* **Via the API**: Magic Prompt can be run server-side for free with an Ideogram API key.

{% hint style="info" %}
For casual exploration, Magic Prompt is the recommended starting point. For production workflows where you need precise, repeatable control over layout, color, and typography, write the JSON directly.
{% endhint %}

***

## JSON vs. Natural language: A side-by-side comparison

The two examples below describe the same subject. Notice how the JSON version provides explicit control over composition and style that the plain-text prompt leaves to interpretation.

**Plain text:**

> *A vintage 1950s collectible natural-history trading card showing a goldcrest bird (Regulus regulus) perched on a pine sprig. The card has a small halftone illustration centered on cream cardstock, with the common name "GOLDCREST" in bold black serif capitals across the top, the Latin name "Regulus regulus" in italic beneath the bird, a small caption noting it is the smallest of the British songbirds at around 9 centimetres, card number "17 OF 50" in the lower right, and the series mark "BRITISH SONGBIRDS" along the bottom in dark green ink. Slight foxing on the paper edges, fine halftone print texture, soft even lighting.*

**JSON:**

```json
            "type":"text",
            "bbox":[
               775,
               150,
               860,
               850
            ],
            "text":"The smallest of the British songbirds, measuring around 9 centimetres.",
            "desc":"Small upright serif body text in dark ink, centered beneath the Latin name."
         },
         {
            "type":"text",
            "bbox":[
               868,
               680,
               930,
               940
            ],
            "text":"17 OF 50",
            "desc":"Small serif card number in dark ink, aligned to the bottom-right corner inside the border."
         },
         {
            "type":"text",
            "bbox":[
               930,
               50,
               990,
               950
            ],
            "text":"BRITISH SONGBIRDS",
            "desc":"Bold spaced green serif capitals in a solid footer band spanning the full width at the bottom of the card."
         }
      ]
   }
}
```

{% tabs %}
{% tab title="Natural language" %}

<figure><img src="/files/X9xqPpLKavJVMyMMpN0J" alt="Vintage trading card of a goldcrest on a pine sprig with the text Goldcrest, Regulus regulus, 17 of 50 and British Songbirds"><figcaption></figcaption></figure>
{% endtab %}

{% tab title="JSON prompt" %}

<figure><img src="/files/WJffd2thqJbQhMAStA1F" alt="JSON-prompted goldcrest card with the same wording, each text element placed in its own fixed region of the layout"><figcaption></figcaption></figure>
{% endtab %}
{% endtabs %}

The plain-text version produced a strong result — but notice what the JSON version guarantees that the plain-text version doesn't: every element landed exactly where it was told to. The title sits in its own zone at the top, the bird has bounded space that no text can bleed into, the Latin name, caption, card number, and footer each occupy a dedicated region. Run the plain-text prompt ten times and the layout will drift. Run the JSON prompt ten times and the structure holds. That's the practical case for JSON — not quality, but **repeatability and compositional control**.


# 5. Handling Negatives

## Why negative phrasing often fails

Ideogram, like many text-to-image AIs, struggles with understanding negation. When you describe something in terms of what it shouldn't include, the AI often misinterprets or ignores the negation. Instead, it focuses on the keywords themselves. For example, prompting *“a man without a beard”* may result in an image of a man with a beard, as the AI emphasizes the word *“beard”* without processing the *“without”* modifier.

This issue arises because these models are trained to associate words with visual elements, but they don't inherently grasp the concept of absence or exclusion.

***

## Turn negatives into positives

When people want to exclude something from the image, they usually write the prompt using negative concept and phrasing of what they don't want — *“no people,” “without clouds,” “not dark.”* That’s completely natural in everyday language, but it doesn’t work well with text-to-image AI like Ideogram.

Instead, try to shift your thinking: describe the ***positive visual opposite*** of the thing you want to exclude.

Ask yourself: *“If this thing wasn’t there, what would I see instead?”*

For example:

* Don't write *"no people in the room"* — write *"an empty room with chairs neatly arranged"*
* Avoid *"without hair"* — replace it with *"a bald figure with smooth skin"*
* Instead of *"a beach without people"* — use *"an empty beach at sunrise"*
* Rather than *"a robot with no eyes"* — try *"a robot with a smooth, featureless face"*
* Don't write *"no cars on the street"* — opt for *"a quiet pedestrian-only street"*

This might feel less intuitive at first, but it gets easier with practice and is far more effective. If you're unsure how to flip your idea into a positive phrase, turn on [Magic Prompt](/using-ideogram/getting-started/prompting-guide/7-creative-tools-in-ideogram/using-magic-prompt) — it will often converts the sentence to a positive phrase — or use a Large Language Models AI (LLM) like ChatGPT to suggest an affirmative rewrite.

***


# 6. Common Pitfalls and Fixes

Even with a good understanding of prompting, it's easy to make small mistakes that lead to strange or disappointing results — especially when you're trying to get a very specific image from the AI. This section highlights some of the most common issues and shows how to fix them.

These tips are especially useful when you have a clear image in mind and want Ideogram to follow your descriptions closely. If you're prompting more for creative discovery, some of these "mistakes" may actually lead to interesting results — so feel free to experiment.

***

## Vague adjectives

**Issue:** Using non-specific descriptors like *“beautiful,” “interesting,” “nice”* or *“cool”* can lead to unpredictable outcomes, as the AI lacks a clear visual reference for these terms.

**Fix:** Replace vague adjectives with specific visual details.

> **Instead of:** *“A beautiful forest”*\
> \&#xNAN;***Try:** “A dense forest with tall pine trees and soft rays of sunlight filtering through the branches”*
>
> **Instead of:** *“A beautiful dress.”*\
> \&#xNAN;***Try:** “A red satin evening gown with intricate lace details.”*

***

## Generic style terms

**Issue:** Using broad style descriptors like "artistic" or "modern" may not provide the AI with enough guidance.

**Fix:** Specify the desired style using well-known art movements, techniques, or mediums.

> **Instead of:** *“a modern painting of a landscape”*\
> \&#xNAN;***Try:** “An impressionist painting of a rolling countryside with thick brushstrokes and pastel tones”*
>
> **Instead of:** *“an artistic photo of a dancer”*\
> \&#xNAN;***Try:** “A soft-focus photo of a ballet dancer mid-leap on a dimly lit stage”*

***

## Contradictory descriptions

**Issue:** Writing conflicting information in a prompt can confuse the AI, leading to inconsistent or nonsensical images.

**Fix:** Ensure all elements of the prompt are coherent and compatible.

> **Instead of:** *“A minimalist sculpture with fine and intricate details”*\
> \&#xNAN;***Try:*** *“A minimalist sculpture with smooth, simple geometric shapes in white marble”*\
> \&#xNAN;***Or:** “A detailed sculpture carved with delicate patterns and ornamental features, displayed on a minimal white pedestal”*
>
> **Instead of:** *“A clean, empty room cluttered with artifacts”*\
> \&#xNAN;***Try:** “A clean, empty room with plain white walls and a single wooden chair”*\
> \&#xNAN;***Or:** “A room filled with ancient artifacts, displayed on simple white pedestals in a clean, open space”*

***

## Abstract concepts tied to a subject

**Issue:** Prompts centered on abstract ideas without concrete visual elements can lead to a wide variety of results.

**Fix:** Anchor abstract concepts with tangible visuals.

> **Instead of:** *“A symbol of hope”*\
> \&#xNAN;***Try:** “A single flower blooming through a crack in the concrete”*
>
> **Instead of:** *“*&#x41; child caught in a moment of wonde&#x72;*”*\
> \&#xNAN;***Try:** “A child staring up at a night sky filled with stars, mouth slightly open in awe”*
>
> **Instead of:** *“An old man lost in regret”*\
> \&#xNAN;***Try:** “An old man sitting alone on a park bench, staring down at a faded photo in his hands”*

***

## The aspect ratio's influence on framing

Even with the exact same prompt, Ideogram may generate very different results depending on the aspect ratio you choose. This is because the AI tries to fill the entire canvas, and different aspect ratios naturally suggest different types of framing.

A prompt like *“A woman walking on a busy city street sidewalk”*:

* In **portrait (1:2)**, the result may show her full body from head to toe.
* In **landscape (2:1)**, the framing may shift closer — showing her from the waist up or knees up to fit the wider format.

**Tips for if you run into this:**

1. **Include visual elements that hint at how much of the subject should be shown**: for full-body results, describe things near the feet (shoes, sidewalk); for close-ups, focus on upper-body features.
2. **Adjust the focus of the prompt**: for wider framing, make the **environment** the main subject; for tighter framing, keep the **person** as the main subject.

Combining descriptive language with the right aspect ratio gives you much better control over the final image.

{% hint style="info" %}
**With JSON prompting (Ideogram 4.0)**, you can use bounding boxes to specify exact subject placement, making aspect ratio and framing far more predictable. See [Section 4.](/using-ideogram/getting-started/prompting-guide/4.-json-prompting-ideogram-4.0)
{% endhint %}

These small changes help steer the AI toward the type of framing that fits your goal — whether it’s a full scene or a focused portrait. Combining descriptive language with the right aspect ratio gives you much better control over what appears in the final image. In the next section, we have some detailed examples where the fixes we discussed are applied.


# Importance of Precision

Ideogram is particularly sensitive to how your prompt is constructed, the words you use, the semantics and the punctuation. In this section, we will cover some specific examples so you can get the most out of your prompts.

***

## Descriptive precision helps refine results

In your prompt, if you write: “*<mark style="color:green;">A painting of a cat.</mark>*” you will probably get something painterly. But being precise might get you better results.

<table data-view="cards"><thead><tr><th></th><th></th><th></th></tr></thead><tbody><tr><td><img src="/files/bvwBVmFUSEMlyQrSJOyS" alt="Traditional painting of a black-and-white cat sleeping on a red armchair beside a lit fireplace in a cozy room" data-size="original"></td><td><p><strong>Prompt:</strong></p><p><em><mark style="color:green;">A painting figuring a cat sleeping next to the fireplace.</mark></em></p></td><td></td></tr><tr><td><img src="/files/eyoJIBOWfdT8Rf3xKiPa" alt="Loose blue-toned abstract painting of a tabby cat sleeping on a wooden floor in front of a glowing fireplace" data-size="original"></td><td><p><strong>Prompt:</strong></p><p><em>An <mark style="color:green;">abstract</mark> painting figuring a cat sleeping next to the fireplace.</em></p></td><td></td></tr><tr><td><img src="/files/54W5s0KLQWp3Sf4aNGxc" alt="Thick impasto painting with heavy brushstrokes of an orange tabby cat curled asleep on the floor beside a fireplace" data-size="original"></td><td><p><strong>Prompt:</strong></p><p><em>An <mark style="color:green;">abstract impasto</mark> painting figuring a cat sleeping next to the fireplace.</em></p></td><td></td></tr><tr><td><img src="/files/o4ZGtoPyMdiMgeADQ485" alt="Soft minimalist watercolor of a calico cat sleeping by a fireplace, with a teal sofa and small side table nearby" data-size="original"></td><td><p><strong>Prompt:</strong></p><p><em>A <mark style="color:green;">soft minimalist watercolor</mark> painting figuring a cat sleeping next to the fireplace.</em></p></td><td></td></tr><tr><td><img src="/files/kRw9URM6SeYqWSWrhG4M" alt="Ornate rococo-style painting of a ginger-and-white cat asleep on a draped stool near a fireplace and a vase of roses" data-size="original"></td><td><p><strong>Prompt:</strong></p><p><em>A <mark style="color:green;">fancy and colorful rococo</mark> painting figuring a cat sleeping next to the fireplace.</em></p></td><td></td></tr><tr><td><img src="/files/KHMT1VqChM0X59WfUldC" alt="Bold pop art illustration of a black-and-white cat curled on a red armchair beside a fireplace and striped wallpaper" data-size="original"></td><td><p><strong>Prompt:</strong></p><p><em>A <mark style="color:green;">pop art</mark> painting figuring a cat sleeping next to the fireplace.</em></p></td><td></td></tr></tbody></table>

As you can see, precision determines the kind of painting you want. The same applies to just about everything you want to put in your prompt. The more precise you are, the more likely you are to generate the image you want.

{% hint style="info" %}
If you're short of words or inspiration, the [Magic Prompt](/using-ideogram/getting-started/prompting-guide/7-creative-tools-in-ideogram/using-magic-prompt) function can come in handy.
{% endhint %}

***

## In that order please!

Ideogram AI, version 1.0 and up, will be very observant of the instructions you put in your prompt. Here are a few examples:

<table data-view="cards"><thead><tr><th></th><th></th><th></th></tr></thead><tbody><tr><td><img src="/files/KWdoLCKRizk9k1rBCgXS" alt="Photo of a tortoise, squirrel, cat and dog lined up in front of a sofa where a woman, girl, boy and man are seated" data-size="original"></td><td><p><strong>Prompt:</strong></p><p><em>Photograph of a tortoise, a squirrel, a cat and a dog are placed in a line in front of a sofa in the living room where a woman, a little girl, a little boy and a man are sitting.</em></p></td><td></td></tr><tr><td><img src="/files/862QLSYBGNamIxxPruZz" alt="Blue-haired woman in red holding an RGB sign, pink-haired woman in cyan holding a CMYK sign, and a grayscale woman holding a Grayscale sign" data-size="original"></td><td><p><strong>Prompt:</strong></p><p><em>A vibrant photography featuring three women side by side. The woman on the left has deep blue hair, a red dress and holds a green sign that says "RGB". The one in the middle has magenta/pink hair, a cyan dress and a black belt and holds a yellow sign that says "CMYK". The last one is in grayscale, has a grey dress and holds a sign that says "Grayscale". They are standing in a living room where there's a sofa behind them a big plant on the left and a floor lamp on the right.</em></p></td><td></td></tr><tr><td><img src="/files/T0PZDDjYaOcbyyV5ngst" alt="Three jars on a kitchen counter labelled Blueberry Jam, Strawberry Jam and Orange Marmalade, each topped with its fruit" data-size="original"></td><td><p><strong>Prompt:</strong></p><p><em>A stunning photograph of three beautifully labelled jam jars displayed on a pristine kitchen counter. The first jar on the left, in the foreground, is a blueberry jam jar, with a blueberry adorning its lid. The second jar, in the middle and slightly recessed, is a jar of strawberry jam, featuring a large, juicy strawberry as its lid decoration. The third jar, on the right and farthest back, is a jar of orange marmalade, with an orange elegantly placed on its lid. The overall atmosphere of the image is warm and inviting, with the jars' colors and labels evoking a sense of nostalgia and comfort.</em></p></td><td></td></tr></tbody></table>

These examples show how Ideogram can adhere to what you describe in your prompt, often with great precision. Of course, there are times when Ideogram can't seem to generate exactly what you describe in your message. The following section will provide you with some great troubleshooting tips.

***

## AI ***will*****&#x20;give you what you ask for**

In this example, we want a photographic portrait of a young boy from the waist up. We also want to describe as many elements and other aspects as possible, but we'll see what happens when we describe less and less.

<table data-view="cards"><thead><tr><th></th><th></th><th></th></tr></thead><tbody><tr><td><img src="/files/m1hbJONdjIISSDxwIbHf" alt="Full-length photo of a blond boy in headphones, red hoodie, jeans and red sneakers crouching outside a music store" data-size="original"></td><td><p><strong>Prompt:</strong></p><p><em>Portrait photo of a young boy blond boy, with blue eyes, wearing headphones, a deep red hoodie and jeans, and red sneakers, in front of a music store.</em></p></td><td></td></tr><tr><td><img src="/files/4kFpIGdK6aqhzM2UxhYj" alt="Waist-up photo of the blond boy in headphones and red hoodie standing outside the store, sneakers no longer visible" data-size="original"></td><td><p><strong>Prompt:</strong></p><p><em>Portrait photo of a young boy blond boy, with blue eyes, wearing headphones, a deep red hoodie and jeans, </em><del><em><mark style="color:purple;">and red sneakers</mark></em></del><em>, in front of a music store.</em></p></td><td></td></tr><tr><td><img src="/files/HUUXUakrkO9DW4hR9Hm3" alt="Close-up head-and-shoulders portrait of the blond boy in headphones and red hoodie in front of a music store window" data-size="original"></td><td><p><strong>Prompt:</strong></p><p><em>Portrait photo of a young boy blond boy, with blue eyes, wearing headphones, a deep red hoodie </em><del><em><mark style="color:purple;">and jeans, and red sneakers</mark></em></del><em>, in front of a music store.</em></p></td><td></td></tr></tbody></table>

Can you see the difference? If you describe something, the AI will **always** try to show it to you, even if you've specifically asked for a certain style or framing that would usually prevent you from seeing it. By simply removing some unnecessary descriptions, we were able to get exactly what we wanted.

## Gradation and relative sizes

Huge, big, normal, small, minuscule…. Using the right qualifier to describe the importance of an element in an image is a simple way of defining an order of proportion. Let's look at an example:

**Prompt:**\
\&#xNAN;*A striking and vivid magazine cover, featuring an anthropomorphic cat exuding wealth and success sitting on an armchair, a paws on each arm. The cat is dressed in a tailored suit and dark sunglasses, striking a confident pose in an opulent living room. The huge magazine modern title in sans-serif font of "Cat Life" dominates the cover, a smaller mention "magazine" just under it on the right side, while the big headline "How I Make Them Clean the Litter Box Every Day" piques the reader's curiosity. The second smaller headline read: "The full story". The dynamic lighting enhances Mr. Whiskers' regal presence, making this a truly unique and memorable cover.*

<figure><img src="/files/fz4ILV44sTU8SFC3aaw1" alt="Cat in a suit and sunglasses on a magazine cover titled Cat Life, with the headline How I Make Them Clean the Litter Box Every Day" width="375"><figcaption></figcaption></figure>

The simple way of describing the relative sizes for each text element was sufficient to produce an expected result.

{% hint style="info" %}
Due to the complexity of the text and visual composition, this image needed more than one attempt to get it done like this.
{% endhint %}


# 7. Prompt Iteration and Refinement

Even with a well-structured prompt, the first image you generate might not be exactly what you envisioned. That's perfectly normal. Refining your prompt through small, thoughtful changes can help you get closer to your desired result.

This section covers practical strategies for adjusting and improving your prompts to achieve better outcomes.

***

## Why iterate?

Each prompt you write is a starting point. If the result isn't quite right—maybe the composition feels off, or the subject isn't clear—making small adjustments can lead to significant improvements. Iteration helps you fine-tune your prompt to guide the AI more effectively.

***

## The "One-Change Rule"

When refining your prompt, it's helpful to change only one thing at a time. This approach allows you to see how each specific change affects the outcome, making it easier to understand what works and what doesn't. You can observe how this single change impacts the image each time.

> **Original:**\
> \&#xNAN;*“A black cat sitting on a windowsill during a storm”*
>
> \
> **Possible changes:**\
> 1\. *“A black cat sitting on a windowsill during a **light drizzle**”*\
> 2\. *“A black **dog** sitting on a windowsill during a light drizzle”*\
> \&#xNAN;*3. “A black dog sitting on a **porch** during a light drizzle”*

***

## Prompt chaining

Start with a simple prompt and gradually add more details in subsequent iterations. This method helps you build complexity step by step, ensuring each addition enhances the image without overwhelming it.

> **Step 1:** *“A medieval castle”*\
> **Step 2:** *“A medieval castle on a hilltop”*\*\
> **Step 3:** *“A medieval castle on a hilltop at sunset”*\
> \&#xNAN;***Step 4:** “A medieval castle on a hilltop at sunset with a dragon flying overhead”*

Each step adds a new element, allowing you to monitor how the image evolves.

***

## Try alternate wording

Sometimes a specific word or phrase just doesn't produce the result you're looking for. When that happens, try swapping it with a synonym, rephrasing the idea in a different way, or using a slightly different expression.

> **Instead of** “*lush jungle*”, **try** “*dense rainforest*” **or** “*tropical forest*”\
> **Instead of** “*futuristic city*”, **try** “*sci-fi metropolis*” **or** “*neon cyberpunk skyline*”\
> **Instead of** “*sad expression*”, **try** “*a face with downturned eyes and a slight frown*”

If something isn’t working right, it doesn’t mean your idea is wrong! A quick thesaurus search—or even asking a language model—can help you find wording that triggers the look you really want.

***

## Emphasize important parts of the image

Sometimes the AI might generate your image correctly in general, but miss something that feels too small, unbalanced, or visually incorrect. In these cases, two small techniques can make a big difference: **repetition** and **description for emphasis**.

### **Repeat key elements**

You can repeat the same element in different parts of the prompt to reinforce its importance. This doesn’t mean saying the exact same thing twice, but rather **referencing the same subject in multiple ways**.

> *A product photo of a men’s perfume bottle named “Nightlife for men” in a sleek studio setup. The bottle is tall and rectangular with dark glass… The bottle stands upright… The bottle is centered in the frame…*

By mentioning the bottle multiple times — in the summary, the details, and the framing — the AI is more likely to understand it’s the focal point and treat it with more visual weight.

### **Add extra description to reinforce details**

If the AI keeps omitting or downplaying something important, try **describing it more fully**:

* Add more visual detail about size, color, texture, or placement
* Mention it in different parts of the prompt (e.g., summary and composition)
* Reinforce its relationship to the rest of the image

For example, if the shoes of a person are missing or awkward, adding *“wearing black leather boots that cast a shadow on the sidewalk”* gives the AI both a visual anchor and spatial context.

**These two techniques are especially helpful when:**

* The AI misplaces or forgets a key detail
* You’re generating a busy or layered scene
* You want to draw focus to a specific object or subject

Use them as subtle tools to guide the AI’s attention without needing to rewrite the entire prompt! :sunglasses:


# 8. Creative Tools in Ideogram

Ideogram comes with several built‑in helpers that can *shift* or *amplify* whatever your prompt says. Think of them as “prompt modifiers.” They don’t replace good wording, but they can change the direction, polish, or diversity of the result.

Below is what each tool *does* to your prompt or image—and when to reach for it. (Full button locations and step‑by‑step instructions live in the official docs.)

***

## Describe – “Image to Prompt”

* **What it does**: Reads an existing image (uploaded or generated) and writes a fresh prompt that would recreate something similar.
* **Why use it**:
  * Kick‑start a new idea when you don’t know how to word it.
  * Borrow phrasing tricks from images whose style you like.
  * Reverse-engineer the JSON structure of an image you want to build on.
* **Best practice**: Treat the generated text as a *draft*. Edit details, reorder parts, or shorten it before re‑using.

***

## Magic Prompt

* **What it does**: Expands or beautifies your text with an LLM. Short prompts grow; long prompts change only slightly. With Ideogram 4.0, Magic Prompt expands your plain text into a **full JSON caption**, giving you the precision benefits of structured prompting from a casual description.
* **Why use it**:
  * Add richer adjectives, lighting cues, or stylistic hints automatically.
  * Get JSON-quality output without writing JSON yourself.
  * Translate your ideas from any language into well-formed English.
* **Best practice**:
  * Short, exploratory prompt? Let Magic Prompt run wild.
  * Highly detailed prompt? Expect targeted tweaks — review to be sure it hasn't added unwanted elements.
* **Examples**:

  > **Short prompt:** *Photo of a cat sitting, gazing outside at the falling snow.*
  >
  > **Magic Prompt result:** *A cozy, warm photograph of a fluffy Persian cat sitting on a window sill, gazing intently at the falling snow. The cat has long, luxurious white fur, bright emerald-green eyes, and a slightly flattened face, creating a charming and endearing expression. Outside the window, large snowflakes gently drift down, partially obscuring a blurred landscape of snow-covered trees and rooftops. Soft, diffused light illuminates the cat's fur from within, casting a gentle glow on its face and creating a peaceful, tranquil atmosphere.*

***

## Random Style & Reference Style

* **Reference Style**: Lets you supply an image (uploaded or existing Ideogram output) whose *look* guides the next image.
* **Random Style**: Injects an unpredictable random image as a reference style before generation — ideal for visual experimentation.

**Why use them:**

* **Random Style** pushes a familiar prompt into new artistic territory — great for concept discovery.
* **Reference Style** anchors colors, textures, or composition to a source image — useful when you want variation without losing a core aesthetic.

{% hint style="info" %}
**Pro tip**: Combine a **short prompt** + **Magic Prompt** + **Random Style** for a variety of wild, unexpected images and creative possibilities.
{% endhint %}

***

## Remix

* **What it does**: Uses an existing image (uploaded or generated) as a parent image for the AI to regenerate while re-using the prompt and other settings.
* **Why use it**:
  * Fix small flaws without re-writing the entire prompt.
  * Try minor lighting, color, or pose changes while keeping the overall composition.

**Best practice**:

1. Identify what you like in the current image.
2. Change one phrase in the prompt (see Section 7).
3. Hit Remix to preview the tweak.

***

## Combining Tools for Different Goals

| Goal                           | Suggested Combo                                            |
| ------------------------------ | ---------------------------------------------------------- |
| Rapid visual exploration       | Short prompt → Magic Prompt → Random Style                 |
| Style transfer                 | Clear prompt → Reference Style (upload reference)          |
| Polish an almost-perfect image | Existing image → Remix (tweak one word)                    |
| Learn how to phrase            | Inspiring image → Describe → edit → generate               |
| Design work with exact layout  | JSON prompt → generate directly                            |
| Design work from casual idea   | Plain text → Magic Prompt (auto-generates JSON) → generate |

***


# Using Magic Prompt

The [Magic Prompt](/using-ideogram/generation-settings/magic-prompt) feature in Ideogram can be very helpful to provide additional content, details, ambiance and stylistic information in a prompt. The more basic is the prompt, the more Magic Prompt will add to it.

{% hint style="info" %}
To find out more about the Magic Prompt function and familiarize yourself with it, you can also visit the section linked below.

[Magic Prompt](/using-ideogram/generation-settings/magic-prompt)
{% endhint %}

## From basic to magic

Let's use a simple prompt and used it to explore what the Magic Prompt would come up with.

**Original prompt:**\
\&#xNAN;*A boy with a dog in a park.*

<figure><img src="/files/SthYvKw1PLZVDGmK5JFH" alt="Photo of a smiling boy in a denim jacket kneeling beside a shaggy tan dog on green grass in a park"><figcaption></figcaption></figure>

When used, the Magic Prompt function generates a new, improved and embellished prompt based on your original prompt, then sends it to the AI to generate an image based on this new prompt. Here are two examples:

<table data-card-size="large" data-view="cards"><thead><tr><th></th><th></th></tr></thead><tbody><tr><td><img src="/files/muBg81nsiutuLCvok41V" alt="3D-animated boy in a blue polo tossing a yellow ball to an excited brown-and-white dog in a flower-filled park" data-size="original"></td><td><strong>Magic Prompt:</strong><br><em>A heartwarming scene of a young boy playing with his happy, wagging dog in a lush, green park. The boy has a playful smile on his face while he tosses a bright yellow ball for his furry friend to fetch. The park is filled with beautiful flowers and trees, creating a serene atmosphere for this bonding moment between boy and dog.</em></td></tr><tr><td><img src="/files/Uk2NK2R0UueXz6v3oU0t" alt="Storybook illustration of a smiling boy in a red shirt petting a happy puppy on sunny parkland dotted with flowers" data-size="original"></td><td><strong>Magic Prompt:</strong><br><em>A charming image of a young boy playing with a cute, wagging-tail dog in a lush green park. The boy's joyful smile and the dog's playful eyes convey a sense of happiness and connection. The park is full of colorful flowers and trees, with a sunny sky overhead. The overall atmosphere of the image is serene and uplifting.</em></td></tr></tbody></table>

{% hint style="info" %}
Even if there is no mention of any style in the original prompt or in the Magic Prompts, the AI decided to generate the images in styles that seemed appropriate for the text.
{% endhint %}

## Styles with Magic Prompt

The Magic Prompt also allows you to illustrate and explain in greater detail a basic style that you can request in your prompt. Here an example:

**Original prompt:**\
A *boy with a dog in a park, <mark style="color:green;">abstract art</mark>.*

<figure><img src="/files/ASrzhmpi5c1ZhtAx339o" alt="Painterly image of a boy in a white hoodie holding a leash beside a small white dog on a lawn framed by park trees"><figcaption></figcaption></figure>

<table data-view="cards"><thead><tr><th></th><th></th><th></th></tr></thead><tbody><tr><td><img src="/files/zaOVFIWzwdU0kEZEKaDh" alt="Abstract painting in swirling magenta, teal and yellow strokes of a boy reaching toward a small dog in a park" data-size="original"></td><td><strong>Magic Prompt:</strong><br><em>A captivating abstract art piece featuring a boy playing with a dog in a park. The park is filled with vibrant colors, and the boy and the dog are depicted in bold, swirling lines. The background is a blend of various shapes and textures, conveying a sense of movement and energy.</em></td><td></td></tr><tr><td><img src="/files/4VGNIuc3jkhfTk58Mcpp" alt="Whimsical sketchy painting of a boy holding a colorful ball while a scruffy dog bounds beside a pink park path" data-size="original"></td><td><strong>Magic Prompt:</strong><br><em>An abstract painting of a boy and a dog playing in a park. The boy is holding a ball, and the dog is running with a playful expression. The park is full of vibrant colors, with trees, flowers, and a winding path. The overall atmosphere of the painting is lively and joyful.</em></td><td></td></tr><tr><td><img src="/files/xQt8fYQCygiAwb4qMrdm" alt="Vibrant impressionistic painting of a boy in blue running beside a leaping brown-and-white dog through a colorful park" data-size="original"></td><td><strong>Magic Prompt:</strong><br><em>A vibrant abstract painting of a boy playing with a dog in a lush park. The background is a swirl of vivid colors, representing the park's foliage and sky. The boy and the dog are in a dynamic pose, with the dog's ears flapping and the boy's arm extended. The overall art piece exudes a joyful and playful atmosphere.</em></td><td></td></tr></tbody></table>

As you can see, the Magic Prompt has expanded on the original prompt while expanding and refining certain aspects of the requested style. Each proposal gave a relatively different image, while remaining within the parameters of the original prompt.

## Magic Prompt for inspiration

We all suffer from a lack of inspiration, the so-called blank page syndrome. To help you get started and stimulate your creativity, there's nothing like using the Magic Prompt. Let's look at a few examples.

**Original prompt:**\
\&#xNAN;*Create a logo for a coffee shop named "Mocha Comfort"*

<table data-view="cards"><thead><tr><th></th><th></th><th></th></tr></thead><tbody><tr><td><img src="/files/xRxL91qNsZSSkcQvmV6n" alt="Warm brown logo of a steaming mocha mug beside an armchair and fireplace, with script text Mocha Comfort Coffee Shop" data-size="original"></td><td><p><strong>Magic Prompt:</strong></p><p><em>A warm and inviting coffee shop logo for "Mocha Comfort" featuring a steaming mug of coffee with a swirl of rich mocha. The coffee is surrounded by a comfortable, cozy chair, and a warm, glowing fireplace. The overall design exudes a sense of relaxation and contentment, with a touch of elegance and sophistication.</em></p></td><td></td></tr><tr><td><img src="/files/wBOwQZhiSztJbFC05OEF" alt="Monochrome logo pairing a steaming coffee cup with a tufted armchair over bold script reading Mocha Comfort Coffee Shop" data-size="original"></td><td><p><strong>Magic Prompt:</strong></p><p><em>A modern and stylish logo for "Mocha Comfort" features a steaming coffee cup with a swirl of creamy mocha on top. The cup is paired with a cozy-looking armchair, evoking a sense of relaxation and comfort. The text of the name, "Mocha Comfort," is written in an elegant, cursive font, with the "C" in "Comfort" shaped like a comfy cushion. The overall design is warm and inviting, perfect for a coffee shop that offers a cozy and relaxing atmosphere.</em></p></td><td></td></tr><tr><td><img src="/files/RB332GEXq6bIo8aJOn4u" alt="Minimalist logo of a mug with whipped cream, a cherry and a heart emblem above the words Mocha Comfort Coffee Shop" data-size="original"></td><td><p><strong>Magic Prompt:</strong></p><p><em>A cozy and inviting logo for "Mocha Comfort" coffee shop, featuring a steaming hot mocha with a whipped cream topping and a cherry on top. The coffee cup is adorned with a comfortable, plush heart, symbolizing love and warmth. The overall design is in a modern, minimalistic style, with a subtle, earthy color palette.</em></p></td><td></td></tr></tbody></table>


# 9. Troubleshooting

Even with a well-structured prompt, the AI may not always interpret your intent exactly as expected. This section highlights common issues that can occur while prompting, along with practical fixes and links to relevant sections of the guide where you can learn more.

<details>

<summary>The AI adds something I specifically said I didn’t want.</summary>

**Possible Causes:**

* Prompt uses negative phrasing (e.g., “*no hair*,” “*no people*”).
* AI fails to process negation and focuses on the mentioned object instead.
* The unwanted object or concept is inadvertently suggested elsewhere in the prompt.
* Use of Magic Prompt.

**Fixes:**

* Rewrite using **affirmative descriptions** (e.g., “*bald*” or “*empty city*”).
* Use **visual substitution** to describe what *is* present instead of what isn’t.
* Double check you prompt for possible contradiction, even subtle.
* Turn Magic Prompt off.

→ **See:** [Handling Negatives](/using-ideogram/getting-started/prompting-guide/4-handling-negatives), [Magic Prompt](/using-ideogram/getting-started/prompting-guide/7-creative-tools-in-ideogram#magic-prompt)

</details>

<details>

<summary>Text appears broken, misspelled, or missing.</summary>

**Possible Causes:**

* Text isn’t properly indicated in prompt.
* Text placed too late in the prompt.
* Too much or too complex text.
* Text in foreign language or non-Latin characters.
* Conflicts with visual complexity.

**Fixes:**

* Put the text in **quotes** (e.g., *a sign that says “Open 24 Hours”*).
* Place the text early in the prompt.
* Limit the amount of generated text.
* Break long text into chunks with placement cues.
* Use **Magic Fill** to correct errors after generation.
* For long copy, add it later in a third party editor.

→ **See:** [Generating Text in Images](/using-ideogram/getting-started/prompting-guide/2-prompting-fundamentals#generating-text-in-images)

</details>

<details>

<summary>Facial features, hands, or limbs look distorted (especially from a distance).</summary>

**Possible Causes:**

* Subject appears too small or far away in the frame for the AI to render detail properly.
* Low emphasis on face or limbs in the prompt.

**Fixes:**

* Move the subject closer by adjusting framing (“*close-up*,” “*portrait*”).
* Emphasize details explicitly (e.g., hands, eyes, facial features).
* Fix imperfections afterward using **Magic Fill**, recommended if you like the image.

*\*This isn't really a problem of wording or style, but rather the fact that most AIs struggle to handle fine detail at a distance, partly because of the lack of available pixels the AI has to work with.* [*Magic Fill*](/canvas-and-editing/canvas/magic-fill) *can help fixing this as it can work with greater pixel density over small areas.*

</details>

<details>

<summary>The subject is cropped when it should be shown fully (or vice versa).</summary>

**Possible Causes:**

* Aspect ratio doesn't match intended framing.
* The aspect ratio isn't commonly used for that type of image.
* Insufficient framing cues in prompt.

**Fixes:**

* Explicitly include framing cues like “full body,” “head and shoulders,” or “wide view.”
* Describe elements near the cropped area (feet, shoes, ground) to encourage full framing.
* Adjust the **aspect ratio** to better fit your subject and match intended composition.

→ **See:** [Aspect Ratio Influence on Framing](/using-ideogram/getting-started/prompting-guide/5-common-pitfalls-and-fixes#aspect-ratio-influence-on-framing)

</details>

<details>

<summary>Important words or concepts are not visually present in the image.</summary>

**Possible Causes:**

* Important ideas are too abstract, ambiguous, or visually unclear.
* Terms used are not visually grounded enough.

**Fixes:**

* Use alternate, more visually concrete wording or synonyms.
* Add more explicit visual cues or repetition of terms.

→ **See:** [Try Alternate Wording](/using-ideogram/getting-started/prompting-guide/6-prompt-iteration-and-refinement#try-alternate-wording), [Emphasize Important Parts of the Image](/using-ideogram/getting-started/prompting-guide/6-prompt-iteration-and-refinement#emphasize-important-parts-of-the-image)

</details>

<details>

<summary>Unwanted object, person or text appears in the image.</summary>

**Possible Causes:**

* Vague or overloaded prompt.
* Ambiguous language indirectly suggesting extra items.
* Uses of Magic Prompt.

**Fixes:**

* Simplify or clarify your prompt to remove ambiguity.
* Emphasize the desired subject and exclude unnecessary ideas.
* Use visual substitution (e.g., “empty field” instead of “no one around”).
* Turn off Magic Prompt.

→ **See:** [Prompt Length and Clarity](/using-ideogram/getting-started/prompting-guide/2-prompting-fundamentals#prompt-length-and-clarity), [Handling Negatives](/using-ideogram/getting-started/prompting-guide/4-handling-negatives), [Magic Prompt](/using-ideogram/getting-started/prompting-guide/7-creative-tools-in-ideogram#magic-prompt)

</details>

<details>

<summary>Non-English or non-Latin text is incorrect or unreadable.</summary>

**Possible Causes:**

* AI has limitations rendering non-Latin alphabets (Cyrillic, Arabic, Chinese).

**Fixes:**

* Use English for best text rendering.
* Add add non-Latin text manually afterward (if necessary).
* Keep non-Latin text very short (logo-length).

→ **See:** [Prompting Uses Natural Language](/using-ideogram/getting-started/prompting-guide/2-prompting-fundamentals#prompting-uses-natural-language), [Generating Text in Images](/using-ideogram/getting-started/prompting-guide/2-prompting-fundamentals#generating-text-in-images)

</details>

<details>

<summary>A phrase isn’t giving the result I expected.</summary>

**Possible Causes:**

* Wording is too vague or abstract.
* Phrase not visually grounded.
* Uses of Magic Prompt.

**Fixes:**

* Use more **visually grounded** synonyms or phrasing.
* Try alternate wording or rephrasing of the concept.
* Turn Magic Prompt off.

→ **See:** [Try Alternate Wording](/using-ideogram/getting-started/prompting-guide/6-prompt-iteration-and-refinement#try-alternate-wording), [Visually Grounded vs Abstract Prompts](https://docs.ideogram.ai/using-ideogram/getting-started/prompting-guide/pages/6s4hgAcyIgdBANvAWiDm#visually-grounded-vs.-abstract-prompts), [Magic Prompt](/using-ideogram/getting-started/prompting-guide/7-creative-tools-in-ideogram#magic-prompt)

</details>

<details>

<summary>The AI ignores important parts of my prompt.</summary>

**Possible Causes:**

* Important details placed too late in the prompt.
* Lack of emphasis for key features.
* Prompt length exceeds \~150 words.

**Fixes:**

* Place important elements early in the prompt.
* Repeat or describe the key elements with more detail.
* Use **descriptive emphasis** to draw attention.

→ **See:** 6.5 [Emphasize Important Parts of the Image](/using-ideogram/getting-started/prompting-guide/6-prompt-iteration-and-refinement#emphasize-important-parts-of-the-image).

</details>

<details>

<summary>Changing one word doesn’t seem to help.</summary>

**Possible Causes:**

* The new word is not visually strong or grounded.
* Other words in the prompt might conflict with it.

**Fixes:**

* Change **multiple related terms** for better alignment.
* Try synonyms that are more visual.
* Use a **thesaurus or LLM** to brainstorm variations.

→ **See:** [Try Alternate Wording](/using-ideogram/getting-started/prompting-guide/6-prompt-iteration-and-refinement#try-alternate-wording)

</details>

<details>

<summary>The style or visual mood isn’t right.</summary>

**Possible Causes:**

* Style or mood not specified or vague (*“artistic,” “modern”*).
* Contradictions between subject and style.

**Fixes:**

* Mention specific style and moods: *“watercolor,” “digital painting,” “dreamy,*” etc.
* Use a visually grounded detailed description for the style and mood you want.
* Try **Magic Prompt** to explore or **Style Reference** to better control styles and moods.

→ **See:** [Visually Grounded vs. Abstract Prompts](https://docs.ideogram.ai/using-ideogram/getting-started/prompting-guide/pages/6s4hgAcyIgdBANvAWiDm#visually-grounded-vs.-abstract-prompts), [Creative Tools in Ideogram](/using-ideogram/getting-started/prompting-guide/7-creative-tools-in-ideogram)

</details>

<details>

<summary>The image doesn’t match the emotion or concept I had in mind.</summary>

**Possible Causes:**

* Emotion or concept described too abstractly for AI recognition.
* Missing concrete visual cues.

**Fixes:**

* Translate emotional or conceptual language into visual or facial/body language cues.
* Blend abstract phrasing with visually grounded language.

→ **See:** [Visually Grounded vs. Abstract Prompts](https://docs.ideogram.ai/using-ideogram/getting-started/prompting-guide/pages/6s4hgAcyIgdBANvAWiDm#visually-grounded-vs.-abstract-prompts), [Abstract Concepts Tied to a Subject](/using-ideogram/getting-started/prompting-guide/5-common-pitfalls-and-fixes#abstract-concepts-tied-to-a-subject)

</details>

This section doesn’t cover every possible scenario, but these are the most frequent issues users run into and most image issues can be fixed with one of these strategies. With time and a little experimentation, you’ll find the right combination of clarity and creativity to make each prompt work better. If something still isn’t working, try breaking your idea into smaller parts and building it up again, one step at a time.

***


# 9- Prompting References


# Prompt Templates

{ } = Choose what goes here\
\[ ] = Optional

For logos:

A {minimalist / modern / vintage / sleek / elegant / professional / playful / whimsical / dynamic} logo design for the brand "{Brand Name}", featuring a {stylized / abstract / illustrated / geometric / hand-drawn / delicate} {subjects}. {describe the subjects in more details.} The text "{Brand Name}" is written in a {clean / bold / elegant / playful} {serif / sans-serif / cursive / handwritten / geometric / pixelated} font, \[with {optional color} outline,] \[rendered in {lowercase / uppercase / small caps}, and] positioned {below / beside / integrated with} the logo\[, with {optional tagline} in smaller text]. The background is {solid color / soft gradient / white / textured}, giving the logo a {clean / warm / bold / elegant / modern / handcrafted} look. {Describe the vibe.}


# Describing Skin Tones

When prompting for people, the way you describe skin tone can have a big impact on how your image turns out. The list below offers a range of terms that go beyond basic color names, helping you get closer to the exact tone you’re aiming for.

#### Ethnicities, regions and skin tone terms

* **African / Afro-Caribbean / Afro-Latin / Aboriginal**\
  Chestnut, walnut, cacao, chocolate, roasted coffee, espresso, brown sugar, obsidian, coal, velvet mahogany, dark molasses, sable, burnt umber, nightwood, onyx
* **Central / Western / Southern European**\
  Sand, beige, oat, cream, butter, wheat, linen, light gold, limestone, champagne
* **East Asian / Southeast Asian**\
  Rice beige, bamboo, light peach, soy, pale gold, warm tan, ginger, milk tea, sesame
* **Latino / Latin American / Mixed Ethnicity**\
  Dulce de leche, mocha, sugar cane, café au lait, burnt sugar, golden cinnamon, pan dulce
* **Mediterranean / Levantine / North African / West Asian**\
  Olive, honey, golden, caramel, sunlit bronze, amber, toffee, toasted almond, turmeric
* **Middle Eastern / Persian / Central Asian**\
  Date, pistachio brown, rose gold, saffron beige, honey-bronze, cardamom, khaki gold
* **Native American / Indigenous American / Andean**\
  Russet, clay, terra cotta, saddle brown, adobe, copper, cedarwood, cinnamon earth
* **Northern European / Nordic / Celtic**\
  Alabaster, porcelain, pearl, ivory, milk, snow, eggshell, frosted glass
* **Oceanic / Polynesian / Melanesian**\
  Island bronze, coconut husk, dark honey, sun-baked clay, palm bark, molasses, smoked amber
* **South Asian / Indian Subcontinent**\
  Almond, cashew, warm bronze, cinnamon, nutmeg, chai, clove, maple syrup, wheat brown

#### **Modifiers & tone enhancers**

To help Ideogram better understand depth, richness, and undertones, here are some modifiers that can be used:

* Dark / Deep / Rich
* Medium / Toasted / Radiant / Golden
* Fair / Pale / Light / Soft
* Cool / Neutral / Warm
* Sun-kissed / Earthy / Luminous / Smooth / Matte / Glowing

#### Examples

You can pair regional or ethnic references with expressive skin tone descriptors to get the best results:

> * *A Middle Eastern woman with a warm olive glow*
> * *A Northern European fireman with fair ivory tone*
> * *Several Central African children with deep ebony skin*
> * *An Afro-Caribbean teenager with a warm cocoa complexion*
> * *Two old Mediterranean sailors with golden-tan olive skin*
> * *A Latin American girl with soft caramel skin*
> * *A Southeast Asian movie star with honey-golden skin*
> * *A Pacific Islander with bronze-tinted skin*


# Describing Body Type

When prompting for people, body shape can be just as important as age, clothing, or lighting. This appendix provides clearly categorized and visually descriptive language to help you communicate body types more effectively. Each group includes both base terms (like “slim” or “athletic”) and optional visual cues to shape the tone and form of the generated subject.

**Slim / Thin / Petite**\
Slim woman / man, thin figure, petite body, slender waist and limbs, model-like proportions, delicate frame, subtle curves, lean and narrow body, low body fat, elongated limbs, minimal muscle tone, flat stomach, narrow shoulders

**Average / Balanced / Natural**\
Average build, proportional figure, natural-looking body, everyday person body type, medium frame, moderate weight, healthy body proportions, softly toned but not muscular

**Athletic / Toned / Fit**\
Athletic female / male, toned arms and legs, strong core, defined abs, fit body with muscle definition, lean and powerful physique, swimmer’s build, active and agile frame, sporty look with low body fat

**Muscular / Bodybuilder**\
Muscular man / woman, bodybuilder physique, bulging biceps, defined chest, ripped six-pack abs, thick thighs, broad shoulders, hyper-defined muscles, gym-hardened body, extreme muscularity, heavy vascularity

**Chubby / Curvy / Plus-Size**\
Curvy woman / man, plus-size model body, full hips, thick thighs, soft belly, round arms, voluptuous figure, wide hips and small waist, thick and padded body, comfortably plump, generous curves

**Obese / Massive / Extremely Overweight**\
Obese woman / man, extremely overweight body, very large frame, pronounced belly, thick neck, round face, heavy limbs, wide body, massive curves, exaggerated proportions, fat rolls, full figure

**Lanky / Wiry / Gangled**\
Lanky young man / woman, tall and thin, wiry frame, long limbs, awkward posture, slight build, spindly arms and legs, slouchy, stretched look

**Stocky / Thickset / Compact**\
Stocky man / woman, short and broad build, thick torso, short legs, dense muscular frame, low center of gravity, solid, wide chest

**Curvy / Hourglass / Voluptuous&#x20;*****(feminine idealized shapes)***\
Hourglass figure, voluptuous body, full bust and hips, tiny waist, rounded thighs and soft belly, shapely and seductive silhouette, pin-up style curves, glamorous body proportions

**Androgynous / Gender-Neutral**\
Androgynous figure, gender-neutral body, flat chest, minimal curves, straight waist, soft features, unisex appearance, balanced proportions.


# Memory Colors for Naming Color Nuances

When describing colors in a prompt, using specific, visually grounded references is much more effective than generic terms like “red” or “green.” Since Ideogram doesn’t understand numerical color codes (like RGB or hex) unless you **use** [**JSON prompting**](/using-ideogram/getting-started/prompting-guide/4.-json-prompting-ideogram-4.0) **on Ideogram 4.0**, using familiar, real-world references — often called *memory colors* — helps convey a more accurate color nuance. These references evoke a mental image based on shared visual experience, such as “cherry red” or “sky blue.”

The list below groups memory-based color terms by base color. Each one can help you fine-tune your prompt and get closer to the exact hue you’re aiming for.

**🔴 Red**\
Apple, cherry, cranberry, blood, scarlet, ruby, wine, burgundy, brick, rose, garnet, fire engine, tomato, coral, blush, pomegranate, strawberry, chili, paprika, beet, firelight, jam, sangria, red velvet, ember

**🟠 Orange**\
Pumpkin, tangerine, apricot, rust, amber, carrot, marmalade, clay, copper, burnt orange, squash, paprika, cantaloupe, butternut, saffron, cheddar, flame, tiger, persimmon, ginger, ochre

**🟡 Yellow**\
Lemon, canary, gold, butter, mustard, sunflower, honey, daffodil, marigold, corn, banana, champagne, straw, yolk, dandelion, custard, pineapple, flax, amber glow, maize, goldenrod

**🟢 Green**\
Emerald, olive, sage, forest, moss, mint, jade, chartreuse, pistachio, lime, seafoam, fern, avocado, shamrock, basil, eucalyptus, pear, pickle, ivy, clover, pine, cactus, wasabi, celery

**🔵 Blue**\
Sky, baby blue, robin’s egg, navy, royal, sapphire, denim, indigo, ice blue, slate, teal, powder blue, steel blue, periwinkle, cobalt, storm, glacier, cornflower, ink, horizon, arctic, bluebell, lake, dusk

**🟣 Purple**\
Lavender, plum, violet, eggplant, orchid, grape, amethyst, wine, mauve, lilac, iris, mulberry, blackberry, heather, wisteria, fig, thistle, aubergine, twilight, royal purple, raisin, elderberry

**⚪ White / Off-White**\
Pearl, cream, ivory, alabaster, porcelain, eggshell, chalk, snow, linen, milk, moonlight, lace, frosting, meringue, cloud, rice paper, marble, parchment, vanilla, whipped cream, winter white

**⚫ Black / Gray**\
Charcoal, graphite, slate, ash, onyx, coal, soot, obsidian, lead, pewter, smoke, shadow, ink, iron, flint, steel, raven, gunmetal, stormcloud, tar, night, cinder

**🟤 Brown / Tan**\
Chocolate, coffee, cinnamon, chestnut, caramel, toffee, walnut, sand, taupe, ochre, clay, hazelnut, sepia, sienna, almond, pecan, mocha, maple, cocoa, bronze, dirt, suede, umber

**🩷 Pink**\
Rose, blush, salmon, bubblegum, flamingo, cotton candy, coral, peach, watermelon, raspberry, fuchsia, magenta, strawberry milk, hibiscus, tulip, rose quartz, guava, flamingo, cherry blossom, lipstick, flamingo feather

**🩵 Cyan / Aqua**\
Aqua, turquoise, glacier, lagoon, ocean, seafoam, pool, iceberg, teal, cyan, electric blue, mint, carribean, celeste, marine, arctic water, jellyfish glow, frostbite, cerulean, surf, wave

**🌈 Multicolored / Iridescent**\
Oil slick, holographic, rainbow, opal, abalone, prism, pearlized, shimmer, aurora, peacock feather, soap bubble, CD surface, crystal sheen, beetle shell, starlight, dragonfly wing

#### Descriptive modifiers for color

To further refine the color you're describing, you can combine memory-based color terms with descriptive modifiers. These help define the **intensity**, **temperature**, **finish**, or **lighting** of the color — allowing for more control and expressiveness in your prompts.

Here are common categories and examples of useful modifiers:

* **Intensity or Brightness**\
  Pale, light, soft, faint, pastel, bright, deep, vivid, bold, dark, muted, rich, intense
* **Warmth and Temperature**\
  Warm, cool, neutral, icy, frosted, fiery, dusky, earthy
* **Finish or Surface Quality**\
  Glossy, matte, metallic, shimmering, iridescent, pearlescent, velvet-like, translucent, silky, powdery
* **Light and Shadow Modifiers**\
  Sunlit, shadowed, backlit, faded, dimmed, glowing, reflective, foggy, moonlit

**Examples**\
You can combine these with memory-based color terms for added clarity and control:

> * *Powdery sky blue*
> * *Rich cherry red*
> * *Frosted mint green*
> * *Dusky rose pink*
> * *Shimmering sapphire blue*
> * *Matte ivory white*


# Angle of View and Perspective

In image generation, the angle from which a scene or subject is viewed can dramatically affect the composition, storytelling, and overall feel of the result. This appendix outlines a variety of useful terms for describing point of view — both for the scene as a whole, and for individual people, animals, or objects within it.

#### 📸 Scene-level perspective (Camera-to-environment angle)

These terms describe how the viewer is positioned relative to the entire scene or environment.

* **Bird’s-eye view** — looking down from high above (also: aerial view, top-down perspective)
* **Worm’s-eye view** — looking up from ground level (also: low-ground view)
* **Overhead view** — directly above the subject (similar to: bird’s-eye, top-down)
* **Aerial view** — wide view from a high altitude (drone-style)
* **Isometric view** — angled top-down with parallel lines and no distortion (also: game map view, simulated 3D)
* **Wide-angle view** — expansive field of vision (also: cinematic wide shot, landscape framing)
* **Establishing shot** — broad scene-setting view (also: intro frame, scene overview)
* **Panoramic view** — ultra-wide horizontal framing (also: 360° view, landscape sweep)
* **Side view** — looking across from the left or right (also: lateral view, profile of the scene)
* **Tilted angle (Dutch angle)** — slanted horizon (also: skewed angle, off-kilter frame)
* **Point of view (POV)** — from a character’s visual perspective (also: first-person view)
* **Over-the-shoulder** — behind a subject, viewing what they see (also: behind POV)
* **Distant view** — subject seen from afar (also: far-shot, wide establishing)

#### 👁️ Subject-level perspective (Viewing a person, animal, or object)

These terms describe how the subject itself is being viewed or framed in the composition.

* **Front view** — directly facing the subject (also: straight-on view)
* **Side profile** — side of the face or body (also: profile view, lateral angle)
* **Back view** — viewing the subject from behind (also: rear angle)
* **Three-quarter view** — angled between front and side (also: partial side view)
* **Close-up** — tightly framed (also: portrait crop, detail view)
* **Extreme close-up** — single facial feature or small detail (e.g., just eyes, lips, hand)
* **Full-body shot** — head to toe (also: wide crop of the subject)
* **Headshot** — upper torso and face (also: bust shot, portrait frame)
* **Low angle** — looking up (also: heroic angle, upward shot)
* **High angle** — looking down (also: downward shot, overhead crop)
* **Eye-level** — neutral, straight-on framing (also: natural perspective)
* **Overhead angle** — directly above the subject (like from a drone or ceiling)
* **Underside view** — from beneath the subject (also: under-angle, worm’s/ant's perspective)
* **Behind-the-subject** — subject turned away (also: back-facing composition)
* **Obscured or cropped view** — subject partially hidden or off-frame (also: partial view)

You can combine these terms with emotional cues, lens types, or action words for even more control.\
For example:

> * *Aerial view of a foggy village*
> * *Over-the-shoulder shot of a warrior facing the horizon*
> * *Three-quarter close-up of a woman smiling*
> * *Low-angle view of a tree glowing in moonlight*
> * *Full-body front view of a seated child*

#### Be careful with conflicting perspective elements

When using angle or point-of-view terms in your prompts, make sure the other details you describe make sense from that same viewpoint. Since the AI tries to include everything you mention, asking for something that wouldn’t normally be visible from a specific angle can confuse it — and may cause the model to ignore the perspective altogether.

**Examples of possible contradictions:**

> * *A top-down bird’s-eye view of a city \[…] the sky is filled with fluffy white clouds.*
> * *A rear view of a man walking away \[…] he is smiling at the camera.*
> * *An extreme close-up of a woman’s face \[…] she is wearing a knee-length red dress.*


# Describing Age and Life Stage

When prompting for people, describing age clearly can shape the outcome just as much as physical features or clothing. However, many AIs don’t reliably interpret numeric ages (e.g., “a 7-year-old girl”) with visual accuracy. Instead of specifying numbers, it’s more effective to use descriptive, life stage–based terms. This appendix breaks those terms into two parts per group: age terms and modifiers to help communicate the age and physical traits more accurately.

You can mix and match across each category for more controlled image generation.

#### **Infant (0–1)**

* **Age terms**\
  Newborn, baby, infant
* **Modifiers**\
  Chubby, swaddled, soft-cheeked, sleeping, wide-eyed, tiny limbs, smooth skin, round cheeks

#### **Toddler (1–3)**

* **Age terms**\
  Toddler, young toddler, early walker
* **Modifiers**\
  Baby-faced, wobbling, curly-haired, pudgy, chubby cheeks, short limbs, clumsy

#### **Young Child (4–7)**

* **Age terms**\
  Young child, small child, preschooler, kindergartener
* **Modifiers**\
  Playful, curious, big-eyed, tousled hair, toothy smile, energetic, innocent expression, round face

#### **Older Child (8–12)**

* **Age terms**\
  Older child, grade-schooler, school-aged kid, preteen
* **Modifiers**\
  Freckled, active, gap-toothed, lean-limbed, lively, transitional build, early maturity

#### **Teenager (13–17)**

* **Age terms**\
  Teenager, adolescent, high school–aged, teenage girl/boy
* **Modifiers**\
  Moody, gangly, early puberty, developing features, serious gaze, youthful but mature, growing taller, soft jawline

#### **Young Adult (18–25)**

* **Age terms**\
  Young adult, college-aged adult, late teen, youthful adult, stylish young man/woman
* **Modifiers**\
  Fresh-faced, smooth-skinned, subtly mature, vibrant, minimal wrinkles, soft features

#### **Adult (26–39)**

* **Age terms**\
  Adult, early 30s adult, adult in their prime, mature young man/woman
* **Modifiers**\
  Refined features, confident, glowing skin, strong jawline, well-groomed, composed, healthy appearance, mature presence

#### **Middle-Aged (40–59)**

* **Age terms**\
  Middle-aged adult, mature adult, adult in their 40s or 50s
* **Modifiers**\
  Distinguished, subtle wrinkles, salt-and-pepper hair, thoughtful expression, experienced face, graceful aging, defined lines, mature elegance, visible signs of life experience

#### **Senior (60–79)**

* **Age terms**\
  Senior, older adult, elderly man/woman, grandparent
* **Modifiers**\
  Silver-haired, deep smile lines, wrinkled skin, wise eyes, cane or reading glasses

#### **Elder / Advanced Age (80+)**

* **Age terms**\
  Elder, aged elder, very old person
* **Modifiers**\
  Frail, thin white hair, deeply wrinkled, slow-moving, hunched posture, fragile yet dignified, timeless expression

#### Age modifiers by life stage

These descriptive modifiers can enhance the emotional tone, physical appearance, or personality of a character based on their age group. While some are flexible, most are naturally suited to a specific stage of life.

* **Youth-oriented modifiers:**\
  Youthful, baby-faced, radiant with youth, fresh-faced, full of life, soft-featured, innocent-looking
* **Neutral or crossover modifiers:**\
  Mature presence, confident, refined, composed, healthy-looking, well-groomed, graceful
* **Age-related or elder-oriented modifiers:**\
  Aging gracefully, time-worn, dignified aging, weathered by time, wise-looking, timeless beauty, deeply lined, gentle presence


# Downloading Images

Once you have created one or more images, you can download them to your computer from the image grid, Image View, or bulk selection tools.

{% hint style="warning" %}
Use the official Download controls instead of saving from the browser right-click menu. **The Download controls let you choose the available file type and size** for your image and plan.
{% endhint %}

## Single-image download

You can click an image to open it in **Image View**, then click **Download** <img src="/files/nN8jAfO9DGfnzvDrPrAX" alt="Download icon" data-size="line"> in the **Details Panel**. The current download menu lets you choose:

* **File type** - choose from the formats currently available for that image, such as JPEG, PNG, or WebP.
* **Size** - choose a small download, the original size, or available upscale sizes.

When browsing images in the [**Image Gallery**](/using-ideogram/ui-overview/ui-components/image-gallery) of any page, hover over an image and click the **Download icon** <picture><source srcset="/files/pKduhMzbnyWfWlqHAcoh" media="(prefers-color-scheme: dark)"><img src="/files/OH5RDVOoxZgvwNE1EU8W" alt="Download icon" data-size="original"></picture> where it appears.

* **Note that this quick access option will not open the download menu mentioned above.** Instead, your most recently saved download file type and size will be used.

<figure><img src="/files/420dn2lj43Iqpi6yw9Rg" alt="Hover an image and click the download button to get an instant download." width="563"><figcaption><p>Hover an image and click the download button to get an instant download. Nice and quick!</p></figcaption></figure>

Some file types and sizes require a paid subscription. If an option is locked, the menu will show that an upgrade is required. For transparent outputs, JPEG is disabled because it does not preserve transparency.

Available file types and sizes can vary by image type, account plan, and whether the image has transparency. **Use the Download menu as the source of truth for the current image.**

## Multiple-image download

When viewing images in your Library or in profile tabs where multi-select is available, you can download multiple images in different ways:

1. Use the select tool in the upper right area:
2. Simply drag from an area outside the images to select the images you want to download.

<figure><picture><source srcset="/files/xaYKimS1f0jWJOauON6q" media="(prefers-color-scheme: dark)"><img src="/files/ygzOwgdu0Z6jHpMa1geX" alt="Library grid with a drag selection across a row of four cat images among other generation sets"></picture><figcaption><p>Select individual images or entire sets of four images (like shown above) by dragging.</p></figcaption></figure>

Once you have selected some images, you can add or remove them as you wish with a single click. Selected images will have a red checkmark in the upper-left corner. A small box with options will appear at the bottom of the screen, allowing you to download all the selected images.

When you click **Download**, the selected images download as a ZIP file. The downloaded format follows the most recently used download rules for your account and selected images.

## What's next?

Now that you know how to download your images, you can use them as inspiration or just look at them! But what if you want to share with the Ideogram community or friends so that others can use your prompts and images as an example? The next section will go over how sharing images works both within and outside the Ideogram web platform!


# Sharing Images

## How to share an image

While browsing images anywhere on the website, hover your cursor over an image and click **Share**. If you’re viewing an image in detail, click the **Share** button located in the upper-right corner of the right-side panel.

{% tabs %}
{% tab title="Image View" %}

<figure><picture><source srcset="/files/W5t3FsJzvody12gErhVs" media="(prefers-color-scheme: dark)"><img src="/files/6HLxhDdzWYC3QW6uoOSB" alt="Share prompt when viewing an image&#x27;s details." width="370"></picture><figcaption><p>While viewing an image in details.</p></figcaption></figure>
{% endtab %}

{% tab title="Image Hover" %}

<figure><img src="/files/CmieBR5ZdlkFR4h650Mi" alt="Share button when hovering over an image." width="260"><figcaption><p>While browsing an image.</p></figcaption></figure>
{% endtab %}
{% endtabs %}

A popup window will appear where you can choose which social media platform you want to share your image to. If the image is currently private, you’ll be notified and prompted to make it public before sharing. Simply click **Set to public** to proceed.

<figure><picture><source srcset="/files/5xGrmEPiABnC6YkBL75l" media="(prefers-color-scheme: dark)"><img src="/files/RFcDllDpjJlObZ96Jkca" alt="Social Media Sharing Options" width="308"></picture><figcaption></figcaption></figure>

## What's next?

That's all you need to know to get started with Ideogram! You've generated images, learned some prompting tips to refine those images, and know how to download and share your results. Happy generating!


# Account Settings

This page covers your Ideogram profile, subscription, billing, credits, theme, muted users, account deletion, and sign-out actions. Most account actions start from the [User Menu](/using-ideogram/ui-overview/ui-components/user-menu) found in the screenshot below.

{% tabs %}
{% tab title="Desktop" %}

<figure><img src="/files/wXdlwyNOrm2lLz3GK3hd" alt="Click on the user&#x27;s profile in the bottom-left to access the user menu."><figcaption><p>Click on your profile picture to bring up the user menu! This is the most important area to manage your subscription and other account settings.</p></figcaption></figure>
{% endtab %}

{% tab title="Mobile" %}

<figure><img src="/files/RJeMNH12ozzSeLCspqeK" alt="Click on your profile picture at the bottom to open your account settings menu!"><figcaption></figcaption></figure>
{% endtab %}
{% endtabs %}

API setup is separate from normal account and subscription settings. To configure API access, use the **API Dashboard** or open [ideogram.ai/manage-api](https://ideogram.ai/manage-api), then follow along with the [Ideogram API](/plans-and-pricing/ideogram-api) page.

## Profile

Use the profile area to view your public profile, edit profile details where available, manage your profile image, and review profile-facing content such as pinned or public images.

<figure><img src="/files/yRc1WYuDDZgwruYHMV8K" alt="A screenshot of the profile page to edit profile details and review someone&#x27;s generations."><figcaption><p>An overview of your profile where you can check stats, add bio, or look through your public generations. Follow me so I can become famous! 😏</p></figcaption></figure>

## Plan, credits, and billing

Use **Manage Subscription** to:

* review your active plan and credit balances;
* upgrade, renew, or manage a subscription;
* buy top-up credits where available;
* update payment or billing information;
* view billing history and invoices.

<figure><img src="/files/oLLQxls7lVt9kLScmTpT" alt="Our plans and pricing that allows for top-ups, changing billing information, managing your subscription, changing plans, and more."><figcaption><p>Our plans and pricing page that allows for credit top-ups, plan/subscription changes and billing modifications. I'm on the Pro plan! <span data-gb-custom-inline data-tag="emoji" data-code="1f60e">😎</span></p></figcaption></figure>

Current plan prices, included credits, top-up details, and plan availability can change. See [Available Plans](/plans-and-pricing/available-plans) and [ideogram.ai/pricing](https://ideogram.ai/pricing) for current pricing.

## Muted Users

Use **Manage Muted users** to review and manage accounts you have muted. Muting affects what content you see from those creators.

## Theme

Use the theme selector to switch between supported appearance modes such as **Light, Dark,** or **Auto.**

## Deleting Your Account

Account deletion is permanent. If you choose **Delete account**, follow the confirmation menu shown below. Deletion removes your Ideogram account data according to the current product and legal policies. **Your subscription will be cancelled at the end of the current billing period and all of your generations and data will be permanently deleted.**

Before deleting an account with an active subscription or API setup, review billing and API settings separately.

<div><figure><img src="/files/WwXwsAW5sxVJaGFKIUm2" alt="Account menu with the Delete account option highlighted below Manage muted users"><figcaption></figcaption></figure> <figure><img src="/files/C7fAHrknipWLHLEvvaNd" alt="Deletion dialog warning that data is permanently deleted, asking you to type delete to confirm, with No and Yes buttons"><figcaption><p>Only continue if you're really sure and make all the proper preparations! I wouldn't want to lose my Pro plan and credits by accident...</p></figcaption></figure></div>


# UI Overview

Ideogram is organized around a few main product areas. The exact controls you see can vary by account, plan, selected model, device, and feature rollout.

## Product Areas

| Area        | What it is for                                                                 |
| ----------- | ------------------------------------------------------------------------------ |
| **Home**    | Start prompt-based generations and browse public content.                      |
| **Library** | My images, Collections, My likes, private images where available.              |
| **Apps**    | Task-focused workflows such as Background Remover.                             |
| **Tools**   | Models, Styles, Characters, Canvas, Batch, and overflow tools where available. |
| **API**     | API Dashboard, Manage API, developer docs.                                     |
| **Account** | Profile, plan, credits, billing, settings, muted users, sign out.              |

For page-level guides, see [Pages UI](/using-ideogram/ui-overview/pages-ui). For reusable controls such as the navigation bar, prompt box, image gallery, and user menu, see [UI Components](/using-ideogram/ui-overview/ui-components).


# Pages UI

Use these pages to understand the main Ideogram surfaces:

* [Home Page](/using-ideogram/ui-overview/pages-ui/home-page)
* [Image View](/using-ideogram/ui-overview/pages-ui/image-view)
* [Library Page](/using-ideogram/ui-overview/pages-ui/library-page)
* [Profile Page](/using-ideogram/ui-overview/pages-ui/profile-page)
* [Apps Page](/using-ideogram/ui-overview/pages-ui/apps-page)
* [API Dashboard](/using-ideogram/ui-overview/pages-ui/api-dashboard)
* [Team Page](/using-ideogram/ui-overview/pages-ui/team-page)

Canvas and editing docs remain available for users who still have access to those workflows:

* [Canvas and Editing](/canvas-and-editing)
* [Editor](/canvas-and-editing/editor)


# Home Page

The Home page is where you explore the creative world of Ideogram. It features a feed of recent and popular images from the community, along with tools to search, browse by subject, or discover top creations. From here, you can easily start generating your own images or explore what others have created.

<figure><picture><source srcset="/files/oVXvVwM7NZY3io5PN98z" media="(prefers-color-scheme: dark)"><img src="/files/IEPiHAxaI6tdrkWL6ZNu" alt="Home page with numbered callouts for the prompt box, navigation tabs, community image gallery, and navigation bar"></picture><figcaption></figcaption></figure>

1. [Prompt Box](/using-ideogram/ui-overview/ui-components/prompt-box) – The main area to enter your text prompt for image generation. It also includes various configuration options (Style, Aspect Ratio, Character, Color Palette, etc.) and the controls to start generating.
2. [Navigation Tabs](/using-ideogram/ui-overview/ui-components/navigation-tabs) – Tabs that let you browse different content categories (Explore, Top, People, Product, Nature, etc.). They act as filters to explore existing creations. It also has a search tool.
3. [Image Gallery](/using-ideogram/ui-overview/ui-components/image-gallery) – The central section of the page where generated images are displayed, either from the community or your own images, depending on the page. You can browse, like, or take inspiration from these creations.
4. [Navigation Bar](/using-ideogram/ui-overview/ui-components/navigation-bar) – This left-hand sidebar provides quick access to the main sections and pages of the platform, including Home, Apps, Library, Tools, API, and Account areas.


# Image View

<figure><picture><source srcset="/files/jf3ajq4TaeymidY2d1aY" media="(prefers-color-scheme: dark)"><img src="/files/M3DxjCe7lbKmZi6enHiL" alt="Image View with numbered callouts for the prompt box, a cat photo in the main display, details panel, sidebar, and thumbnail strip"></picture><figcaption></figcaption></figure>

1. [Prompt Box](/using-ideogram/ui-overview/ui-components/prompt-box) – The main area to enter your text prompt for image generation. It also includes various configuration options (Style, Aspect Ratio, Character, Color Palette, etc.) and the controls to start generating.
2. **Main Image Display –** Shows the selected image in large format at the center of the screen. The image automatically fits within the available space in the Image View, maintaining its original aspect ratio. It cannot be zoomed or panned, but always adjusts to fill the central area for an optimal view.
3. [Details Panel](/using-ideogram/ui-overview/ui-components/details-panel) – The central section of the page where generated images are displayed, either from the community or your own images, depending on the page. You can browse, like, or take inspiration from these creations.
4. [Navigation Bar](/using-ideogram/ui-overview/ui-components/navigation-bar) – The left-hand sidebar provides quick access to the main sections of the platform, including Home, Apps, Library, Tools, API, and Account areas.
5. **Thumbnail Strip** – Lets you quickly navigate between images using your mouse, keyboard arrows, or touch gestures. Images separated by a small gap belong to the same generation set (up to four images.


# Library Page

The Library page is where signed-in users organize and revisit their own Ideogram activity.

Common Library areas include:

* **My images** - generated and uploaded images associated with your account.
* **Collections** - saved groups of images for organization and reuse.
* **My likes** - images you have liked.
* **Private images** - private generations where your plan and current product surface support them.

Library actions can vary by image type, ownership, plan, and selected workflow. For multi-image actions, see the [Image Gallery](/using-ideogram/ui-overview/ui-components/image-gallery). For visibility controls, see [Private Generations](/using-ideogram/generation-settings/private-generations).


# Profile Page

The Profile page displays all information related to a user account, including the username, bio, social media links, and gallery of pinned and public images. From here, you can edit your profile, view your followers or users you follow.

<figure><picture><source srcset="/files/afItQhZMHn2sOqN0u9Zb" media="(prefers-color-scheme: dark)"><img src="/files/SvcQUpSlmYszHhyGUXmu" alt="Profile page with numbered callouts marking the prompt box, profile picture, username, stats, bio, tabs, and image gallery"></picture><figcaption></figcaption></figure>

1. [Prompt Box](/using-ideogram/ui-overview/ui-components/prompt-box) **–** The main area where you enter your text prompt for image generation. It includes various configuration options (Style, Aspect Ratio, Character, Color Palette, etc.) and the controls to start generating.
2. **Profile Picture** – This is the image other users will see as your profile photo. You can set it from any of your images by clicking the **More** icon (<picture><source srcset="/files/DCiR5D2cnVppKd9qELB3" media="(prefers-color-scheme: dark)"><img src="/files/eVQ3eQw7IgtlCP87XKyl" alt="More icon"></picture>) and selecting **Set as profile photo**.
3. **Username** – The first line displays your Ideogram username, visible to everyone. You can add your real name or another identifier below it if you wish.
4. **Statistics** – Displays your number of followers, the users you follow, and your total likes received. You can view detailed lists by clicking on the **followers** or **following** labels.
5. **Bio** – A short personal description about yourself. Optional.
6. **Date Joined** – Shows when your account was created.
7. **Location** – Indicates where you are located. Optional.
8. **More menu** – Available only when viewing another user’s profile. Provides options to:
   * **Mute creator** – Hides all creations from this user.
   * **Report creator** – Report the user for inappropriate content.
9. **Edit Profile / Follow / Following** – When viewing your own profile, this button is labeled **Edit Profile**, allowing you to modify your profile information. On another user’s page, it shows either **Follow** or **Following**, letting you follow or unfollow them.
10. **Social Media** – Add links to your social media accounts to share with the community. Optional.
11. **Navigation Tabs** – Control how your image gallery is displayed:
    1. **Default** – Shows pinned images first, followed by public images, both from newest to oldest. This is the default view other users see.
    2. **Latest** – Displays all public images, pinned or not, from newest to oldest.
    3. **Oldest** – Displays all public images, pinned or not, from oldest to newest.
12. **Image Gallery** – Displays public and pinned images, visible to all users.
13. [Navigation Bar](/using-ideogram/ui-overview/ui-components/navigation-bar) – Provides quick access to the main sections of Ideogram, including Home, Apps, Library, Tools, API, and Account areas.


# Apps Page

The Apps page collects task-focused Ideogram workflows. Apps are designed around a specific job, such as removing an image background, instead of the general prompt-based generation flow on Home.

Available apps can change as product surfaces roll out. For the current background workflow, see [Background Remover App](/using-ideogram/features-and-tools/background-remover-app).


# API Dashboard

The API Dashboard is the in-product area for setting up and managing Ideogram API access.

Use it to review API account status, create and manage API keys, track usage, and manage API billing. Endpoint details, schemas, examples, and model availability live in the public developer docs at [developer.ideogram.ai](https://developer.ideogram.ai). For first-time setup steps (accepting the Developer API Agreement, adding a payment method), see [Ideogram API](/plans-and-pricing/ideogram-api).

To open it, visit [ideogram.ai/manage-api](https://ideogram.ai/manage-api) or click **API Dashboard** in the left sidebar of the Ideogram app.

## Dashboard Home

The home screen shows your API credit balance at a glance — available, consumed, expired, and total issued credits — plus shortcuts for creating an API key, opening the developer docs, tracking usage, and connecting the Ideogram MCP server to agent workflows.

The sidebar's **Manage** section is where account administration lives: Dashboard, API Keys, Usage, Billing, and Settings. The **Playground** section (Generate, Remix, Remove background) lets you try the API interactively, and **Build** links out to the documentation, service status, and API pricing.

<figure><img src="/files/6pq3FC47ukzVrQtkigRw" alt="API Dashboard home screen showing credit summary tiles and get-started shortcuts, with the Manage section of the sidebar highlighted"><figcaption><p>The API Dashboard home screen. Management pages live in the sidebar's <strong>Manage</strong> section.</p></figcaption></figure>

API accounts are separate from your regular Ideogram workspace. The switcher at the top of the sidebar selects between your personal API account and any API teams.

## API Keys

API keys authenticate your requests to the Ideogram API. The API Keys page lists each key's partial value, label, creation date, and status.

To create a key:

1. Click **Create key**.

<figure><img src="/files/fBwb1L5Cfr40XnxPMoPQ" alt="API Keys page listing keys with partial value, label, date created, and status columns, with the Create key button highlighted"><figcaption><p>The API Keys list. Key values are only ever shown in part after creation.</p></figcaption></figure>

2. Optionally give the key a name, then click **Create**.

<figure><img src="/files/KvcJP3h9OVbyS9wOrnDa" alt="Create API key dialog with an optional name field and the Create button highlighted"><figcaption><p>Names help you tell keys apart later.</p></figcaption></figure>

3. **Copy the key immediately and store it securely.** The full key is shown only this once — afterwards, only the partial value is visible.

<figure><img src="/files/0BSKsb8ngaWVQvmVEndn" alt="Dialog confirming a new API key has been created, with the full key value obscured and the Copy key button highlighted"><figcaption><p>This is the only time the full key is displayed.</p></figcaption></figure>

To rename or revoke a key, click the **⋯** menu at the end of its row and choose **Edit label** or **Delete key**.

<figure><img src="/files/TvX22sAPKwGSZw2SbaJ3" alt="API key row menu open, showing the Edit label and Delete key options highlighted"><figcaption><p>Each key's row menu offers <strong>Edit label</strong> and <strong>Delete key</strong>.</p></figcaption></figure>

## Usage

The Usage page charts your recent API activity per endpoint and model version. Use the date-range selector to switch between the last 30, 60, or 90 days, and the **Show zero usage metrics** toggle to include endpoints you haven't called in the period.

<figure><img src="/files/SS4ofIWbDXKkTihiW2pU" alt="Usage page showing a per-endpoint API usage chart over time, with the date range selector highlighted"><figcaption><p>Per-endpoint usage over time, filterable by date range.</p></figcaption></figure>

## Billing

API billing is managed separately from Ideogram subscriptions and uses prepaid API credits. The Billing page has three tabs:

* **Credits** — your credit balances and top-up controls.
* **Billing information** — payment method, tax information, and a **Manage via Stripe** link to the billing portal.
* **Invoices** — invoice history, expandable to per-line-item detail.

### Adding credits

Click **Add credits**, then pick a preset amount or enter a custom one and confirm.

<figure><img src="/files/smXhdkvfNWvKK9cHgiHD" alt="Add credits dialog with preset amount options and the add button highlighted"><figcaption><p>Choose a preset or a custom amount.</p></figcaption></figure>

### Auto recharge

Auto recharge tops up your balance automatically: set a **minimum balance threshold** and a **top-up balance**, and when your credits fall below the threshold, Ideogram recharges to the top-up level. Enabling it can trigger an immediate charge to bring your balance up to the configured level — the confirmation dialog notes this before you save.

<figure><img src="/files/DyDO2e4aVhX79BVEL2KC" alt="Billing page Credits tab showing credit balance tiles and auto recharge settings, with the Add credits button and Auto recharge toggle highlighted"><figcaption><p>The Credits tab: balances, <strong>Add credits</strong>, and the <strong>Auto recharge</strong> toggle.</p></figcaption></figure>

### Credit expiry

API credits have an effective window — the **Ideogram API Usage** card on the Credits tab shows the effective date range for your issued credits, and any credits that lapse appear under **Total expired**. Check this card if your balance is lower than expected.

## Settings

Individual API accounts currently have no configurable settings; the Settings page applies to API team accounts where available.

## Playground

The sidebar's **Playground** section (Generate, Remix, Remove background) lets you run real API requests from the browser — no code required. See [Playground](/plans-and-pricing/ideogram-api/playground) for a full walkthrough.


# Team Page

The Team page is the account area for Team plan administration.

Team owners use it to manage team billing, invite or remove members, review seat-related billing, and manage team membership. Team members can use team account access according to their role and current plan settings.

For the full Team plan guide, see [Team Plan](/plans-and-pricing/team-plan).


# UI Components


# Details Panel

The Details panel appears on the right (desktops computers and large tablets) or bottom (devices such as smartphones) when viewing a single image. It provides all generation information, including prompts, model settings, and available actions.

<figure><picture><source srcset="/files/uZaylMIYSokLI5DmVNQl" media="(prefers-color-scheme: dark)"><img src="/files/JVaFrseKEdDI5jZ4lJrn" alt="Details panel with numbered callouts marking Download, Like, Share, More, Generation and Edit image buttons, prompt fields, and metadata" width="372"></picture><figcaption></figcaption></figure>

1. **Download** – Download the image to your device or computer.
2. **Like** – Click to add a like. Also shows the number of people who liked the image.
3. **Share** – Share the image on a website or social network of your choice.
4. **More** – Displays the [More menu](/using-ideogram/ui-overview/ui-components/more-menu-...) containing several additional options.
5. **Username & Creation** – Creator’s username and profile picture, a link to their profile, and the time when the image was generated.
6. **Generation** – (This section is visible only for your images)
   1. **Retry** – Generate the image again with the same or adjusted settings.
   2. **Pin / Unpin** – Keep or remove the image from the top of your profile.
   3. **Private / Public** – Make the image visible only to you or to everyone.
7. **Rate Generation** (visible only for your images) – Provide feedback on the quality of the result.
8. **Edit Image** – Fast access to the most popular editing features:
   1. **Remix** – Create a new image variation starting from this one.
   2. **Magic Fill** – Replace or fill areas of the image using AI.
   3. **Upscale** – Increase the image resolution up to 2×.
   4. **Remove Background** – Remove the background around the main subject. Click the dropdown menu to replace the background instead.
   5. **Open in Canvas** – Launch the image in the advanced editing workspace.
9. **Reference** – Use the image as reference for your next generation:
   1. **Character** – Use the image as a character reference.
   2. **Style** – Use the image as a style reference.
   3. **Describe** – Generate a text description of the image.
10. **Prompt** – The original prompt as it was written in the prompt box before clicking Generate.
11. <picture><source srcset="/files/G9B1FfhLU9k0VOxgFLlq" media="(prefers-color-scheme: dark)"><img src="/files/94OYTQzAzidXlJCoUfNN" alt="Copy icon" data-size="original"></picture> **Copy /** <picture><source srcset="/files/G7RJIz3oNa265gbbvgPl" media="(prefers-color-scheme: dark)"><img src="/files/jfYj4UF2SpbcdhchjDUh" alt="Use icon"></picture> **Use** – Copy or use the prompt or setting in your next generation. Also available for other settings described below.
12. **Magic Prompt** – The Magic Prompt text if the image was generated with that feature.
13. **Description** – The text prompt that was generated if you used Describe on the image.
14. **Negative Prompt** – The text used as the negative prompt.
15. **Color Palette** – The color palette used when generating the image.
16. **Parent Image** – The parent image used when the generation was a Remix or an Upscale.
17. **Style** – The style used to generate the image. It can be a generic or a custom one.
18. **Other Information** – In this section, you will see various details such as the **Model** and Character **Reference** used to generate the image, the **dimensions** and **aspect ratio**, the **Rendering speed**, the **Seed number**, and the **date and time** the image was created.


# Image Gallery

The Image Gallery is the central section of the page where generated images are displayed, either from the community or from the user.

When moving the cursor over an image in the gallery, different informations and options appear and become available:

<figure><img src="/files/8bSDLeL79wtoYYSrM7pS" alt="Gallery image on hover with numbered callouts for the More, Download and Share buttons, creator name, and like count" width="467"><figcaption><p>Image in the gallery when the cursor is over it.</p></figcaption></figure>

1. **More button** – Display the [More menu](/using-ideogram/ui-overview/ui-components/more-menu-...) containing several additional options.
2. **Download** – Download the image to your device or computer.
3. **Share** – Share the image on a site or a social network of your choice.
4. **User/image info** – The creator's name, a link to their profile and when the image was generated.
5. **Likes** – Number of people who liked the image. Click to add a like.

### Image Gallery in the Library

When browsing images in the Library, you may be able to select multiple images to perform batch actions. Once multiple images are selected, a panel appears at the bottom of the gallery where supported actions can include downloading, changing visibility, or deleting images.

Available actions vary by ownership, plan, and image type.


# Navigation Bar

The Navigation Bar groups Ideogram's main product areas. The exact items shown can vary by account, screen size, rollout, and whether a tool is available to you.

## Main Sections

| Section     | What it opens                                                             |
| ----------- | ------------------------------------------------------------------------- |
| **Home**    | Return to the main creation and browsing area.                            |
| **Apps**    | Opens task-focused apps such as Background Remover.                       |
| **Library** | Contains My images, Collections, My likes.                                |
| **Tools**   | Models, Styles, Characters, Canvas, Batch, and More/Less where available. |
| **API**     | Dashboard and Documentation.                                              |
| **Account** | Profile/user menu, plan/credits, notifications, settings.                 |

## Library

The Library section is the primary place for your own images and saved organization tools. Depending on your account, it can include **My images**, **Collections**, **My likes**, and private images where available.

## Tools

The Tools section collects creation and management workflows that are separate from the main Home feed. It can include **Models**, **Styles**, **Characters**, **Canvas**, **Batch**, and overflow controls such as **More** or **Less**.

Canvas and Batch may appear only for accounts, plans, or cohorts that have access to those tools.

## API

The API section links to the in-product API dashboard and the public developer documentation at [developer.ideogram.ai](https://developer.ideogram.ai).

## Account

Use the account area to open your profile/user menu, review plan and credit information, manage billing or subscriptions, access notifications and settings, manage muted users, switch theme, or sign out.


# More Menu (...)

When associated with a single image, the More menu <picture><source srcset="/files/DCiR5D2cnVppKd9qELB3" media="(prefers-color-scheme: dark)"><img src="/files/eVQ3eQw7IgtlCP87XKyl" alt="More icon"></picture> presents different options, depending on where you are in the interface. For example:

* While browsing other users’ images.
* While viewing a user’s image in detail.
* While browsing your Library.
* While viewing a single image in details.

The exact menu items shown depend on the image, ownership, plan, and current workflow.

Here are the items you might encounter in the More menu, in alphabetical order:

<picture><source srcset="/files/tSDV9GXZ7B0k2BPfv9zM" media="(prefers-color-scheme: dark)"><img src="/files/RsEw9PsD7hRkSnK022Vl" alt="Character icon"></picture> **Character** – Use the image as a character.

<picture><source srcset="/files/GZx2MHo3ZwLAg3TBb5Sa" media="(prefers-color-scheme: dark)"><img src="/files/1xscXxNOJizVEWaxegUm" alt="Delete icon"></picture> **Delete** – Permanently remove the selected image.

<picture><source srcset="/files/ydCzdb6kfMD79TgQzjuY" media="(prefers-color-scheme: dark)"><img src="/files/EE36Z203mqSJ3mLBo4i9" alt="Describe icon"></picture> **Describe** – Generate a text description of the image.

<picture><source srcset="/files/TemIhLV0XLl0WgYmjgBG" media="(prefers-color-scheme: dark)"><img src="/files/EGDhjixaXCSN96bfl3Ld" alt="Edit in Editor icon"></picture> **Edit in Editor** – Open the image in the Editor.

<picture><source srcset="/files/V47royzRXrOuZCi1aJNL" media="(prefers-color-scheme: dark)"><img src="/files/h8jqv3jLu9rix0FrTuwb" alt="Extend icon"></picture> **Extend** – Expand the image beyond its current borders.

<picture><source srcset="/files/tUpFlbKlWfapzRTa6DUq" media="(prefers-color-scheme: dark)"><img src="/files/KRFuwQo4zgCEnZRbT2Z3" alt="Magic Fill icon"></picture> **Magic Fill** – Replace or fill areas of the image using AI.

<picture><source srcset="/files/qrvCZSTxuJ3HxKESYocG" media="(prefers-color-scheme: dark)"><img src="/files/uYCIX7qcCqsVzU4ICSar" alt="Make Private icon"></picture> **Make Private** / <picture><source srcset="/files/sVJmhT6KevcwsGBTPmKO" media="(prefers-color-scheme: dark)"><img src="/files/DrNMsBlZp0ASJENGvejC" alt="Make Public icon"></picture> **Make Public** – Make the image visible only to you or to everyone.

<picture><source srcset="/files/jlPG8OJ65mypyHZgrlKm" media="(prefers-color-scheme: dark)"><img src="/files/wuXNYekrLSAVwphsA2bO" alt="Mute creator icon"></picture> **Mute creator** – Hide posts from a specific creator.

<picture><source srcset="/files/DPJLIQkDBbUJA8fpPpE4" media="(prefers-color-scheme: dark)"><img src="/files/mVwqOrfNcKPrA7YAI8pk" alt="Open in Canvas icon"></picture> **Open in Canvas** – Launch the image in the advanced editing workspace.

<picture><source srcset="/files/XQx1q1zMFlWEBhqsLhq9" media="(prefers-color-scheme: dark)"><img src="/files/NbCzC6twpkKx87Cciubs" alt="Pin icon"></picture> **Pin** / <picture><source srcset="/files/abz4VlzMC5xpowUkjkuZ" media="(prefers-color-scheme: dark)"><img src="/files/akd9I0md0Y3yo610zjPG" alt="Unpin icon"></picture> **Unpin** – Keep or remove the image at the top of your profile.

<picture><source srcset="/files/jBM37z6d5g455vB3Uw4x" media="(prefers-color-scheme: dark)"><img src="/files/l7qbvhzmwK9wQzAIe3xp" alt="Thumbs up icon"></picture> <picture><source srcset="/files/0xueNEFAGFmL1yMoIzgv" media="(prefers-color-scheme: dark)"><img src="/files/qS33UfP9gX0SYlK43hvx" alt="Thumbs down icon"></picture> **Rate Generation** – Provide feedback on the quality of the result.

<picture><source srcset="/files/q23voY5JkfWplcZqWRxG" media="(prefers-color-scheme: dark)"><img src="/files/jv5wOXciwMGrDL3eWg7q" alt="Remix icon"></picture> **Remix** – Create a new image variation starting from this image.

<picture><source srcset="/files/nPYs1uE6RHnv391LAgQY" media="(prefers-color-scheme: dark)"><img src="/files/NN73ikgSQH47hF118LCL" alt="Remove background icon"></picture> **Remove background** – Delete the background around the main subject of the image.

<picture><source srcset="/files/JZAzXMLPbdUYZyxfTadl" media="(prefers-color-scheme: dark)"><img src="/files/BE3vWPimvjpbb1BteDpN" alt="Replace background icon"></picture> **Replace background** – Swap the background with a new generated one.

![Report icon](/files/ACX9kRftIWyTXJ8x27oc) **Report** – Report a poor image quality or an inappropriate image/prompt.

<picture><source srcset="/files/2ri3wEzOzbFBdo2Ghabu" media="(prefers-color-scheme: dark)"><img src="/files/apEYKic3wBu2q9OEnbNW" alt="Retry icon"></picture> **Retry** – Generate the image again with the same settings or with adjusted settings.

<picture><source srcset="/files/Q1NE3vI5AiSNTYWpfCQB" media="(prefers-color-scheme: dark)"><img src="/files/EQP6zysFPz88zDpDKD8A" alt="Set as profile photo icon"></picture> **Set as profile photo** – Use the image as your account profile picture.

<picture><source srcset="/files/zQjZyA72JQ9NgTNDuyL9" media="(prefers-color-scheme: dark)"><img src="/files/HIK57Mgf43Ugg5Pwngwf" alt="Style icon"></picture> **Style** – Use the image as a style reference.

<picture><source srcset="/files/DRMasiaxP7zRDDK6DP1c" media="(prefers-color-scheme: dark)"><img src="/files/OT70zx6EQf6HEZC2eUrU" alt="Upscale icon"></picture> **Upscale** – Increase the image resolution up to 2x.

<picture><source srcset="/files/lr938W8FQr7VdBJDLgoA" media="(prefers-color-scheme: dark)"><img src="/files/t0pD8kHgfFlAYLNUGgo7" alt="Use prompt icon"></picture> **Use prompt** – Reuse the exact prompt that generated the image.

{% hint style="info" %}
Some other kind of More menus are available in other locations and features. These menus are described directly in the feature in question.
{% endhint %}


# Navigation Tabs

Ideogram's homepage features a navigation section that allows you to explore, search, and filter the community’s creations. Here’s a breakdown of each element:

<figure><picture><source srcset="/files/WJF5Sc2tmWTgpZgXRIGr" media="(prefers-color-scheme: dark)"><img src="/files/uRW9zeu0DoMOkrcNFLNP" alt="Navigation bar with numbered callouts for the search icon, Explore tab, Top tab, and subject filters such as People and Product"></picture><figcaption></figcaption></figure>

1. **Search Icon** - Use this to [search](/using-ideogram/features-and-tools/search) for public images using keywords used in prompts. Great for quickly locating content created by others on a particular subject or style. When clicking the icon, the entire navigation tab transforms into a text field where you can enter your search terms.

<figure><picture><source srcset="/files/Dvzvg9vlQwD2nug7aZwP" media="(prefers-color-scheme: dark)"><img src="/files/xWtb1qjxTliwXge05Ak4" alt="Expanded search field containing the term Wolf, with an X button on the right to clear it"></picture><figcaption></figcaption></figure>

2. **Explore Tab** – This is the default view when accessing the homepage. Displays the most recent public image generations from the Ideogram community.
3. **Top Tab** – Displays the most popular images based on community engagement — including likes, remixes, and usage — over selectable time periods. When clicking the Top tab, a scroll down menu appear on the right where you can choose from the following views:<br>

   <div align="center"><figure><picture><source srcset="/files/zg13jnwx4K9KTz6I2jsB" media="(prefers-color-scheme: dark)"><img src="/files/CdBljnSE8QI1pv8gWlzt" alt="Top tab selected, with a dropdown next to it set to Day" width="124"></picture><figcaption></figcaption></figure></div>

   1. **Hour**: Top trending images in the past 60 minutes.
   2. **Day**: Top images today.
   3. **Week**: Most popular from the past 7 days.
   4. **Month**: High-performing images over the past 30 days.
   5. **All-Time**: Most popular images ever created on Ideogram.
4. **Subjects Filter** – A list of image categories such as: People, Product, Nature, Poster, Logo, T-shirt, and more. Quickly filter the image feed by subject matter to match your interests or your intended use.


# Prompt Box

## Overview

The Prompt Box is the main area where you describe what you want Ideogram to generate. It also contains the generation controls for model, speed, image count, dimensions, references, style, visibility, and submission.

Controls appear only when supported by the selected model, plan, device, or workflow. If a control is not shown, switch to a compatible model or workflow, or use one of the options that is available in the current prompt box.

## Core Controls

1. **Prompt field** - enter the text prompt for the image you want to create.
2. **Image upload** - upload, paste, or drag in an image for supported workflows such as Describe, Remix, Upscale, Style Reference, Character Reference, Open in Canvas or Editor where available, Magic Fill, Extend, Remove BG, or Replace BG.
3. **Model picker** - choose the model used for generation. See [Available Models](/using-ideogram/generation-settings/available-models).
4. **Render speed** - choose an available speed for the selected model. See [Render Speed](/using-ideogram/generation-settings/render-speed).
5. **Number of images** - choose how many outputs to generate where the selected model and workflow support multiple outputs.
6. **Aspect ratio or resolution** - choose a preset ratio, custom dimensions, or resolution tier where supported. See [Aspect Ratio and Dimensions](/using-ideogram/generation-settings/aspect-ratio-and-dimensions).
7. **Style** - choose a style mode, preset, or Style Reference where supported. See [Style Reference](/using-ideogram/features-and-tools/reference-features/style-reference).
8. **Character Reference** - use a saved or selected character where supported. See [Character Reference](/using-ideogram/generation-settings/character-reference).
9. **Product and reference features** - use supported reference workflows such as product references, style references, custom models, or other account-specific reference tools where public and available.
10. **Color palette** - guide the generated image with preset or custom colors where supported. See [Color Palette](/using-ideogram/generation-settings/color-palette).
11. **More options** - open additional model-dependent controls such as [Seed Number](/using-ideogram/generation-settings/seed-number), [Negative Prompt](/using-ideogram/generation-settings/negative-prompt), and [Tile](/using-ideogram/generation-settings/tile) where supported.
12. **Magic Prompt** - choose whether Ideogram should enhance or expand your prompt. See [Magic Prompt](/using-ideogram/generation-settings/magic-prompt).
13. **Public/private visibility** - choose whether the generation is public or private where private generation is available. See [Private Generations](/using-ideogram/generation-settings/private-generations).
14. **Arrow-up submit button** - starts the current generation or workflow.

## Reference and Workflow Thumbnails

When a reference or workflow is active, a thumbnail can appear in or near the Prompt Box. Common examples include:

* **Style Reference** - shows the selected style reference image or saved style.
* **Character Reference** - shows the selected character reference.
* **Remix** - shows the parent image and remix strength where supported.
* **Upscale** - shows the image selected for upscaling and opens Upscale controls.
* **Background workflows** - show the image selected for Remove BG or Replace BG where applicable.

Use a thumbnail menu to adjust or remove the active reference when that workflow supports it.

## Importing an Image

When you import an image, Ideogram shows the supported actions for that image and your account. Available actions can include:

* **Describe** - generate a text description of the image.
* **Remix** - use the image as the parent for a new generation.
* **Upscale** - increase resolution and detail.
* **Style Reference** - use the image's look as style guidance.
* **Character Reference** - use the image as a character reference where supported.
* **Open in Canvas or Editor** - edit the image where those workflows are available.
* **Magic Fill** - edit a masked region with a prompt.
* **Extend** - expand the image beyond its current edges.
* **Remove BG** - remove the background and create a transparent PNG/cutout.
* **Replace BG** - generate a new background from a prompt.

Selecting an action moves you into the relevant workflow and carries the image into the Prompt Box or editor surface as needed.


# User Menu

## Overview

The User Menu opens from your account/profile area in the [Navigation Bar](/using-ideogram/ui-overview/ui-components/navigation-bar). It collects account, billing, support, API, and session actions in one place.

Menu contents and order can vary by plan, team role, device, and rollout. Use the categories below as the stable map.

## Menu Categories

* **User info and profile** - shows your account identity and links to your [Profile Page](/using-ideogram/ui-overview/pages-ui/profile-page).
* **Plan and credits** - shows your current plan, credit information, and upgrade or plan-management entry points.
* **Top-up credits** - opens the flow for purchasing additional priority credits where available.
* **Manage subscription and billing** - opens subscription, billing, invoice, or payment settings for the active account.
* **Help and documentation** - opens Ideogram help resources and docs.
* **Muted users** - lets you view and manage accounts you have muted.
* **API dashboard** - opens the in-product API area for API setup, keys, usage, billing, and related developer links.
* **Theme selector** - switches between supported visual themes such as Light, Dark, or Auto.
* **Log out** - signs you out of the current session.

Some accounts may also show team, account deletion, footer, or social links. For API setup details, see [Ideogram API](/plans-and-pricing/ideogram-api).


# Generation Settings

Generation settings control how Ideogram interprets a prompt and returns image results. Start with [Available Models](/using-ideogram/generation-settings/available-models) for Ideogram 4.0 and current model compatibility, then adjust the settings that are available for your selected model, plan, endpoint, and workflow.

## Guides

* [Available Models](/using-ideogram/generation-settings/available-models) - Ideogram 4.0, earlier models, and model compatibility.
* [Render Speed](/using-ideogram/generation-settings/render-speed) - speed options and credit behavior where supported.
* [Aspect Ratio and Dimensions](/using-ideogram/generation-settings/aspect-ratio-and-dimensions) - presets, custom dimensions, and resolution guidance.
* [Magic Prompt](/using-ideogram/generation-settings/magic-prompt) - prompt enhancement options.


# Available Models

When generating images with Ideogram, you can choose between model options where your account, plan, endpoint, and selected workflow support them. The selected model affects prompt interpretation, visual style, speed options, supported settings, and credit usage.

To select a model:

1. Open the [Prompt Box](/using-ideogram/ui-overview/ui-components/prompt-box).
2. Open the model picker or model/variations menu.
3. Choose the model, number of images, and supported [Render Speed](/using-ideogram/generation-settings/render-speed) for that workflow.

<figure><img src="/files/sr8mRU2BNFaPsvoS3OgR" alt="Prompt Box on the Home page with the 4.0 (latest) model picker button highlighted"><figcaption></figcaption></figure>

<figure><img src="/files/bdMQgUXIzZawGfDYuq4f" alt="Open image count menu showing Count options 1 to 4 and Render speed choices Turbo, Default, and Quality"><figcaption></figcaption></figure>

## Ideogram 4.0

Ideogram 4.0 is the current Ideogram model for prompt fidelity, crystal-clear type, reliable editing, native transparency, style control, and design-quality outputs.

Use Ideogram 4.0 for practical design workflows such as posters, campaigns, print-on-demand artwork, interface assets, brand worlds, and images that need to hold up beyond the first prompt.

Ideogram 4.0 is available across approved public surfaces including the Ideogram app, API workflows, MCP for agents and internal tools, and open weights or open-source releases for builders. Exact availability can vary by account, endpoint, plan, and rollout.

The product docs use the label **Ideogram 4.0**. For exact API model values, endpoint support, and request schemas, use the public developer docs at [developer.ideogram.ai](https://developer.ideogram.ai).

## Earlier and Legacy Models

Older models may still appear where your account, plan, endpoint, or workflow supports them.

| Docs label            | API/model value if public | Notes                                        |
| --------------------- | ------------------------- | -------------------------------------------- |
| Ideogram 3.0 Latest   | `V_3_1`                   | Public if still exposed.                     |
| Ideogram 3.0 March 26 | `V_3_0`                   | Older 3.0 option.                            |
| Ideogram 2a           | `V_2_1`                   | Faster 2.x model.                            |
| Ideogram 2.0          | `V_1_5`                   | Older 2.x model.                             |
| Ideogram 1.1 / 1.0    | `V_1_1` / `V_0_3`         | Legacy.                                      |
| Auto                  | `AUTO` if public          | Automatically selects model where supported. |

## Compatibility

Not every model supports every setting. Controls such as Flash render speed, custom dimensions, color palette, negative prompt, tile, character reference, style reference, product references, custom models, Canvas, and API availability can differ by model and rollout.

Where available, Ideogram 4.0 supports post-generation workflows such as remove background, prompt edit, layerize or editable text layers, extend, reframe, upscale, remix, and Magic Fill.

For API model values and endpoint-specific availability, use the public developer docs at [developer.ideogram.ai](https://developer.ideogram.ai).


# Aspect Ratio and Dimensions

Aspect ratio controls the shape of your generated image. Depending on the selected model, workflow, and generation size tier, you may see preset ratios, custom ratio controls, custom pixel dimensions, or resolution choices.

To select an aspect ratio or dimensions:

1. Open the [Prompt Box](/using-ideogram/ui-overview/ui-components/prompt-box).
2. Open **Aspect Ratio**, **Dimensions**, or **Resolution** depending on the current workflow.
3. Choose a preset or custom value supported by the selected model.

<figure><img src="/files/VOzgrk8GbHNUAVtl7vDC" alt="Prompt Box with the 1:2 aspect ratio button highlighted next to the model and image count buttons"><figcaption></figcaption></figure>

<figure><img src="/files/YtyXFReWpgZOIBrOQlit" alt="Aspect ratio menu with a 1:2 preview, portrait and landscape preset lists, a slider, and custom width and height fields"><figcaption></figcaption></figure>

## Common Preset Ratios

Ideogram commonly uses these preset ratios:

| Orientation | Presets                                            |
| ----------- | -------------------------------------------------- |
| Vertical    | `1:3`, `1:2`, `9:16`, `10:16`, `2:3`, `3:4`, `4:5` |
| Square      | `1:1`                                              |
| Horizontal  | `5:4`, `4:3`, `3:2`, `16:10`, `16:9`, `2:1`, `3:1` |

In API requests, aspect ratios use `x` separators, such as `16x9`, instead of `16:9`.

## Custom Dimensions and Resolution Tiers

Some models and plans support custom dimensions or resolution tiers. When custom dimensions are available, Ideogram may normalize your requested dimensions to a supported ratio, model size, or resolution tier.

Exact pixel outputs depend on the model, generation size tier, endpoint, and workflow. If docs need exact pixel tables, generate them from the same model catalog/config used by the app rather than maintaining a static table by hand.


# Character

Creating visually consistent characters across multiple images has long been a challenge in AI image generation—until now.

With Character Reference, you can define and reuse distinctive characters so that facial features, hairstyles, and other key traits remain consistent from one image to the next.

This feature gives you greater creative control and continuity, whether you’re illustrating a story or exploring different settings with the same character.

Once defined, your characters can be customized and reused with new prompts, helping you build cohesive image series quickly.

In the sections below, you’ll learn how to create, manage, and use Character References effectively, along with tips for combining them with other features such as [Remix](/using-ideogram/features-and-tools/remix) and [Magic Fill](/canvas-and-editing/canvas/magic-fill).

## Accessing Character Reference

### **From the Prompt Box**

1. Click or tap inside the Prompt Box to reveal the option bar (if it isn’t already visible).
2. Open the **Tools** button to see the available generation tools.
3. Then select the **Character** button to open a popup where you can access your existing Character References or create a new one.

<figure><img src="/files/R3c9frpRRJg2jgOMMK2x" alt="Ideogram home page with the Tools toggle and the Character button highlighted in the Prompt Box option bar"><figcaption></figcaption></figure>

<figure><img src="/files/EjPkvh890mLsGvKeOTdb" alt="Image options"><figcaption><p>Popup showing your Character References.</p></figcaption></figure>

If you select an existing character, its thumbnail appears in one of two locations depending on context. In standard views, it appears below your prompt in the Prompt Box. On the Character Page, the thumbnail appears larger at the top left of the Prompt Box.

<figure><img src="/files/LIZxYt9VLbpzk17VECtE" alt="Small thumbnail of a curly-haired woman above a Character label"><figcaption><p>Character thumbnail in the Prompt Box.</p></figcaption></figure>

Selecting **New Character** opens the dedicated **Character** page, where you can define and manage your custom Character References.

### Other locations

You can access the Character feature from several other locations:

1. Select the **Character** tab <picture><source srcset="/files/tSDV9GXZ7B0k2BPfv9zM" media="(prefers-color-scheme: dark)"><img src="/files/RsEw9PsD7hRkSnK022Vl" alt="Character icon"></picture> on the [Navigation Bar](/using-ideogram/ui-overview/ui-components/navigation-bar) on the side (desktop) or bottom (mobile) to open the Character page.
2. Click or tap the **Character** button in the [Details Panel](/using-ideogram/ui-overview/ui-components/details-panel) when viewing a single image to use that image as a Character Reference.
3. Click the **More** icon <picture><source srcset="/files/DCiR5D2cnVppKd9qELB3" media="(prefers-color-scheme: dark)"><img src="/files/eVQ3eQw7IgtlCP87XKyl" alt="More icon"></picture> while hovering over an image in the [Image Gallery](/using-ideogram/ui-overview/ui-components/image-gallery), then choose **Character** from the [More menu](/using-ideogram/ui-overview/ui-components/more-menu-...).

## How to use a Character Reference

### Create or choose a Character

On the Character page, click or tap the **New Character** button in the upper-right corner to create a new Character Reference.

You can add an image as a Character Reference in one of three ways:

1. **Camera** — This enables you to take a picture with your device/computer and use it as a character reference. You may need to authorize your browser or app to access your camera.
2. **Upload** — Browse images from your device or computer and upload one.
3. **Library** — Browse your images on Ideogram and select one as a reference.

<figure><picture><source srcset="/files/54lZYBO77bsLtOv7mMLm" media="(prefers-color-scheme: dark)"><img src="/files/kEQbOPH4YBbTSE5XHJyf" alt="Options to add a Character Reference using Camera, Upload, or Library." width="563"></picture><figcaption><p>Options to add a Character Reference using Camera, Upload, or Library.</p></figcaption></figure>

Alternatively, you can select an existing *Character Reference*.

Your selected image appears in the top-left corner of the *Prompt Box*.

<figure><picture><source srcset="/files/7whsn2lbsySNgUNXJHR7" media="(prefers-color-scheme: dark)"><img src="/files/I0msCSE8CRjUfssJGC0Z" alt="Prompt Box with a young boy&#x27;s portrait attached as the reference, Realistic style selected, and template cards below"></picture><figcaption><p>*Prompt Box on the Character Page showing a selected Character Reference.*</p></figcaption></figure>

{% hint style="success" %}
**Tip:** A portrait-style image with a clear, well-lit face (preferably at a slight angle) yields the best results.
{% endhint %}

#### When on the Home Page

If a Character Reference is active in the [Prompt Box](/using-ideogram/ui-overview/ui-components/prompt-box), selecting on it will display two buttons:

* **Describe** — Activates the Describe function, which adds a description of the image to the Prompt Box.
* **Edit Mask** — Opens the mask editor, allowing you to modify how the AI interprets the selected Character Reference. (See [How Masking Works](#how-masking-works) below for details.)

Selecting the **X** icon removes the Character Reference from the Prompt Box.

#### When on the Character Page

Hovering over the Character thumbnail at the top of the prompt box will reveal the **More** Icon <picture><source srcset="/files/DCiR5D2cnVppKd9qELB3" media="(prefers-color-scheme: dark)"><img src="/files/eVQ3eQw7IgtlCP87XKyl" alt="More icon"></picture> and clicking on it will give you two options:

* **Edit character mask** — Opens the mask editor so you can adjust which areas of the image are used by the AI.
* **Remove image** — Deletes the image from the Character Reference. You can select or upload a new one to replace it.

Alternatively, selecting the image itself opens the Edit Character Mask function directly.

### Personalizing your Character

Now that you’ve selected a Character Reference image, follow these steps to generate an image with it:

1. Choose how you want to describe the image to be generated:
   * **Write a prompt** that details your character and background, or
   * **Choose a template** from the available predefined options for a quick start.\
     (Templates appear below the Prompt Box on the Character Page. You can reopen them by selecting the **Templates** button next to **Generate**.)
2. Select a **Style**:
   * **Auto** — Automatically selects the optimal style based on your prompt.
   * **Realistic** — Creates lifelike photography with natural colors, textures, and lighting.
   * **Fiction** — Creates imaginative characters with artistic variation.

<figure><picture><source srcset="/files/apCAyEKXyxrGB3oLZp3n" media="(prefers-color-scheme: dark)"><img src="/files/xZOqQVL7aXDMJ5CE4bza" alt="Style selection interface showing Auto, Realistic, and Fiction options." width="509"></picture><figcaption><p>Style selection interface showing Auto, Realistic, and Fiction options.</p></figcaption></figure>

3. Apply the other generation options such as **Public/Private**, **Aspect Ratio**, and others, except:
   1. **Unavailable options**: *Color Palette, Negative Prompt, Seed Number.*
   2. Any previously selected Style Reference is disabled when using a Character Reference.
4. Once ready, click **Generate** to create your image.

Here are a few examples:

<div><figure><img src="/files/GI2XXDg4F0ekOqFfZ9Fp" alt="Portrait photo of a woman with wavy red hair in a cream cardigan beside a sprig of lavender"><figcaption><p>Original image.</p></figcaption></figure> <figure><img src="/files/r08kT4jMMl47DQuEJJ0h" alt="Queen of hearts playing card illustration with the same woman&#x27;s face as the crowned queen"><figcaption><p>Generated with the Fiction style.</p></figcaption></figure> <figure><img src="/files/wIKEpQtVJjiEfJ2MwA5z" alt="The same woman in a straw hat and white dress smiling while riding a mint-green scooter"><figcaption><p>Generated with the Realistic style.</p></figcaption></figure></div>

## How Masking Works

When you select an image as a Character Reference, the AI automatically identifies and masks the face and hair from that image.

You can adjust the mask to refine results—for example, to modify a character’s hairstyle or preserve accessories.

For instance, consider the following prompt:

> *A woman with vibrant blue pixie-cut hair.*

With the default mask, the generated image doesn’t fully reflect the requested hairstyle, only a small color overlay appears on the original hair.

<div><figure><picture><source srcset="/files/5HWoUgYeqRkJU4arrPdN" media="(prefers-color-scheme: dark)"><img src="/files/nOHbZ1nqwr5lF0O220qp" alt="Default mask highlighting the face and hair." width="563"></picture><figcaption><p>Default mask highlighting the face and hair.</p></figcaption></figure> <figure><img src="/files/lGimmkjYTZic8giZHvgv" alt="Generated image using the default mask." width="563"><figcaption><p>Generated image using the default mask.</p></figcaption></figure></div>

By erasing the hair area from the default mask, the AI can replace the hairstyle and apply a consistent color more effectively.

<div><figure><picture><source srcset="/files/TbNvpUdQFduaKXbINclO" media="(prefers-color-scheme: dark)"><img src="/files/MAY2DF5vFFhuWSCDyzGY" alt="Modified mask excluding hair." width="563"></picture><figcaption><p>Modified mask excluding hair.</p></figcaption></figure> <figure><img src="/files/d5xslzvTGNK07F2eGfDc" alt="Result showing new hairstyle with uniform color." width="563"><figcaption><p>Result showing new hairstyle with uniform color.</p></figcaption></figure></div>

Conversely, you can preserve more of the original image to maintain specific details, such as a hat, jewelry, or other distinctive elements.

Consider the following prompt:

> *A woman wearing a red ruby pendant and a red evening gown.*

With the default AI mask, the generated image doesn’t preserve the look of the pendant and generates one with a different appearance.

<div><figure><picture><source srcset="/files/Gpu2PiuPJUlo0a4Tz1GW" media="(prefers-color-scheme: dark)"><img src="/files/7yfIez9WlelWYtdBGNat" alt="Default mask excluding pendant area." width="563"></picture><figcaption><p>Default mask excluding pendant area.</p></figcaption></figure> <figure><img src="/files/mWtl85XrB0ZR5bMGDsD2" alt="Generated image showing altered pendant design." width="563"><figcaption><p>Generated image showing altered pendant design.</p></figcaption></figure></div>

By editing the default mask to include the pendant, the generated image successfully preserved the pendant’s original appearance.

<div><figure><picture><source srcset="/files/MG5drc1HbZXdg0qDtBYq" media="(prefers-color-scheme: dark)"><img src="/files/Oyl6pIc1d8kiRSsG5yeR" alt="Modified mask including pendant." width="563"></picture><figcaption><p>Modified mask including pendant.</p></figcaption></figure> <figure><img src="/files/zj36tHHBhExn7XswjhN2" alt="Generated image with original pendant preserved." width="563"><figcaption><p>Generated image with original pendant preserved.</p></figcaption></figure></div>

{% hint style="info" %}
**Tip:** Use the mask editor to fine-tune which details the AI preserves or replaces. Small adjustments often lead to noticeably improved results.
{% endhint %}

## Using a Character Reference with Other Features

While Character Reference is a powerful feature on its own, combining it with tools like [Magic Fill](/canvas-and-editing/canvas/magic-fill) and [Remix](/using-ideogram/features-and-tools/remix) allows you to create exactly the image you have in mind.

For example, you might already have generated an image that meets most of your requirements. However, the image may not fully match your vision. Below are two methods you can use, depending on your needs.

### Using Remix

To preserve the overall composition and environment of the original image, Remix is an excellent solution. Here’s how:

1. Select the image you want to remix, then click **Remix** in the right-side panel.
2. In the Prompt Box, click the **Character** tab to access existing Character References or create a new one.
3. Provide a detailed prompt describing the character’s physical appearance and the environment.
4. Adjust the image weight for the remixed image (usually between 60–80; some experimentation may be needed to find the optimal value).
5. Set the other options to your liking. It’s recommended to turn Magic Prompt **Off** to preserve the intended character and environment.
6. Click **Remix** to generate the images.

<figure><picture><source srcset="/files/pugQUn2cGULGbiJWzoiX" media="(prefers-color-scheme: dark)"><img src="/files/Ib9y1ZA1rvEmn0XLDiGw" alt="Prompt Box with a detailed pub-scene prompt, a Character thumbnail, and a Remix weight of 65"></picture><figcaption></figcaption></figure>

<div><figure><img src="/files/gcvOmJigxCANUPN8SQiD" alt="Bearded brown-haired man drinking a pint of stout at a pub table with coins and fish and chips, a Ryan&#x27;s sign behind"><figcaption><p>Image to Remix.</p></figcaption></figure> <figure><img src="/files/HPz1byTz8zIepyo34kXB" alt="Man with long red hair and a sweeping handlebar mustache in a leather vest against a rocky landscape"><figcaption><p>Character reference.</p></figcaption></figure> <figure><img src="/files/TrqaFJhNq6yWo4COogKJ" alt="The red-haired mustached character drinking a stout at the pub table, closely matching the original scene"><figcaption><p>Result using Remix.</p></figcaption></figure> <figure><img src="/files/ldN9XftdglCpLWg3GD6i" alt="The mustached character in a plaid shirt holding a pale lager in a brighter pub that differs from the original"><figcaption><p>Result with prompt only.</p></figcaption></figure></div>

### Using Magic Fill

If you need to preserve as much of the background and environment as possible, Magic Fill can be an excellent solution. There are many ways to proceed, here’s one of them:

1. Select the original image where you want to change the character.
2. Click **Open** in Canvas in the [Details Panel](/using-ideogram/ui-overview/ui-components/details-panel).
3. Select the **Magic Fill** icon in the Left Sidebar.
4. Mask the area of the character you want to replace.
5. Click or tap **Next**.
6. Click **Character** at the bottom of the Prompt Box.
7. Select or create a Character Reference.
8. Write a detailed prompt describing the new character’s physical features and the environment.
9. Click **Magic Fill** to generate the images.

<div><figure><img src="/files/gcvOmJigxCANUPN8SQiD" alt="Original pub scene of a bearded man drinking a stout, before the character swap" width="563"><figcaption><p>Original image.</p></figcaption></figure> <figure><img src="/files/a0Cuel0WmKX69kB0OPTK" alt="Magic Fill canvas with the man&#x27;s face masked in pink, plus the prompt, Character chip, and Magic Fill button" width="563"><figcaption><p>Magic Fill mask, Character and prompt.</p></figcaption></figure> <figure><img src="/files/beNZ5SMkO2d5APHI5H6W" alt="Pub scene with the red-haired mustached character replacing the original man while the background is preserved" width="563"><figcaption><p>Result of Character and Magic Fill.</p></figcaption></figure></div>

{% hint style="info" %}
See [Remix](/using-ideogram/features-and-tools/remix) and [Magic Fill](/canvas-and-editing/canvas/magic-fill) to learn more about how to use each feature.
{% endhint %}


# Color Palette

Available to all users, the Color Palette setting lets you guide the overall color tone of your image generations. It’s best used as a creative direction tool rather than for precise color matching. When combined with descriptive color terms in your prompt, Color Palette produces more consistent and visually cohesive results.

To access the Color Palette menu:

1. Select the [Prompt Box](/using-ideogram/ui-overview/ui-components/prompt-box) to expand it (if not already expanded) and display the generation settings.
2. Select **Color** (or the already used color palette thumbnail), to open the **Color palette** menu.

<figure><picture><source srcset="/files/U6mvU8GVzfnGkFT1lFP7" media="(prefers-color-scheme: dark)"><img src="/files/IkeQyVB2UmRba8nRk5Gh" alt="Color button in the Prompt Box showing palette icon" width="290"></picture><figcaption><p>Color Palette menu showing preset options and the Custom section.</p></figcaption></figure>

{% hint style="warning" %}
The Color Palette option is hidden when a **Character Reference** is active. If you previously selected a palette, it’s temporarily disabled and automatically restored once the Character Reference is removed.
{% endhint %}

Once selected, the chosen palette replaces the text label of the **Color** button, showing the active palette.

## Examples

The following examples show how different color palettes can influence the tone and color expression of generated images.

> **Prompt**:\
> \&#xNAN;*A photo of the moon rising above the tree line near a lake at night. The moon is partially obscured by clouds. A wooden cabin is located near the lakeshore. The lake is calm, reflecting the sky and the trees. The ground is covered with pine needles. The background contains mountains.*

<table data-card-size="large" data-view="cards"><thead><tr><th></th><th></th><th></th></tr></thead><tbody><tr><td>No color palette</td><td><img src="/files/rS6qjoHurbWIcRHMfKVn" alt="Moon rising over a lakeside cabin among pines in muted natural night tones" data-size="original"></td><td></td></tr><tr><td>Using the <strong>Ultramarine</strong> color palette</td><td><img src="/files/tGbQdlrFKkKBxGy4xfXX" alt="The same moonlit lakeside cabin scene rendered in deep ultramarine blue tones" data-size="original"></td><td></td></tr></tbody></table>

> **Prompt**:\
> A *dynamic abstract expressionist painting of a mother and child embracing. The mother and child's forms are overlapping brushstrokes, inspired by expressive painting techniques. The background is a radiant glow with vibrant warm hues. The painting exudes profound nurturing love.*

<table data-card-size="large" data-view="cards"><thead><tr><th></th><th></th><th></th></tr></thead><tbody><tr><td>Using the <strong>Ember</strong> color palette</td><td><img src="/files/fYwJMrlyqequz9DV3iWI" alt="Abstract expressionist painting of a mother embracing a child in warm reds, oranges, and pinks" data-size="original"></td><td></td></tr><tr><td>Using the <strong>Jungle</strong> color palette</td><td><img src="/files/Q04Mh3uYtrrZXRz0yGfQ" alt="Abstract expressionist painting of a mother embracing a child in greens, teals, and golden yellows" data-size="original"></td><td></td></tr></tbody></table>

## Custom Color Palette

Users with a **Plus Plan** or higher can create their own custom color palette.

To create one:

1. Scroll to the bottom of the **Color palette** menu and select **Custom**.
2. Enter up to five colors in your palette.
3. Choose colors using the color picker or type hexadecimal RGB values (starting with “#”). Separate multiple values with a space.

<div><figure><picture><source srcset="/files/8vwDIvsD5r4nQpkj4Qbm" media="(prefers-color-scheme: dark)"><img src="/files/z0nGvREsg6LYoiMSKlkr" alt="Defining custom colors using hexadecimal values."></picture><figcaption><p>Defining custom colors using hexadecimal values.</p></figcaption></figure> <figure><picture><source srcset="/files/0n1YlRD2zpqvOLZhhSgz" media="(prefers-color-scheme: dark)"><img src="/files/4Ktz9XTXbTToW1gJTPu9" alt="Defining custom colors using the color picker."></picture><figcaption><p>Defining custom colors using the color picker.</p></figcaption></figure></div>

## Creativity and Experimentation

Using Color Palette not only refines the overall color tone but also influences the composition and atmosphere of the generated image. It encourages experimentation and creative exploration.

> **Prompt**:\
> \&#xNAN;*A minimalist single-line cat design in gold on a black background*

<table data-card-size="large" data-view="cards"><thead><tr><th></th><th></th><th></th></tr></thead><tbody><tr><td><img src="/files/uQv67Py7Op3YKMbDlBA5" alt="Minimalist single-line cat drawn in gold on a plain black background" data-size="original"></td><td>Normal prompt using v2.0 Design style.</td><td></td></tr><tr><td><img src="/files/QTAIv69Z58qPZWhMmtwA" alt="Single-line gold cat on textured black with a metallic gold band along the right edge" data-size="original"></td><td>Using v2.0 Design style with a two-color custom color palette: #000000 #f1c859</td><td><picture><source srcset="/files/sB9JSG905rilGsKC9XG8" media="(prefers-color-scheme: dark)"><img src="/files/4dc5CRcrxVqMMX1LFpsT" alt="Custom palette row with black and gold swatches and the hex values #000000 #f1c859" data-size="original"></picture></td></tr></tbody></table>


# Magic Prompt

Magic Prompt helps you craft better prompts effortlessly. It uses Ideogram’s built-in language model to interpret, refine, or expand your text to increase variety and visual quality in the generated images. You can also write in your native language — Magic Prompt translates and enhances it for you.

## Magic Prompt options

To access the Magic Prompt options:

1. Select the [Prompt Box](/using-ideogram/ui-overview/ui-components/prompt-box) to reveal the generation settings (if not already visible).
2. Choose a model, as the model will determine if Magic Prompt settings can be changed.
3. Select **Magic Prompt** (displayed as the selected option such as <kbd>**Auto**</kbd>) to open the dropdown menu.

<figure><img src="/files/11Qf19j5BFi3fX9kz85c" alt="Prompt Box with arrows pointing to the model picker button and the Magic Prompt button showing Auto"><figcaption></figcaption></figure>

<figure><picture><source srcset="/files/1UBfqoSwcC2htSJ6cDit" media="(prefers-color-scheme: dark)"><img src="/files/jfiyvVmqscTqbtFyve5O" alt="Magic Prompt dropdown menu showing Auto, On, and Off options." width="253"></picture><figcaption><p>Magic Prompt menu.</p></figcaption></figure>

### Magic Prompt Modes

* **Auto** — Lets Ideogram decide how many images use enhanced prompts based on the length of your original prompt.
* **On** — Applies the enhanced prompt to all four generated images.
* **Off** — Uses your original prompt without any modification.

***

## Examples

Here are a few examples of Magic Prompt in action, showing the enhanced prompts and resulting images.

### Example 1 — Cat and beach ball

> **Original Prompt:**
>
> *A cat on the right side of a beach ball on a sunny beach.*

#### With Magic Prompt off:

With Magic Prompt set to **Off**, Ideogram generated four images that follow the instructions from your original prompt.

<figure><img src="/files/rb4maHtAQs20DHxtuUQE" alt="Images generated with Magic Prompt set to Off, using the original prompt."><figcaption><p>With Magic Prompt set to Off, your original prompt is used without modification.</p></figcaption></figure>

#### With Magic Prompt on

In this example, Magic Prompt generated an enhanced version of the prompt, adding common beach elements and introducing artistic and playful details

<figure><img src="/files/jV6w8fe54EMVFK7jiNkL" alt="Images generated with Magic Prompt set to On, showing enhanced prompts with artistic variations."><figcaption><p>With Magic Prompt set to On, the feature enhances your prompt to produce more interesting images.</p></figcaption></figure>

In the example above, the first image was generated by the AI according to the enhanced *Magic Prompt* prompt below:

> **Magic Prompt:**
>
> *A playful cat is sitting on the right side of a vibrant beach ball, situated on a sunny, sandy beach. The beach is dotted with sunbathers and colorful umbrellas. Waves gently lap at the shore, and a pristine blue sky is adorned with a few fluffy white clouds. Seagulls soar overhead, adding to the lively and carefree atmosphere.*

{% hint style="info" %}
**Tip:** When you select an image, the [Details Panel](/using-ideogram/ui-overview/ui-components/details-panel) shows both the original and enhanced prompts if *Magic Prompt* was active when generating that image.
{% endhint %}

Below are a few other examples of images generated with and without Magic Prompt.

### Example 2 — Cupcake and strawberries

> **Original Prompt:**
>
> *Photo of cupcake and strawberries.*

<figure><img src="/files/jYe6yZpc0SrkpOFpiWPy" alt="Photo of a cupcake and strawberries generated with Magic Prompt Off." width="375"><figcaption><p>Photo of a cupcake and strawberries as asked in the prompt.</p></figcaption></figure>

> **Magic Prompt:**
>
> *A delectable photo of a scrumptious cupcake adorned with fresh, vibrant strawberries. The cupcake features a soft, fluffy frosting covered in colorful sprinkles, while the strawberries add a touch of natural sweetness and elegance. The background evokes a sense of warmth and comfort, with a rustic, vintage feel, and a hint of a sunlit afternoon.*

<figure><img src="/files/PiWgmsfuOICGhHLQwaUx" alt="Enhanced cupcake and strawberries image generated with Magic Prompt On." width="375"><figcaption><p>Image generated from the enhanced prompt.</p></figcaption></figure>

### Example 3 — Summer camp logo

> **Original Prompt:**
>
> *Make a logo for a summer camp named "Pinecrest Pioneers Camp."*

<figure><img src="/files/n6a2fiJVRCuxjbwq30Un" alt="Logo created from the original prompt for Pinecrest Pioneers Camp." width="375"><figcaption><p>Logo made from the original prompt.</p></figcaption></figure>

> **Magic Prompt:**
>
> *A vibrant and colorful logo for the "Pinecrest Pioneers Camp" summer camp. It features a pioneer-style wooden cabin nestled among tall pine trees, with a bright yellow sun shining overhead and a blue sky. In the background, there's a lake surrounded by lush green grass. The camp's name is written in bold, playful letters in a mix of red, orange, and yellow, evoking the warmth and excitement of summer. The logo exudes an atmosphere of adventure and friendship.*

<figure><img src="/files/Q7WgfucjfqfvvdLKM5RT" alt="Logo created with Magic Prompt enabled, showing a colorful camp scene." width="375"><figcaption><p>Logo generated from the enhanced prompt.</p></figcaption></figure>


# Negative Prompt

The Negative Prompt feature guides the AI away from generating specific types of images or content. It instructs the AI on what to avoid or exclude in the generated images.

For example, if you’re using an AI to create landscape images but want to avoid beaches, you could use a negative prompt like "beach" or "beach, sand, water, ocean." This helps the AI understand your preferences and constraints so it can generate images that more closely match your intended outcome.

To access the Negative Prompt feature:

1. Select the [Prompt Box](/using-ideogram/ui-overview/ui-components/prompt-box) to reveal the generation settings (if not already visible).
2. Select the **Tools** button to expand the generation tools.
3. Select the **More** button <picture><source srcset="/files/bbvScHeWGxLkjTbtJpXt" media="(prefers-color-scheme: dark)"><img src="/files/G9uvkUnXUA9rkmLWWyVG" alt="More button in the Prompt Box." data-size="line"></picture> to open a dropdown menu where you can enter the terms or concepts you want the AI to avoid.
4. In the **Negative prompt** field, enter the terms or concepts you want the AI to avoid. Separate multiple items with commas (for example: green, green candies, cheese, cheddar.)

<figure><img src="/files/1f6C7n099MupvtyMB6YW" alt="Prompt Box with arrows to the settings and More buttons and the Negative prompt field highlighted in the open dropdown"><figcaption></figcaption></figure>

<figure><picture><source srcset="/files/N7hzoSEwcKUaKLrYk00J" media="(prefers-color-scheme: dark)"><img src="/files/JUqme3vPNPIPjicCabUX" alt="Negative Prompt input field inside the Prompt Box." width="375"></picture><figcaption><p>The Negative prompt field in the More menu of the Prompt Box</p></figcaption></figure>

Here are examples showing how *Negative Prompt* changes image results:

<table data-card-size="large" data-view="cards"><thead><tr><th></th><th></th><th></th></tr></thead><tbody><tr><td><img src="/files/1ryYmYBkaV9QPEnYjHHu" alt="Colorful candies including all colors, generated without a negative prompt." data-size="original"></td><td><strong>Prompt</strong>:<br>An assortment of colorful candies like Smarties or M&#x26;Ms, neatly arranged on a rustic wooden table.</td><td><strong>Negative prompt</strong>:<br>–</td></tr><tr><td><img src="/files/mV16GU8NnNkxNbwMXGOK" alt="Colorful candies with green candies removed using a negative prompt." data-size="original"></td><td><strong>Prompt</strong>:<br>An assortment of colorful candies like Smarties or M&#x26;Ms, neatly arranged on a rustic wooden table.</td><td><strong>Negative prompt</strong>:<br>green, green color, green candies</td></tr><tr><td><img src="/files/R3WjRETDfw5k5l81vORe" alt="Gourmet burger with cheese and fries, generated without a negative prompt." data-size="original"></td><td><strong>Prompt</strong>:<br>Food photography picture of a delicious gourmet burger with a side of french fries and a beverage in the background.</td><td><strong>Negative prompt</strong>:<br>–</td></tr><tr><td><img src="/files/2tJKbkZWnOApNeO4szL8" alt="Gourmet burger without cheese, generated using a negative prompt for cheese." data-size="original"></td><td><strong>Prompt</strong>:<br>Food photography picture of a delicious gourmet burger with a side of french fries and a beverage in the background.</td><td><strong>Negative prompt</strong>:<br>cheese, cheeseburger, cheddar cheese</td></tr></tbody></table>

{% hint style="info" %}

#### Tips:

Here are some tips to get the most out of the feature:

* Use multiple keywords to describe what you don't want.
* Be as precise as possible without providing excessive detail.
* It is often simpler and more effective to write prompts that naturally exclude unwanted elements instead of relying heavily on negative prompts. See the [Handling Negatives](/using-ideogram/getting-started/prompting-guide/4-handling-negatives) section of the *Prompting Guide* for more details.
  {% endhint %}

{% hint style="warning" %}
**Important tip:** If your negative prompt does not seem to work, check whether something in your main prompt interferes with or contradicts it. The content of the regular prompt will always be favored over the negative prompt. For example, a prompt asking for a classical guitar will almost always imply a guitar with strings. Trying to generate a guitar without strings may be difficult because the model usually interprets “guitar” as an object with strings.
{% endhint %}


# Private Generations

With an Ideogram **Plus Plan** or higher, you can generate private images that only you can view.\
Private images remain private even after your subscription ends — you can still access and download them in JPG format. To unlock all download options again, resubscribe to a *Plus Plan* or higher.

For more details about purchasing, upgrading, or managing your subscription, visit [Available Plans](/plans-and-pricing/available-plans).

## Generating Private Images

You can set your generation visibility using the **Visibility** button.

1. Select the [Prompt Box](/using-ideogram/ui-overview/ui-components/prompt-box) to show the generation settings (if not already visible).
2. Select **Visibility** (displayed as the current visibility such as <kbd>**Published**</kbd> or <kbd>**Unpublished**</kbd>) to open the dropdown and select your preferred visibility for the next generated image.

<figure><img src="/files/T3wgzE4hXupumNSY1Alt" alt="Arrow pointing to the Visibility lock button in the Prompt Box with a menu showing Published and Unpublished options"><figcaption></figcaption></figure>

## Viewing Your Private Generations

To view private generations, open [Library](/using-ideogram/ui-overview/pages-ui/library-page) and use the private view where it is available for your account.

## Changing Image Visibility

To make a private image public or a public image private, you can:

1. When viewing an image in detail, select the **Public/Private** button located in the [Details Panel](/using-ideogram/ui-overview/ui-components/details-panel) on the right and select the desired option from the dropdown menu.
2. To update multiple images at once, open [Library](/using-ideogram/ui-overview/pages-ui/library-page), select the images where multi-select is available, select the **More** icon <picture><source srcset="/files/DCiR5D2cnVppKd9qELB3" media="(prefers-color-scheme: dark)"><img src="/files/eVQ3eQw7IgtlCP87XKyl" alt="More icon in the Image Gallery action bar."></picture> in the panel below the [Image Gallery](/using-ideogram/ui-overview/ui-components/image-gallery), and select **Make private** or **Make public** from the menu.


# Render Speed

Render Speed controls how much time Ideogram spends producing an image. It affects generation latency, refinement level, and credit usage. Available speeds depend on the selected model, plan, endpoint, and workflow.

To select a render speed:

1. Open the [Prompt Box](/using-ideogram/ui-overview/ui-components/prompt-box).
2. Open the model picker to choose the specific model you want to use.
3. Open the number of images to be generated.
4. Choose one of the speeds shown for the selected model.

<figure><img src="/files/vzVdjB6BEbD10z3k2yhM" alt="Image count menu open in the Prompt Box with the Render speed section highlighted showing Turbo, Default, and Quality options"><figcaption></figcaption></figure>

## Speed Families

| Speed family           | Use it for                           |
| ---------------------- | ------------------------------------ |
| **Flash**              | Fastest generation where supported.  |
| **Turbo / Fast**       | Quick iteration and brainstorming.   |
| **Default / Balanced** | Normal mode for everyday generation. |
| **Quality**            | More refinement where supported.     |

Not every model supports every render speed. If a speed is not shown in the prompt box or is rejected by the API, choose one of the speeds available for that model.

Credit usage can change by model, render speed, output count, and workflow. See [Available Plans](/plans-and-pricing/available-plans) for the credit system overview and [ideogram.ai/pricing](https://ideogram.ai/pricing) for current plan details.


# Seed Number

The Seed Number feature serves as a unique numerical identifier or starting point for image generation. Think of it as a special code that sets the initial conditions the AI uses to create an image. It’s primarily used to reproduce the same result and ensure consistency across generations.

To access Seed Number:

1. Select the [Prompt Box](/using-ideogram/ui-overview/ui-components/prompt-box) to expand it (if not already expanded) and show the available options.
2. Select the **More** button <picture><source srcset="/files/bbvScHeWGxLkjTbtJpXt" media="(prefers-color-scheme: dark)"><img src="/files/G9uvkUnXUA9rkmLWWyVG" alt="More button icon" data-size="line"></picture> to open the dropdown menu.
3. In the **Seed number** field, enter the number you want to use for the next generation.

<figure><img src="/files/YnkV9aU8QOjD9VmFrtqc" alt="Prompt Box with arrows highlighting the settings and More buttons, and the Seed number field shown in the open dropdown"><figcaption></figcaption></figure>

<figure><picture><source srcset="/files/aEJ4iibdEMu5sfj1HvNf" media="(prefers-color-scheme: dark)"><img src="/files/zkAxjjHaG7uhrmgMzpIr" alt="Seed number field in the More menu." width="375"></picture><figcaption><p>Seed number field in the More menu.</p></figcaption></figure>

If no Seed Number is entered, the AI will automatically assign a random value. You can enter any number to act as a seed for generation.

When viewing an image, its Seed Number appears in the [Details Panel](/using-ideogram/ui-overview/ui-components/details-panel) on the right (desktop) or below the image (mobile).

{% hint style="warning" %}
**Warning:** In Ideogram **Model v3.0**, using the same Seed Number with different [Render Speeds](/using-ideogram/generation-settings/render-speed) won’t generate identical images as in earlier versions. However, the results will remain visually similar if the same prompt is used.
{% endhint %}

## Seed Number Use Cases

One example is to keep the same Seed Number and generate the same prompt using different Render speeds, as shown below:

<table data-view="cards"><thead><tr><th></th><th></th></tr></thead><tbody><tr><td>Seed: 406220<br>Rendering: Turbo</td><td><img src="/files/CglFanTYYK4tkpaDjv2m" alt="Image generated with Turbo render speed using Seed 406220" data-size="original"></td></tr><tr><td>Seed: 406220<br>Rendering: Default</td><td><img src="/files/M7OBlL6hUVrTFM0hL8hL" alt="Image generated with Default render speed using Seed 406220" data-size="original"></td></tr><tr><td>Seed: 406220<br>Rendering: Quality</td><td><img src="/files/KJE0ULyg8azPQl17wI1P" alt="Image generated with Quality render speed using Seed 406220" data-size="original"></td></tr></tbody></table>

You can also use the Seed Number to make small prompt adjustments while preserving most of the original composition.

<table data-view="cards"><thead><tr><th></th><th></th><th></th></tr></thead><tbody><tr><td><strong>Prompt</strong>: <em>... The background is a dark <mark style="color:green;">blue</mark> gradient, ...</em><br><strong>Seed</strong>: 406220<br><strong>Rendering</strong>: Default</td><td><img src="/files/X3az5DYluCQuu4HH0mPI" alt="Stylized bird with flowing blue and brown feathers on a dark blue gradient background" data-size="original"></td><td></td></tr><tr><td><strong>Prompt</strong>: <em>... The background is a dark <mark style="color:green;">purple</mark> gradient, ...</em><br><strong>Seed</strong>: 406220<br><strong>Rendering</strong>: Default</td><td><img src="/files/Ar17Gupb98AAvKjktHCk" alt="The same stylized bird composition on a dark purple gradient background" data-size="original"></td><td></td></tr><tr><td><strong>Prompt</strong>: <em>... The background is a dark <mark style="color:green;">red</mark> gradient, ...</em><br><strong>Seed</strong>: 406220<br><strong>Rendering</strong>: Default</td><td><img src="/files/DuaRCMoSrnWbaeJMtVuU" alt="The same stylized bird with red breast accents on a dark red gradient background" data-size="original"></td><td></td></tr></tbody></table>

The images aren’t identical, but they maintain the same composition and overall appearance. Only the background changes as specified.

{% hint style="warning" %}
**Warning:** Even when using the same *Seed Number*, changing a key concept in the prompt — for example, replacing “photography” with “painting,” or switching to another **model** — will generate different images.
{% endhint %}


# Tile

## Using the Tile Feature

The Tile feature lets you generate images that repeat seamlessly without visible borders or interruptions. It’s available to **all paid users** and is ideal for creating backgrounds, textures, and repeating patterns directly from a prompt.

To access Tile:

1. Select the [Prompt Box](/using-ideogram/ui-overview/ui-components/prompt-box) to expand it (if not already open) and display the generation settings.
2. Ensure **Model version 1.0** is selected under [Models + variations](/using-ideogram/generation-settings/available-models) — the Tile option is greyed out and unavailable when using any other model version.
3. Select the **Tools** button to expand the generation tools.
4. Select the **More** button <picture><source srcset="/files/bbvScHeWGxLkjTbtJpXt" media="(prefers-color-scheme: dark)"><img src="/files/G9uvkUnXUA9rkmLWWyVG" alt="More options icon" data-size="line"></picture> to open a dropdown menu.

<figure><img src="/files/zmJJuLTr1RQQ128aN4d7" alt="Ideogram home page with the settings and More buttons highlighted, revealing a dropdown with the Tile option set to Off"><figcaption></figcaption></figure>

<figure><picture><source srcset="/files/Ma1yH4QH1Jb8tQq1ybma" media="(prefers-color-scheme: dark)"><img src="/files/BK8vTTcnWZ5jqNu18gWe" alt="Dropdown panel with a Tile toggle set to Off next to a Grid selector, plus Seed number and Negative prompt fields" width="375"></picture><figcaption><p>The More dropdown menu.</p></figcaption></figure>

{% hint style="warning" %}
**Important note:** The Tile feature is available only in **Ideogram model version 1.0**.
{% endhint %}

4. Select the **dropdown arrow** at the right end of the **Tile** option to display a list of available tiling styles.

<figure><picture><source srcset="/files/ge7rcP0NysC9fUVqIZy4" media="(prefers-color-scheme: dark)"><img src="/files/o6xtGkW5bmSStfLJ5uae" alt="Tile style menu expanded to list Off, Grid, Vertical brick, Horizontal brick, Column, and Row" width="375"></picture><figcaption><p>Available grid options.</p></figcaption></figure>

#### Grid Styles

These options define how your image repeats:

* **Off** — Disables the tiling feature.
* **Grid** — Arranges images in a regular checkered grid.
* **Vertical brick** — Offsets each column by half its height relative to the one beside it.
* **Horizontal brick** — Offsets each row by half its width relative to the one above or below.
* **Column** — Tiles images in a single vertical column.
* **Row** — Tiles images in a single horizontal row, ideal for banners.

Here are some visual examples of each grid style:

<table data-card-size="large" data-view="cards"><thead><tr><th></th><th></th><th></th></tr></thead><tbody><tr><td>No tile (generated without tiling)</td><td><img src="/files/jHOFvJbSNGb9jl7cnOlO" alt="Original image to be remixed." data-size="original"></td><td>This is the image that will be remixed to generate the tile examples.</td></tr><tr><td>Grid (4x4)</td><td><img src="/files/01y40BpXh2ojPlZbgMEY" alt="Example of the Grid tiling style (4×4)" data-size="original"></td><td>This is the most common type of tile, arranged in a checkered grid.</td></tr><tr><td>Vertical brick (4x4)</td><td><img src="/files/BoVhlt4qGtLVnWhvreZv" alt="Cottage-and-garden scene tiled 4x4 in vertical brick style, each column offset by half a tile" data-size="original"></td><td>In this example, you can see that the columns are aligned but the rows alternate.</td></tr><tr><td>Horizontal brick (4x4)</td><td><img src="/files/aGG0qlvm7LJJf3jyp1Xl" alt="Yellow cottage scene tiled 4x4 in horizontal brick style, each row offset by half a tile" data-size="original"></td><td>Here, in contrast, you can see that the rows are aligned but the columns alternate.</td></tr><tr><td>Column (1x1)</td><td><img src="/files/YO4gQiKK9zzLkmE6B739" alt="Tall single-column tile of dark ivy climbing a weathered stone wall" data-size="original"></td><td>It's often a good idea to create your image in the same direction of the column (or row) to minimize the effect of repetition.</td></tr><tr><td>Column (2x1)</td><td><img src="/files/uVnB1qe9RlirPLFC9V5g" alt="The ivy-covered stone wall repeated twice vertically as a seamless 2x1 column tile" data-size="original"></td><td></td></tr></tbody></table>

Row (1x1)

<figure><img src="/files/bZtvGyOJ1H011Mx18baV" alt="Wide shot of assorted glass bottles lined up along a dimly lit bar counter"><figcaption><p>Here, the image was generated horizontally to get the maximum number of bottle and minimize visible repetition.</p></figcaption></figure>

Row (2x1)

<figure><img src="/files/3fjAYUMObgcY5L0HaQGS" alt="The bar counter image repeated twice side by side, forming a seamless extra-wide banner of bottles"><figcaption></figcaption></figure>

### Viewing and Adjusting Tiles

When viewing the generated images, you can toggle the tile’s animation by selecting the **Play** <img src="/files/2Kjn7Kg9xxTLiKihneFY" alt="Play button icon" data-size="line"> or **Pause** <img src="/files/xRf1iVEorQxR2mHzo6nF" alt="Pause button icon" data-size="line"> buttons in the upper corner, depending on the current animation state.

You can adjust the on-screen tile pattern’s size using the **Tile scale slider** located at the top right...

<figure><img src="/files/yHBLvuPsgfhbk9l92RFk" alt="Vertical tile scale slider with its handle at 50%" width="118"><figcaption></figcaption></figure>

## Downloading Tiles

You can export your seamless Tile images in two ways:

1. From the [Details Panel](/using-ideogram/ui-overview/ui-components/details-panel) — While viewing a tile image, select the **dropdown arrow** at the right end of the **Download** button, then choose a format. Available formats vary depending on the tile type generated.

<figure><picture><source srcset="/files/OM5BpdAcoaCC42sDWI3w" media="(prefers-color-scheme: dark)"><img src="/files/4WmpfnJgDUDbArZGO0nW" alt="Download menu listing 1x1, 2x1, 4x1, and 8x1 tile options" width="160"></picture><figcaption><p>Menu showing the available download Tile formats.</p></figcaption></figure>

2. From **Library** — When one or more tiles are selected, click **Download** below the image gallery. The **2×2** (or **2×1 / 1×2**, depending on the tile type) versions are automatically packaged in a **ZIP** file and downloaded to your computer where supported.

## Combining Remix and Tile

You can combine [Remix](/using-ideogram/features-and-tools/remix) and Tile to refine or extend an image for use as a banner, pattern, or background. This combination helps you generate exactly the composition and repetition you want.

Here are some examples:

### Example 1

Image generated from a normal prompt:\
![Watercolor of a fluffy sparrow perched on a steaming teacup decorated with flowers](/files/3swrdlwkcIhh1wRmGimT)

2x2 Tile generated from a Remix of the image above:\
![Seamless 2x2 tile of the watercolor sparrow perched on a teacup](/files/HuYkD1Oecf6rS0W2CM46)

### Example 2

Image generated from a normal prompt:\
![Seven cats peeking over a weathered wooden fence under a blue sky](/files/6UkcuVNU7kRPifxPdh00)

2x1 Tile generated from a Remix of the image above:\ <img src="/files/JbQxtCzXUpSIrv1SVXAy" alt="The cats on a fence image tiled 2x1 into a wide seamless banner of kittens peering over fence posts" data-size="original">


# Features and Tools

Use these guides for Ideogram workflows beyond basic prompt-based generation:

* [Batch Generation](/using-ideogram/features-and-tools/batch-generation) - upload a spreadsheet to run many prompt-based generations at once.
* [Background Remover App](/using-ideogram/features-and-tools/background-remover-app) - use the Apps surface to remove an image background and download a transparent PNG/cutout.
* [Describe](/using-ideogram/features-and-tools/describe) - generate a text description from an uploaded or generated image.
* [Reference Features](/using-ideogram/features-and-tools/reference-features) - learn how Character Reference, Style Reference, and other reference tools guide generation where supported.
* [Remix](/using-ideogram/features-and-tools/remix) - create a new image using an existing image as the parent.
* [Replace or Remove Background](/using-ideogram/features-and-tools/replace-or-remove-background) - remove a background for transparency or generate a replacement background from a prompt.
* [Search](/using-ideogram/features-and-tools/search) - find public images or your own images where search is available.
* [Upscale](/using-ideogram/features-and-tools/upscale) - increase image resolution and detail where supported.

Feature availability can vary by model, plan, endpoint, and rollout.

## Ideogram 4.0 Workflows

Ideogram 4.0 is the current model for design-quality outputs and reliable editing. Where available, supported post-generation workflows include remove background, prompt edit, layerize or editable text layers, extend, reframe, upscale, remix, and Magic Fill.


# Prompt Builder

Prompt Builder is a visual tool for crafting structured JSON captions for **Ideogram 4.0** — without writing JSON by hand. It gives you a guided interface for defining your scene, placing elements precisely using bounding boxes, and watching the JSON prompt build in real time as you work.

It's designed for users who want the layout control and color precision that JSON prompting offers, but prefer a visual, form-based approach over writing raw JSON.

## Accessing Prompt Builder

Prompt Builder is accessible from the **Explore** page at [ideogram.ai/t/explore](https://ideogram.ai/t/explore). Select **Prompt Builder** from the tabs at the top of the prompt box to open it.

![Prompt Builder tab on the Explore page prompt box](/files/HzxrduhZwZnTFouUwZxJ)

Once open, Prompt Builder displays a three-panel layout:

* **Left panel** — Your input: scene settings, background, and elements
* **Center canvas** — A visual grid where you place and resize bounding boxes
* **Right panel** — A live JSON preview that updates as you fill in each field

![Prompt Builder overview showing the three-panel layout](/files/H93SDv7gp4AE6ef70IyN)

***

## Two Modes: Manual and Generate

Prompt Builder has two modes, selectable via the **Manual** and **Generate** tabs at the top of the left panel.

### Manual

Use Manual mode when you want full control over the structure of your scene. You define the scene description, background, aspect ratio, and each individual element yourself.

### Generate

Use Generate mode when you want Prompt Builder to create the scene structure for you. Simply describe your image in plain language and click **Generate scene** — Prompt Builder will automatically populate the scene fields, background, and elements based on your description.

![Generate mode with a plain-text description field and Generate scene button](/files/3jQTMNGiQ1059fi1nSnG)

This is the fastest way to get started with a complex composition. Once the scene is generated, you can switch to Manual mode to fine-tune individual elements.

***

### Manual Mode Walkthrough

### Scene

The **Scene** section at the top of the left panel contains two fields:

* **Aspect ratio** — Choose the aspect ratio for your image. This controls the shape of the canvas in the center panel.
* **Scene description** — A short description of the overall image. This maps to `high_level_description` in the JSON output.

### Background

The **Background** field describes the setting or environment behind your elements — the sky, surface, room, landscape, or any other backdrop. This maps to `compositional_deconstruction.background` in the JSON.

### Elements

The **Elements** section is where you add the individual objects and text that appear in your scene. Each element gets its own bounding box on the canvas and its own entry in the JSON.

Click **Add object** to add a visual subject, or **Add text** to add in-image text.

For each element you can set:

* **Type** — Object or Text
* **Description** — What the element looks like (for objects), or visual styling notes (for text)
* **Text** — The literal text string to render (for text elements only)

Each element is listed in the left panel and shown as a labeled, color-coded bounding box on the canvas.

![Manual mode showing a fully built scene with multiple elements, bounding boxes on the canvas, and the live JSON preview on the right](/files/pyLO1I400xDf7vsaFEyZ)

### Placing Bounding Boxes

Bounding boxes define where each element appears in the frame. There are two ways to set them:

1. **Draw on the canvas** — Click and drag directly on the grid to draw a bounding box for the currently selected element.
2. **Edit numerically** — The bounding box coordinates are reflected in the JSON panel on the right and update in real time.

Each element's bounding box is shown in a distinct color matching its entry in the element list, making it easy to see which box belongs to which element.

![Element editing panel showing a selected element with its description field and corresponding bounding box highlighted on the canvas](/files/MMWREjU9rFWXbS65fqVX)

***

## The JSON Panel

The right panel shows a live preview of the JSON caption as you build it. Every field you fill in — scene description, background, element descriptions, bounding boxes — is instantly reflected in the structured output.

You can:

* **Download** the JSON using the download icon at the top of the panel
* **Copy** the JSON to your clipboard using the copy icon
* **Import** an existing JSON caption using the **Import** button at the top right of the page, to load and edit a previously saved prompt

***

## Generating from Prompt Builder

Once your prompt is ready, click **Enhance & apply prompt** at the bottom right of the screen. This sends your structured JSON caption to the Ideogram generator and queues your images for generation.

You can follow generation progress from the **Generating images...** indicator that appears at the bottom of the screen once the job is submitted. Click **View in Creations** to go directly to your generated images once they're ready.

<figure><img src="/files/pwVPdG1Mas8wixedSIE9" alt="Prompt box on the generate page filled with a structured JSON caption describing a bear chasing a fox through an autumn forest"><figcaption></figcaption></figure>

![Generation progress indicator showing four images at 6% with a View in Creations button](/files/LW1QQjKGNQKTzbbaLmkv)

***

## Other Controls

* **Reset all** — Clears all fields and resets the canvas to a blank state. Available at the top right of the page.
* **Import** — Loads an existing JSON caption into Prompt Builder so you can edit and re-use it.
* **Build from image** — Generates a structured JSON caption from an uploaded image, populating the scene and element fields automatically based on what the model detects in the image.
* **Generate prompt** — Generates a plain-text prompt from the current canvas state without opening the full generator.

***

## Tips

* Use **Generate mode** first to scaffold a complex scene quickly, then switch to **Manual** to adjust individual element descriptions or bounding boxes.
* Draw bounding boxes that don't overlap, especially for text elements — overlapping boxes can cause elements to compete for the same canvas region.
* The JSON panel is fully editable. If you prefer to tweak a value directly in JSON rather than through the form, you can do so.
* Prompt Builder is designed specifically for **Ideogram 4.0**. The JSON caption format it produces is optimized for that model.

For more on the JSON caption format and how bounding boxes work, see the [Prompting Guide — JSON Prompting](https://claude.ai/chat/818e9ae9-6f23-4a27-aed1-4a88ea9855c5).


# Image Studio

This is basically Canvas.


# Batch Generation

Batch Generation lets you create many generations from a spreadsheet of prompts and settings.

{% hint style="info" %}
Batch Generation is available where your plan and account support it, typically on Pro and Team plans.
{% endhint %}

Upload a .csv, .xls, .xlsx, or .ods spreadsheet up to 1 MB. A batch can include up to 500 prompt rows plus one header row. Each prompt row becomes one generation, and num\_images controls how many images each generation creates.

## How to Use Batch Generation

1. Open **Batch** under the Tools section in the [Navigation Bar](/using-ideogram/ui-overview/ui-components/navigation-bar) on the side (desktop) or bottom (mobile).
2. Download the simple or full template.
3. Fill in the spreadsheet using supported columns and values.
4. Upload the spreadsheet.
5. Review the preview, total generations, image count, and required Priority credits.
6. Start the batch.
7. Return to the Batch page to review progress, stop or resume supported jobs, and download completed results as a ZIP file.

<figure><img src="/files/9bjmRwTfy7QiqM3nUj5f" alt="Batch Generation page with an arrow to Batch in the sidebar and two completed jobs listed at 100% with Done status"><figcaption></figcaption></figure>

Generated images are also available from your [Library](/using-ideogram/ui-overview/pages-ui/library-page) where your account and current product surface support them.

## Template Columns

The full template can include these columns:

| Column            | Purpose                                                          |
| ----------------- | ---------------------------------------------------------------- |
| `prompt`          | Text prompt for the generation.                                  |
| `visibility`      | Public/private visibility where private generation is supported. |
| `aspect_ratio`    | Aspect ratio such as `1:1` or `16:9`.                            |
| `magic_prompt`    | Magic Prompt setting.                                            |
| `model`           | Model label supported by the batch workflow.                     |
| `num_images`      | Number of images for each prompt row.                            |
| `seed_number`     | Seed value where supported.                                      |
| `rendering`       | Render speed where supported by the model.                       |
| `negative_prompt` | Terms or concepts to avoid where supported.                      |
| `style`           | Style setting where supported.                                   |
| `color_palette`   | Preset or custom color palette where supported.                  |

If a column has a default in the template or product flow, Ideogram applies that default when the cell is left blank.

## Formatting Tips

* Keep the header row exactly aligned with the template column names.
* Remove example rows before uploading your file.
* Save CSV files as UTF-8 when possible.
* In spreadsheet apps, format cells as text to prevent values such as `2:3` from being converted to dates.
* If upload validation fails, fix the highlighted rows or columns and upload again.

## Credits

Batch Generation uses Priority credits. Credit usage depends on the selected model, render speed, number of prompt rows, and `num_images` value.

For current plan and credit details, see [Available Plans](/plans-and-pricing/available-plans) and [ideogram.ai/pricing](https://ideogram.ai/pricing).


# Background Remover App

The Background Remover App is a task-focused workflow in **AI Apps**, accessible from the Navigation Bar under the Tools category. It lets you upload or select an image, remove the background, preview the transparent result, and download the output.

Open it from **AI Apps** where available, or visit [ideogram.ai/apps/background-remover](https://ideogram.ai/apps/background-remover).

<figure><img src="/files/tmn0W1hVy6GG28EcxE4L" alt="Ideogram Apps page with an arrow to AI Apps in the sidebar and cards for Background remover and Recompose"><figcaption></figcaption></figure>

## What It Does

**Remove BG** identifies the foreground subject and returns a transparent PNG/cutout.

The app focuses on background removal. If you want to generate a new prompt-based background behind the subject, use [Replace Background](/using-ideogram/features-and-tools/replace-or-remove-background#replace-background).

## Using the App

1. Open **AI Apps** from the [Navigation Bar](/using-ideogram/ui-overview/ui-components/navigation-bar).
2. Choose **Background Remover**.
3. Upload an image, paste one, drag one in, select an example, or choose a Library image where available.
4. Select **Remove background**.
5. Preview the transparent result.
6. Download the PNG or continue editing where supported.

<figure><img src="/files/uO3uXqx320hGEobRwZIp" alt="Background remover playground with an upload area beside a pair of white sneakers on a checkerboard transparent background"><figcaption></figcaption></figure>

The API version of background removal is documented at [developer.ideogram.ai](https://developer.ideogram.ai/api-reference/api-reference/remove-background).

## Related Background Tools

Ideogram also supports background actions from image details and import workflows:

* [Remove Background](/using-ideogram/features-and-tools/replace-or-remove-background#remove-background) - creates a transparent PNG/cutout.
* [Replace Background](/using-ideogram/features-and-tools/replace-or-remove-background#replace-background) - generates a replacement background from a prompt.


# Describe

The Describe feature analyzes any image — uploaded[^1] or generated — and produces a detailed text description. Use it to understand how Ideogram interprets visual elements and to identify the type of prompt wording that would recreate a similar result.

## How to Access the Feature

You can access Describe in several ways:

1. From image feeds, such as Home and Library –\
   Hover over any image in the [Image Gallery](/using-ideogram/ui-overview/ui-components/image-gallery), select the **More** icon <picture><source srcset="/files/DCiR5D2cnVppKd9qELB3" media="(prefers-color-scheme: dark)"><img src="/files/eVQ3eQw7IgtlCP87XKyl" alt="More icon"></picture> at the top of the image, and choose **Describe** from the [More menu](/using-ideogram/ui-overview/ui-components/more-menu-...).
2. From image details –\
   In the [Details Panel](/using-ideogram/ui-overview/ui-components/details-panel), select the **Describe** button.\
   Alternatively, select the **More** icon <picture><source srcset="/files/DCiR5D2cnVppKd9qELB3" media="(prefers-color-scheme: dark)"><img src="/files/eVQ3eQw7IgtlCP87XKyl" alt="More icon"></picture> in the upper-right corner and choose **Describe** from the More menu.
3. When [importing an image](/using-ideogram/ui-overview/ui-components/prompt-box#importing-an-image) into the [Prompt Box](/using-ideogram/ui-overview/ui-components/prompt-box) –\
   In the popup window, select **Describe** to generate an automatic description.
4. When using [Remix](/using-ideogram/features-and-tools/remix) or [Character Reference](/using-ideogram/generation-settings/character-reference) –\
   Click the Remix or Character Reference thumbnail at the bottom of the Prompt Box, then select **Describe** from the dropdown.

<figure><img src="/files/cT9f0WvTBAYKtiXoNCVV" alt="Popup menu over an imported landscape thumbnail with an arrow pointing to the Describe button among options like Remix and Upscale"><figcaption></figcaption></figure>

<div><figure><picture><source srcset="/files/R0RfSw6adJIWeYz4haUI" media="(prefers-color-scheme: dark)"><img src="/files/l9csBnMWYF1hwEOYQfIH" alt="Remix dropdown" width="220"></picture><figcaption><p>Remix dropdown.</p></figcaption></figure> <figure><picture><source srcset="/files/ZRRZIJMeocOJGy7IuPrC" media="(prefers-color-scheme: dark)"><img src="/files/bJZBE5mvFXNz6Y20NFwN" alt="Character Reference dropdown" width="220"></picture><figcaption><p>Character Reference dropdown.</p></figcaption></figure></div>

***

## Examples of Descriptions

When you activate **Describe**, Ideogram analyzes your image and generates a prompt that describes its visual content.

{% hint style="info" %}

## Tips

The description output depends on the **Model version** you selected.

* **Model version 3.0** produces more detailed and slightly longer prompts.
* **Model versions 2.0**, **2a**, and **1.0** return shorter, simpler descriptions.

If the result isn’t what you expected, crop or zoom in on your image using the [Editor](/canvas-and-editing/editor). Adjusting the framing can generate a different prompt and improve the results.
{% endhint %}

The following examples show how Describe converts real photos into text prompts. Each prompt was then used to generate new images, **without** [Remix](/using-ideogram/features-and-tools/remix) or [Magic Prompt](/using-ideogram/generation-settings/magic-prompt) enabled.

<figure><img src="/files/B71bUu2qL4rkhyT1h2yg" alt="Photo of an American Goldfinch with bright yellow plumage and black and white wings perched on a branch among green leaves"><figcaption><p>Original photo.</p></figcaption></figure>

> **Prompt from Describe 3.0:**
>
> *A close-up photograph of an American Goldfinch perched on a dark brown tree branch. The bird has vibrant yellow plumage on its head, back, and wings, with distinctive black and white wing bars. The goldfinch's beak is bright orange-yellow, and its eye is dark and alert. The bird is positioned facing right, gripping the rough-textured branch with its feet. In the background, there are green leaves visible, slightly out of focus, creating a natural bokeh effect. The lighting is bright and natural, highlighting the bird's bright yellow feathers. The composition is sharp and detailed, with the goldfinch positioned in the left two-thirds of the frame. The background has a blue-green tint, suggesting a summer or late spring setting.*

> **Prompt from Describe 2.0:**
>
> *A vibrant yellow bird perched on a slender brown branch. The bird has black and white markings on its wings and tail. The backdrop consists of green leaves, suggesting that the bird is in a tree. The blue sky forms the upper portion of the image, providing a serene backdrop to the bird's bright plumage.*

<div><figure><img src="/files/CO2U32r1RSQHUTB5iKr1" alt="AI-generated goldfinch with streaky olive-yellow plumage perched on a bare branch surrounded by green leaves"><figcaption><p>Generated with 3.0, Realistic style, using Describe 3.0.</p></figcaption></figure> <figure><img src="/files/DVRuHxM0EgEnm8IlSCGL" alt="AI-generated goldfinch with vivid yellow body and black and white wing bars perched on a thick gray branch"><figcaption><p>Generated with 2.0, Realistic style, using Describe 3.0.</p></figcaption></figure></div>

<div><figure><img src="/files/XcOuddHoGQBe3Hpk2PGO" alt="AI-generated yellow songbird perched on a slender twig against a clear blue sky"><figcaption><p>Generated with 3.0, Realistic style, using Describe 2.0.</p></figcaption></figure> <figure><img src="/files/cTxKMYKNszEopXV5tQbL" alt="AI-generated bright yellow bird with black and white wings on a bare branch beneath green leaves"><figcaption><p>Generated with 2.0, Realistic style, using Describe 2.0.</p></figcaption></figure></div>

***

<figure><img src="/files/jW4Q68ZAkcCyjovPisEa" alt="Aerial drone photo of a small town along a two-lane road, surrounded by autumn forest with a lake on the right"><figcaption><p>Original drone photo.</p></figcaption></figure>

> **Prompt from Describe 3.0:**
>
> *An aerial photograph of a small town during autumn, captured from a high drone perspective. The main road runs through the center of the image, a two-lane asphalt road with yellow center lines. The town is nestled between dense forested hills covered in vibrant fall foliage featuring orange, yellow, and red leaves. The buildings are predominantly white and gray residential homes with pitched roofs, scattered along both sides of the main road. A large body of water, a lake, is visible on the right side of the image, with dark blue water and a rocky shoreline. The sky is bright blue with wispy white cirrus clouds stretching across it. The landscape shows a mix of deciduous and evergreen trees, with the foliage displaying various shades of autumn colors. The terrain rises from the town toward the hills in the background. The image has natural lighting from a clear day, creating strong contrast between the bright foliage and the deep blue sky. The photograph captures the entire town layout, from the dense residential area to the waterfront, showing the natural integration between the town and its surrounding natural landscape.*

> **Prompt from Describe 2.0:**
>
> *A picturesque town nestled between a dense forest and a serene lake. The town is characterized by a main road that runs through it, flanked by houses on both sides. The houses vary in size and color, with some having red roofs. The forest is ablaze with autumn colors, ranging from golden yellows to fiery reds and deep oranges. In the background, majestic mountains rise, partially obscured by the mist. The sky above is clear with a few wispy clouds, suggesting a bright and sunny day.*

<div><figure><img src="/files/7o2n5wgk70KYy3cumlMQ" alt="AI-generated aerial view of a lakeside town in warm light with vivid red and orange autumn trees lining the main road"><figcaption><p>Image generated with 3.0, General style, using Describe 3.0.</p></figcaption></figure> <figure><img src="/files/A8dI0yoymZQPpYwYOfRX" alt="AI-generated aerial view of a lakeside village under streaked cirrus clouds with a straight road running toward hills"><figcaption><p>Image generated with 2.0, General style, using Describe 3.0.</p></figcaption></figure></div>

<div><figure><img src="/files/Mai4qGaHlqqsKfkUVtXy" alt="AI-generated view of colorful village houses along a road with autumn forest, mountains, and a lake behind"><figcaption><p>Image generated with 3.0, General style, using Describe 2.0.</p></figcaption></figure> <figure><img src="/files/amZugcjDOVsX8BQsxEOK" alt="AI-generated aerial view of a village road leading toward a misty lake between forested autumn hills"><figcaption><p>Image generated with 2.0, General style, using Describe 2.0.</p></figcaption></figure></div>

{% hint style="warning" %}
**Note:** The Describe feature is available to all users and supports images generated or uploaded through Ideogram. A **Plus Plan** or higher is required to upload an image.
{% endhint %}

[^1]: You need a **Plus Plan** or higher to upload images.


# Reference Features

Reference features let you guide a generation with images, saved assets, or trained assets in addition to your text prompt. Compatibility varies by model, plan, endpoint, and rollout.

{% hint style="info" %}
**Credit usage:** Reference and Edit image tools use **priority credits** on paid plans — they don't run in the slow queue. On the Free plan, these tools run using **Slow credits**.
{% endhint %}

## Character Reference

[Character Reference](/using-ideogram/generation-settings/character-reference) uses a selected character image or saved character to guide a person's or character's appearance across supported generations.

## Style Reference

[Style Reference](/using-ideogram/features-and-tools/reference-features/style-reference) uses a selected image or saved style to guide the visual look, composition, color, or design language of supported generations.

## Product References

Product references may appear where public and supported. Use them to guide product or object consistency in workflows that expose the feature.

## Custom Models

Custom Models let you train an image model on approved brand, subject, or style assets so new generations follow a consistent visual identity. Use them when your account has access to train, manage, share, or select custom model assets.

Custom Models are available on Team, Pro, and Enterprise plans and through the API where supported. In the app, open the Models tab to create a model, upload a training set, review generated captions, and start training. Training sets typically use 15 to 100 images; quality and consistency matter more than quantity.

For production workflows, Custom Models can support brand systems, campaign art, product photography styles, character or illustration styles, posters, print-on-demand assets, and other repeated visual directions.

## Compatibility

Reference features can disable or change other controls. For example, available styles, color controls, seed, negative prompt, model choices, or editing workflows may change when a reference is active.

If a reference control is not shown, choose a compatible model or workflow, or use another supported reference option.


# Style Reference

The Style Reference feature helps you create visually consistent and appealing images from a prompt. Choose from a curated library of ready‑made styles, or upload up to three reference images to design your own custom style. Reuse your styles anytime to keep your creations cohesive and polished.

## Using Style Reference

To generate an image with a selected Style:

1. Click or tap inside the [Prompt Box](/using-ideogram/ui-overview/ui-components/prompt-box) to reveal the option bar (if not already visible).
2. Select the **Tools** button to expand the generation tools.
3. Select **Style** to open the Styles popup.\
   (v3.0 models only. See [Styles in Older Models](/using-ideogram/features-and-tools/reference-features/style-reference/styles-in-older-models) for older models.)
4. Select one of the available options (see details below).
5. Enter your prompt and adjust any generation settings as needed.
6. Click or tap **Generate**.

<figure><img src="/files/kes6bwPVBsOdwu0Sv7Hq" alt="Ideogram home page with numbered callouts marking the Tools toggle and the Style button in the Prompt Box option bar"><figcaption></figcaption></figure>

<figure><picture><source srcset="/files/doWDT2utvRauGRpP3BiA" media="(prefers-color-scheme: dark)"><img src="/files/6X5BZuuVixar6IHY0Cuj" alt="Styles popup showing Explore, Recents, My styles, and available modes"></picture><figcaption><p>The Styles popup showing the available options.</p></figcaption></figure>

### Available Modes

* **Auto** – Automatically selects the most suitable style based on your prompt.
* **General** – A flexible mode suitable for most uses, including artistic and abstract work.
* **Realistic** – Produces lifelike photography with authentic colors, textures, and lighting.
* **Design** – Ideal for clean, vector-style images such as logos, posters, and other design assets.

{% hint style="warning" %}
**Warning:** The **Random** mode is **deprecated** and no longer available.
{% endhint %}

#### While Using a Character Reference

If a [Character Reference](/using-ideogram/generation-settings/character-reference) is present in the [Prompt Box](/using-ideogram/ui-overview/ui-components/prompt-box), the available modes adapt automatically. The selected Mode applies to the next generated image and incorporates the active Character Reference:

<figure><picture><source srcset="/files/3mtksP27hYaOALwdGLhl" media="(prefers-color-scheme: dark)"><img src="/files/dHe0C1UWN37Ryb9KWpJB" alt="Modes available when a Character Reference is active."></picture><figcaption><p>Modes available when a Character Reference is active.</p></figcaption></figure>

* **Auto** – Automatically determines the most suitable rendering style based on your prompt and the referenced character.
* **Realistic** – Generates lifelike results, preserving the character’s facial features, colors, and textures as faithfully as possible.
* **Fiction** – Interprets the character creatively, blending stylized elements while keeping key traits recognizable.

### Style Presets

The following preset options are always available, regardless of whether you are generating normally or using a Character Reference.

* **Explore** – Select a style from a curated library of popular aesthetics.
* **Recents** – Reuse a style from your most recently used styles.
* **My styles** – Choose one of your custom styles.
* **Quick reference** – Upload or select up to three images to define a **temporary custom style** that will not be saved.

### Examples

These examples show how different style presets reimagine Grant Wood’s *American Gothic* using the same prompt.

> **Prompt:**
>
> *A stern couple in front of a white church with a Gothic-style window. The woman wears a brown polka-dotted dress with a white lace collar and a large brown brooch, while the man holds a pitchfork and wears a black suit with a light blue shirt, white collar, and round wire-rimmed glasses. The church's white exterior features vertical siding, and the background includes green trees and a red barn.*

The following images show the output produced by a few preset styles.

<div><figure><img src="/files/iRLVIXwcCrOeMixJGj9t" alt="Flat abstract illustration of the American Gothic couple in bold shapes, with a blue line-drawn church and green blobs"><figcaption><p>Abstract Organic.</p></figcaption></figure> <figure><img src="/files/Y0nw1GOCX4O2uc9SEe1g" alt="Retro film-style photo of the stern couple with a pitchfork in front of a white church"><figcaption><p>Analog Nostalgia.</p></figcaption></figure> <figure><img src="/files/xvJ9DJ2iwIUJwc4CYLQx" alt="Whimsical storybook illustration of the couple with a pitchfork before a white church, red barn, and peach sky"><figcaption><p>Children's Book.</p></figcaption></figure> <figure><img src="/files/2DTkwAxkMUeYhjwwAKnl" alt="Photo of the couple with a pitchfork bathed in warm golden sunset light in front of a white church"><figcaption><p>Golden Hour.</p></figcaption></figure></div>

{% hint style="success" %}

### Tips & Tricks

#### To generate the best images using Styles:

* **Turn** Magic Prompt **off** to avoid unintended stylistic additions to your original prompt.
* **Avoid** adding **style-related keywords** in your prompt, especially those that may conflict with the selected style.
* Short, focused prompts usually yield the best results.
  {% endhint %}

### Creating Your Own Style

In addition to using preset styles, you can also create your own custom styles to achieve a personalized aesthetic.

How to create a style:

1. Select **Style** in the *Prompt Box*.
2. Open the **My styles** tab.
3. Select **Create new style**.
4. Upload or choose **up to three images** as visual references for your style.
5. Name your style.
6. Click or tap **Create**.

<figure><picture><source srcset="/files/o31Ncdpt8mQvDGvZd5aq" media="(prefers-color-scheme: dark)"><img src="/files/oGvQLDb5piBQqmMKNL85" alt="Create new style dialog with a name field, two uploaded reference images, and a button to add a third" width="375"></picture><figcaption></figcaption></figure>

Your custom style appears under **My styles** and can be reused in any prompt.

{% hint style="success" %}

### Tips & Tricks

#### **Selecting the best images for custom styles:**

* **For a strong, unified style:** Choose images that share a similar look, mood, aesthetic, and composition.
* **For creative, unexpected results:** Mix diverse references to let the AI blend aesthetics and produce surprising outcomes.
* **Using gradients to control color:** Upload a gradient-based image as one of your three references to influence the overall tone.
  {% endhint %}

{% hint style="warning" %}
The reference images for your custom styles **cannot be changed after creation**. This ensures that anyone who uses your style in the future will see consistent results based on the images you originally uploaded.
{% endhint %}

## Combine Style Reference With Other Features

Style Reference integrates seamlessly with other Ideogram features to expand creative possibilities:

* [Describe](/using-ideogram/features-and-tools/describe) – Generate prompts from existing images and apply a style.
* [Remix](#remix) – Reimagine existing images with a chosen style.
* [Character Reference](/using-ideogram/generation-settings/character-reference) – Maintain a consistent subject across different aesthetics.
* [Color Palette](/using-ideogram/generation-settings/color-palette) – Match your prompt to a specific mood or tone.

### Describe + Style Reference

Use Describe to generate detailed text prompts from existing images, then apply a style to create a new version.

{% hint style="success" %}
Remove any stylistic keywords from Describe results for cleaner, more controlled outputs.
{% endhint %}

Stylistic words and sentences shown with ~~strikethrough~~ were removed or replaced to optimize how the AI interprets and applies styles. Additionally, any words highlighted in <mark style="color:green;">green</mark> — which indicated the colors of elements in the image — have also been removed.

Example using the image below:

<div align="center"><figure><img src="/files/EBdZGMQIVTQMdEbpTzu5" alt="Young man in a red hoodie singing passionately while playing a cream electric guitar in a green-walled living room" width="375"><figcaption><p>Original image.</p></figcaption></figure></div>

> **Original Describe prompt:**
>
> A dynamic ~~indoor photograph~~ of a young man playing an electric guitar with intense emotion. The musician wears a <mark style="color:green;">burgundy red</mark> hoodie and <mark style="color:green;">light blue</mark> jeans, displaying an enthusiastic expression with eyes closed and mouth open in a passionate singing pose. He holds a <mark style="color:green;">cream-colored</mark> Fender electric guitar with a <mark style="color:green;">black</mark> pickguard. The setting features a <mark style="color:green;">dark green</mark> wall with two black and white framed photographs visible in the background. A <mark style="color:green;">brown</mark> leather couch is partially visible in the lower portion of the frame. ~~The lighting creates a warm, indoor atmosphere, highlighting the musician's features and the guitar's cream finish. The composition captures a moment of musical expression, with the subject positioned slightly left of center in the frame.~~

> **Adjusted Describe prompt:**
>
> A dynamic image of a young man playing an electric guitar with intense emotion. The musician wears a hoodie and jeans, displaying an enthusiastic expression with eyes closed and mouth open in a passionate singing pose. He holds a Fender electric guitar with a pickguard. The setting features a wall with two black and white framed photographs visible in the background. A leather couch is partially visible in the lower portion of the frame.

The images below show how different styles reinterpret the adjusted prompt.

<div><figure><img src="/files/DddTWeliezjFAigtUzEw" alt="3D cartoon character in an orange hoodie singing and playing a blue electric guitar in a stylized pastel living room"><figcaption><p>Style: C4D Cartoon.</p></figcaption></figure> <figure><img src="/files/25ruPfOfjGEcqiExE9gW" alt="Black-and-white line drawing of the singing guitarist in coloring book style"><figcaption><p>Style: Coloring Book I.</p></figcaption></figure> <figure><img src="/files/R4FJku1hVLlUmGBaD4Lq" alt="Moody photo of a hooded guitarist singing under contrasting orange and blue neon-style lighting"><figcaption><p>Style: Nightlife.</p></figcaption></figure></div>

### Remix + Style Reference

Add a Style Reference to [Remix](/using-ideogram/features-and-tools/remix) to refresh existing images while preserving their structure. This method usually matches the composition better than using Describe alone.

* **Higher Remix weight** → Keeps composition closer to the original image.
* **Lower Remix weight** → Produces results more influenced by the selected style.

The example below uses Remix at 60% with the same original image and adjusted Describe prompt:

<div><figure><img src="/files/EBdZGMQIVTQMdEbpTzu5" alt="Original photo of the young man in a red hoodie playing a cream electric guitar"><figcaption><p>Original image.</p></figcaption></figure> <figure><img src="/files/iYW607lOzRnFAsp5GaeA" alt="Flat retro illustration of the guitarist in a red and purple hoodie against bold geometric shapes"><figcaption><p>Style: 80s Illustration - Remix at 60%.</p></figcaption></figure> <figure><img src="/files/P7OI5GQeYgHejo36MpIO" alt="Muted-tone photo of the guitarist in a gradient hoodie against a sweeping black-and-white swirl backdrop"><figcaption><p>Style: Avant Garde - Remix at 60%.</p></figcaption></figure></div>

### Character Reference + Style Reference

Combine a Character Reference with Style Reference to maintain a consistent subject across multiple images while exploring different aesthetics. Perfect for creating variations while maintaining consistency.

The following example shows how combining a character reference with different styles affects the final output.

<div><figure><img src="/files/WGV5RbBEqIqn5CkWF1RX" alt="Photorealistic portrait of a gray-haired man with a mustache and clasped hands, used as the Character Reference"><figcaption><p>Character Reference.</p></figcaption></figure> <figure><img src="/files/eWH6Uh2UqcWojW8Eh6CB" alt="Black-and-white illustration of the older man playing a rainbow-colored guitar amid red and yellow color blocks"><figcaption><p>Style: Mixed Media.</p></figcaption></figure> <figure><img src="/files/rBQRMpDcoZM8WvLaRw7r" alt="Black-and-white photo of the older man laughing while playing an electric guitar"><figcaption><p>Style: Monochrome.</p></figcaption></figure></div>

### Color Palette + Style Reference

Use them together to influence the overall tone and mood of your image. When a [Color Palette](/using-ideogram/generation-settings/color-palette) is applied, the selected colors are incorporated while maintaining the style’s visual identity.

The images below show how different color palettes influence a single style. The selected palette appears in the lower-left corner of each image.

<div><figure><img src="/files/kUYVWhVJgmU4nhspbFn9" alt="Vintage-toned photo of a young guitarist singing, rendered in the style&#x27;s original teal and olive tones"><figcaption><p>Style: Analog Nostalgia</p></figcaption></figure> <figure><img src="/files/m6vHcxtXdEzlj57B4uqq" alt="Same guitarist scene tinted in soft pinks and mint greens, with the pastel palette swatch in the corner"><figcaption><p>Analog Nostalgia — Pastel.</p></figcaption></figure> <figure><img src="/files/y54whkAsrLOFl83M0iB3" alt="Same guitarist scene washed in deep blue tones, with the aquamarine palette swatch in the corner"><figcaption><p>Analog Nostalgia — Aquamarine.</p></figcaption></figure></div>

{% hint style="info" %}
**Tip:** For the best results, choose palettes that enhance, rather than compete with, the style’s dominant tones.
{% endhint %}


# Styles in Older Models

Older Ideogram models (versions 1.0, 2.0, and 2a) use styles differently from Model 3.0. This page explains how Style work in these earlier models and how they affect your prompts.

## Styles in Version 2.0 and 2a

To access the Style options:

* Click or tap inside the [Prompt Box](/using-ideogram/ui-overview/ui-components/prompt-box) to reveal the option bar (if not already visible).
* Select **Style** to open the dropdown.

The examples below compare the Style options available in versions 2.0/2a and 1.0 as they vary depending on the model you select

<div><figure><picture><source srcset="/files/yuCVnrGfixRvGhFUvQbI" media="(prefers-color-scheme: dark)"><img src="/files/ViGBLfcfn0p3rfKibSv1" alt="Style popup for versions 2.0 and 2a with Auto, General, Realistic, Design, 3D, and Anime options"></picture><figcaption><p>Styles available in version 2.0 and 2a.</p></figcaption></figure> <figure><picture><source srcset="/files/v5FujD5MjzvXIGqh81Y0" media="(prefers-color-scheme: dark)"><img src="/files/jye5C7KK2w689uhAJfEA" alt="Style popup for version 1.0 with keyword tags such as Photo, Illustration, 3D render, Cinematic, and Ukiyo-e"></picture><figcaption><p>Styles available in version 1.0.</p></figcaption></figure></div>

The styles available in version 2.0 and 2a are specialized AI models and do not add any extra text to your prompt, unlike styles in version 1.0.

Here are the available styles:

* **Auto**, **General**, **Realistic** and **Design** are just like their counterparts in [Version 3.0](/using-ideogram/features-and-tools/reference-features/style-reference#available-modes).
* **3D** – Generates characters, objects, and other creations with a 3D visual look.
* **Anime** – Creates images and characters inspired by anime-style artwork.

### Example Styles in 2.0

Here are some examples of the 2.0 styles.

> **Prompt:**
>
> Portrait of a fireman.

<table data-view="cards"><thead><tr><th></th><th></th><th></th></tr></thead><tbody><tr><td><img src="/files/z9DMSQd3vnbZuVrlyBRS" alt="Portrait of a fireman in a red helmet and tan turnout gear standing before a wall of flames" data-size="original"></td><td>Style: General</td><td></td></tr><tr><td><img src="/files/yGhEchSWN0MwSNWdgBGH" alt="Photorealistic smiling bearded fireman in a cream helmet standing in front of a red fire truck" data-size="original"></td><td>Style: Realistic</td><td></td></tr><tr><td><img src="/files/97NvD2kMhDmL7M2oEXjZ" alt="Flat vector-style illustration of a fireman whose white helmet reads Fireman, on a solid blue background" data-size="original"></td><td>Style: Design</td><td></td></tr><tr><td><img src="/files/Nx6G8qeX1nG5bJSZJjAn" alt="3D-rendered cartoon fireman with large blue eyes and a helmet badge reading 1 Fireman, flames behind him" data-size="original"></td><td>Style: 3D</td><td></td></tr><tr><td><img src="/files/dY2fKMyH7ULWDnG287UL" alt="Anime-style fireman with a white helmet and dark turnout coat in front of a burning structure" data-size="original"></td><td>Style: Anime</td><td></td></tr></tbody></table>

{% hint style="info" %}
**Pro tip**: Experiment with the same prompt in different Styles. Each one can produce distinct and sometimes unexpected results, even when it was not originally designed for your use case.
{% endhint %}

***

## Styles in Version 1.0

In version 1.0, using a style adds the corresponding keywords to the end of your prompt just before the image is generated. This helps the AI understand the type of image you want.

Select a Style to apply it. You can select and apply multiple Styles at once.

### Example Styles in 1.0

<table data-view="cards"><thead><tr><th></th><th></th><th></th></tr></thead><tbody><tr><td>3d render</td><td><img src="/files/sDUASLg6gFjXoslnl2gs" alt="3D-rendered cartoon fireman in blue turnout gear and a red helmet on a crimson background" data-size="original"></td><td>Prompt:<br>A fireman</td></tr><tr><td>Anime</td><td><img src="/files/oPeBph4pi3Zq4GS5mQBU" alt="Anime-style young fireman with gray hair in a red helmet, flames rising behind him" data-size="original"></td><td>Prompt:<br>A fireman</td></tr><tr><td>Architecture</td><td><img src="/files/2jLywr1bNT3jgKPaGlgK" alt="Modern fire station with two red garage doors photographed at dusk under a pink and purple sky" data-size="original"></td><td>Prompt:<br>A fire station</td></tr><tr><td>Cinematic</td><td><img src="/files/RlqFwrei4KLDIMVtygf9" alt="Cinematic photo of a serious fireman in a black helmet standing in front of a red fire truck" data-size="original"></td><td>Prompt:<br>A fireman</td></tr><tr><td>Conceptual Art</td><td><img src="/files/fJApd9G8fdMQC0q5W9FW" alt="Painterly conceptual portrait of a fireman in a red helmet and navy coat against a teal background" data-size="original"></td><td>Prompt:<br>A fireman</td></tr><tr><td>Dark Fantasy</td><td><img src="/files/Vy4r7mgKy4xplrQJRqqH" alt="Dark, moody portrait of a bearded fireman in a weathered helmet beneath a stormy sky" data-size="original"></td><td>Prompt:<br>A fireman</td></tr><tr><td>Fashion</td><td><img src="/files/AU71EagQtiqF2hurjovm" alt="Fashion-style photo of a man in a firefighter jacket and wide-brimmed helmet walking along a beach" data-size="original"></td><td>Prompt:<br>A fireman</td></tr><tr><td>Graffiti</td><td><img src="/files/5sfiQbG5ByS6zy5uUnCV" alt="Painted portrait of a fireman in front of a red wall covered in yellow graffiti strokes" data-size="original"></td><td>Prompt:<br>A fireman</td></tr><tr><td>Illustration</td><td><img src="/files/JDJ888z0BigxyifSPoQv" alt="Comic-style illustration of a goateed fireman in red hooded gear on a teal background" data-size="original"></td><td>Prompt:<br>A fireman</td></tr><tr><td>Painting</td><td><img src="/files/2i92E6VhmvyVBNNjx5Gf" alt="Painting of a red fire truck seen head-on driving down a tree-lined town street" data-size="original"></td><td>Prompt:<br>A fire truck</td></tr><tr><td>Photo</td><td><img src="/files/QQJRa9hf2u4dox2bWkA9" alt="Photo of a fireman in navy turnout gear and a red helmet standing before a red corrugated wall" data-size="original"></td><td>Prompt:<br>A fireman</td></tr><tr><td>Portrait photography</td><td><img src="/files/KulXlQdlcGRNLU0EofZN" alt="Close portrait of a fireman in a black leather helmet gazing directly at the camera" data-size="original"></td><td>Prompt:<br>A fireman</td></tr><tr><td>Poster</td><td><img src="/files/g326OoHczJbmgyJzeNCv" alt="Vintage-style poster on a brick wall showing a fireman in red gear above the caption A Fireman" data-size="original"></td><td>Prompt:<br>A fireman</td></tr><tr><td>Product</td><td><img src="/files/mV9sHbXPiZftnsiIpme1" alt="Product photo of a shiny red toy fire truck on a rustic wooden table" data-size="original"></td><td>Prompt:<br>A fire truck</td></tr><tr><td>Typography</td><td><img src="/files/OhCd30TsP4YU27FtTuKN" alt="Fire truck parked under a dramatic sky with large yellow letters reading A Fire Truck" data-size="original"></td><td>Prompt:<br>A fire truck</td></tr><tr><td>Ukiyo-e</td><td><img src="/files/mDAcFMhraUgpnaFuz3Gc" alt="Japanese woodblock-style print of a fireman in a blue patterned robe and helmet holding tools" data-size="original"></td><td>Prompt:<br>A fireman</td></tr><tr><td>Vibrant</td><td><img src="/files/tiQzvutpGqy0KAkLEo2D" alt="Vivid portrait of a fireman in bright red gear surrounded by swirling smoke and flames" data-size="original"></td><td>Prompt:<br>A fireman</td></tr><tr><td>Wildlife Photography</td><td><img src="/files/s5yu57ZutdP8IiPO6OAp" alt="Fire truck photographed head-on on a leaf-strewn road between tall forest trees" data-size="original"></td><td>Prompt:<br>A fire truck</td></tr></tbody></table>


# Remix

## Overview

The Remix tool lets you modify existing images by using them as a starting point. Your edit instruction shapes the result, while the parent image grounds the composition.

<div><figure><img src="/files/DeISC1lJoI07rP0ffog3" alt="Original image used as the Remix parent."><figcaption><p>Original image.</p></figcaption></figure> <figure><img src="/files/tDBOby07cNiPuVuJvbaS" alt="Image created from the Remix parent."><figcaption><p>Remixed image.</p></figcaption></figure></div>

## Access Methods

Users can access Remix through three routes:

1. **Image feeds** - Hover over images in the gallery, select the More icon, and choose Remix.
2. **Image details** - Use the Remix button in the Details Panel or More menu.
3. **Image import** - Select Remix in the popup when importing or pasting into the Prompt Box.

<figure><img src="/files/lLfrwBnH4QPdqNyL3x7X" alt="Image feed More menu with Remix highlighted."><figcaption><p>Remix from the image feed More menu.</p></figcaption></figure>

<figure><img src="/files/qfwHstQWVU152NCBP5JO" alt="Image details More menu with Remix highlighted."><figcaption><p>Remix from the image details More menu.</p></figcaption></figure>

<figure><img src="/files/jnG6i9dmgPIAD1kJ06ET" alt="Image import popup with Remix highlighted."><figcaption><p>Remix from the image import popup.</p></figcaption></figure>

## Key Features

### Automatic Settings

The original prompt (or auto-generated description for uploads) populates the Prompt Box automatically. On Ideogram 4.0, you can pick any aspect ratio for the output or choose **Original** to match the parent. Prior to 4.0, the parent image's aspect ratio applies by default and cannot be modified without using the Editor tool first.

### Strength Control

Prior to 4.0, a slider ranging from 1 to 100 determines influence level:

* Higher values keep the result closer to the original.
* Setting strength to 0 removes the parent image entirely, generating based solely on prompt and style tags.

On 4.0, the slider is hidden. The model selects the right blend automatically from your edit instruction, so you can focus on the prompt.

<figure><img src="/files/iMIrbeLK8StSS4ONH81x" alt="Remix settings popover showing the Strength slider."><figcaption><p>Strength slider in Remix settings prior to v4.0.</p></figcaption></figure>

### Removing Parent Image

Hovering over the Remix thumbnail reveals an "X" icon for removal from the Prompt Box.

<figure><img src="/files/Wd1HzzsHyMo9RLWLkzId" alt="Remix thumbnail with the remove icon visible."><figcaption><p>Remove icon on the Remix thumbnail.</p></figcaption></figure>


# Replace or Remove Background

Use background tools to isolate the subject of an image or place it into a new generated scene.

For the dedicated app workflow, see [Background Remover App](/using-ideogram/features-and-tools/background-remover-app).

Ideogram 4.0 supports native transparency and background workflows where available, making these tools useful for product cutouts, interface assets, campaigns, and other design workflows.

## Modes

* **Remove BG** creates a transparent PNG/cutout by removing the image background.
* **Replace BG** generates a new background from your prompt while keeping the main subject.

Availability, credit usage, and editing options can vary by plan, model, and workflow.

## Access

You can access background actions from supported image surfaces:

1. **Image details** - select **Remove BG**, use its dropdown for **Replace BG** where available, or open the [More menu](/using-ideogram/ui-overview/ui-components/more-menu-...).
2. **Image import** - import, paste, or drag an image into the [Prompt Box](/using-ideogram/ui-overview/ui-components/prompt-box), then choose **Remove BG** or **Replace BG** where shown.
3. **Apps** - open [Background Remover App](/using-ideogram/features-and-tools/background-remover-app) for the dedicated Remove BG workflow.
4. **Canvas or editing surfaces** - use background actions where those tools are available to your account.

## Remove Background

Remove BG detects the foreground subject and removes the surrounding background. The result is saved as an image with transparency where the workflow supports transparent output.

After removing the background, you can download the result, continue editing, or use the cutout in another supported workflow.

## Replace Background

Replace BG lets you describe a new background in the [Prompt Box](/using-ideogram/ui-overview/ui-components/prompt-box). Ideogram generates new image options that place the subject into the prompted scene.

Use a clear prompt for the replacement background, including setting, lighting, materials, and mood when those details matter.

{% hint style="warning" %}
When replacing a background, the generated result may adjust edges, lighting, or contact shadows so the subject blends with the new scene.
{% endhint %}


# Search

With Ideogram, you can search for your own images or publicly available images generated by other users. Use keywords that would typically appear in the image prompts.

Search scope can vary by plan and product surface. Depending on your account, search may cover public/community images, your own images, your Library, or a collection.

## Search in the Home Page

To perform a search, select the **Search** icon <picture><source srcset="/files/7hu890uHqA3Pjk8iN4ph" media="(prefers-color-scheme: dark)"><img src="/files/dA1QuDX2nNpY9muvTnsi" alt="Search icon" data-size="original"></picture> located at the top-left of the [Image Gallery](/using-ideogram/ui-overview/ui-components/image-gallery).

1. Select the **Search** icon to open the search box.
2. Type your keywords, then press <kbd>**Enter**</kbd> or <kbd>**Return**</kbd> to start the search.

You can also search your [Library](/using-ideogram/ui-overview/pages-ui/library-page) where Library search is available.

Matching images appear directly in the Image Gallery below the Search box.


# Upscale

The Upscale feature, available to users on the **Basic Plan** or higher, increases the resolution of your Ideogram-generated images, and of any images you’ve uploaded using the [Image Upload](/canvas-and-editing/image-upload) function (available on the **Plus Plan** or higher), by up to **2×**.

With Ideogram 4.0, Upscale is part of the supported post-generation workflow set where available, alongside editing, remixing, and background workflows.

{% hint style="warning" %}
**Important:** Upscale **crops** images to the nearest supported aspect ratio listed in the table below. This behavior applies to all images, including both default and custom aspect ratios used in Ideogram v2.0 and later.
{% endhint %}

Aspect ratios and their final pixel dimensions after upscaling:

| Aspect ratio | Final dimensions (pixels) |
| :----------: | :-----------------------: |
|   **`1:3`**  |        1024 x 3072        |
|  **`9:16`**  |        1440 x 2560        |
|  **`10:16`** |        1536 x 2464        |
|   **`2:3`**  |        1536 x 2304        |
|   **`3:4`**  |        1536 x 2048        |
|   **`1:1`**  |        2048 x 2048        |
|   **`4:3`**  |        2048 x 1536        |
|   **`3:2`**  |        2304 x 1536        |
|  **`16:10`** |        2464 x 1536        |
|  **`16:9`**  |        2560 x 1440        |
|   **`3:1`**  |        3072 x 1024        |

**Example 1** — If you upload an image that is 1500 pixels by 1500 pixels, which has an aspect ratio of 1:1, the upscale will result in a 2048 pixels by 2048 pixels image.

**Example 2** — If you generate an image with a custom aspect ratio of 17:12 (1088 × 768 pixels) and then use *Upscale*, the image will be cropped it to the nearest available aspect ratio, which is 3:2, and the final image will be 2304 pixels by 1536 pixels.

## Upscaling an Image

You can access Upscale in several ways:

1. **From image feeds** (Home and Library pages) –\
   Hover over any image in the [Image Gallery](/using-ideogram/ui-overview/ui-components/image-gallery), select the **More** icon <picture><source srcset="/files/DCiR5D2cnVppKd9qELB3" media="(prefers-color-scheme: dark)"><img src="/files/eVQ3eQw7IgtlCP87XKyl" alt="More icon"></picture> at the top of the image, and select **Upscale** from the [More menu](/using-ideogram/ui-overview/ui-components/more-menu-...).
2. **From image details** –\
   In the [Details Panel](/using-ideogram/ui-overview/ui-components/details-panel), select the **Upscale** button.\
   Alternatively, select the **More** icon <picture><source srcset="/files/DCiR5D2cnVppKd9qELB3" media="(prefers-color-scheme: dark)"><img src="/files/eVQ3eQw7IgtlCP87XKyl" alt="More icon"></picture> in the upper-right corner and choose **Upscale** from the More menu.
3. **When** [importing an image](/using-ideogram/ui-overview/ui-components/prompt-box#importing-an-image) **into the** [Prompt Box](/using-ideogram/ui-overview/ui-components/prompt-box) –\
   In the popup window, select **Upscale** to generate an automatic description.

## Parameters

To adjust settings, select the Upscale thumbnail in the [Prompt Box](/using-ideogram/ui-overview/ui-components/prompt-box). A pop-up window appears, allowing you to fine-tune the **Resemblance** and **Detail** parameters. You also have the option to [Describe](/using-ideogram/features-and-tools/describe) the image or to edit it in the [Editor](/canvas-and-editing/editor) before applying the upscale.

Upscale lets you control how much **Resemblance** the new image retains from the original, and how much **Detail** the AI adds during generation.

Select the **Upscale** thumbnail in the Prompt Box to open its options.

<figure><picture><source srcset="/files/Wk9NSmKnV7LWvPCOXsR0" media="(prefers-color-scheme: dark)"><img src="/files/KqZZfba7H0Bk1sGmFDUA" alt="Adjustable Upscale parameters: Resemblance and Detail." width="220"></picture><figcaption><p>Adjustable Upscale parameters: Resemblance and Detail.</p></figcaption></figure>

### Resemblance

This parameter determines how closely you want the enlarged image to resemble the original. A value of 1 allows the AI more freedom to be creative with the image, which can be useful for correcting certain defects or enhancing specific details. On the other hand, a value of 100 will produce a result that is as close as possible to the original image while still enlarging it and maintaining optimal sharpness.

<div><figure><img src="/files/iXTbPXOw64rNA5JZ7ASU" alt="Boston terrier in a cowboy hat playing a banjo on a Western porch, alternating between the original and a loosely reinterpreted upscale"><figcaption><p>Original compared to an upscaled image with a Resemblance value of 1</p></figcaption></figure> <figure><img src="/files/cm4DEDnQouJ4IWjLuXL0" alt="The same cowboy dog scene alternating between the original and a faithful, sharper upscaled version"><figcaption><p>Animation of the original image compared to an upscaled image generated with a Resemblance value of 100</p></figcaption></figure></div>

### Detail Slider

This slider allows you to adjust the level of detail in the enlarged image. A higher value will increase the visibility of details, while a lower value will reduce them.

**Detail value: 1 vs 100**

<figure><img src="/files/K9PM2mDJ38xuwsGiN7MA" alt="The cowboy dog scene alternating between low and high Detail upscales, with fine fur and wood textures changing" width="563"><figcaption><p>Animation of two upscaled images generated with a Detail value of 1 compared to the same generated with a value of 100.</p></figcaption></figure>

After adjusting both sliders to your desired values, click or tap the **Upscale** button to begin the process.

Once the upscaling is complete, you can click on the image preview to get a more detailed view of the upscaled image.

Select the **Split View** icon <picture><source srcset="/files/q693Le5Kw8K413u3Uww9" media="(prefers-color-scheme: dark)"><img src="/files/hqoRgIronJWBtl02A6FJ" alt="Split View icon"></picture> in the upper-right corner to open an interactive comparison slider between the original and upscaled images.

<figure><img src="/files/SiYbZbWJKI8T3H93gFFw" alt="Comparison slider dividing the cowboy dog image into Original and Upscaled halves, the upscaled side noticeably sharper"><figcaption><p>Using the split view function.</p></figcaption></figure>

You can view the final image dimensions and the parameters used during upscaling in the [Details panel](/using-ideogram/ui-overview/ui-components/details-panel).

<figure><picture><source srcset="/files/HfUfEhnkUEn7An2ZMv48" media="(prefers-color-scheme: dark)"><img src="/files/P0w9MLUg1H1aXMtnVT29" alt="Details panel listing the upscale model, final resolution, Resemblance and Detail values, seed, and creation date" width="352"></picture><figcaption><p>Information availableIn the Details panel when viewing an upscaled image.</p></figcaption></figure>

{% hint style="info" %}
**Note:** Images can currently be upscaled up to **2×**. Additional scaling options may be introduced in future updates.
{% endhint %}


# Canvas and Editing

{% hint style="warning" %}
**Deprecated:** Canvas is deprecated and is no longer a primary promoted Ideogram feature. These pages remain available for users who still have access to Canvas or older editing workflows.
{% endhint %}

Availability can vary by account, plan, device, and product rollout.

Ideogram 4.0 supports editing workflows such as prompt edit, layerize or editable text layers, extend, reframe, remix, and Magic Fill where those surfaces are available.

## Guides

* [Canvas](/canvas-and-editing/canvas) - deprecated Canvas overview and Canvas-specific tools.
* [Editor](/canvas-and-editing/editor) - crop, draw, and prepare images for supported workflows.
* [Image Upload](/canvas-and-editing/image-upload) - upload or paste images for Describe, Remix, Upscale, reference features, background tools, Canvas, or Editor where available.


# Canvas

Canvas docs are for users who still have access to the Canvas workspace.

## Canvas Guides

* [Canvas Overview](/canvas-and-editing/canvas/canvas-overview) - interface, access paths, panels, and core Canvas behavior.
* [Extend](/canvas-and-editing/canvas/extend) - expand an image beyond its current edges.
* [Generate & Remix](/canvas-and-editing/canvas/generate-and-remix) - create or remix images inside Canvas.
* [Magic Fill](/canvas-and-editing/canvas/magic-fill) - edit a selected area with a prompt.
* [Text Tool](/canvas-and-editing/canvas/text-tool) - add and edit text on the Canvas.

For the broader editing section, see [Canvas & Editing](/canvas-and-editing).


# Canvas Overview

## What is Canvas?

Ideogram **Canvas** is an infinite creative board for generating, editing, and organizing images. These docs are for users who still have access to Canvas.

With Canvas, you can:

* **Upload your own images** by clicking Upload, using copy-paste or simply dragging in an image.
* **Edit images** using tools such as:
  * **Magic Fill** (inpainting) to add or modify elements within an image.
  * **Extend** (outpainting) to expand your image beyond its original edges.
* **Generate** images using text prompts.
* **Remix** images and compositions.
* Add **Text** to your images.
* **Download** your final composition/work as an image.

***

## Accessing Canvas

You can access Canvas in different ways:

1. Click the Canvas icon on the left-side panel to create a new canvas.

<figure><picture><source srcset="/files/MvBsIlECKftecU55L2zR" media="(prefers-color-scheme: dark)"><img src="/files/J1y2HjccGRACkrzOT6yQ" alt="Ideogram left-side panel with the Canvas icon highlighted between Home, Creations, and Batch, marked with a Beta tag" width="82"></picture><figcaption></figcaption></figure>

2. When viewing an image in detail, click the **More** icon <picture><source srcset="/files/DWOCdWuHaPBzJrjuAqYP" media="(prefers-color-scheme: dark)"><img src="/files/tTYSFk9L2gZga2UbTKcA" alt="More icon" data-size="line"></picture> and select **Open in Canvas**.

<figure><picture><source srcset="/files/yxxdUYxvkkGCcKPvYJTA" media="(prefers-color-scheme: dark)"><img src="/files/4U2ihEsN6lIaEmBX0my6" alt="Image details panel with action buttons and an arrow pointing to the Open in Canvas button" width="370"></picture><figcaption></figcaption></figure>

3. When browsing or viewing images, click the **More** icon <picture><source srcset="/files/DWOCdWuHaPBzJrjuAqYP" media="(prefers-color-scheme: dark)"><img src="/files/tTYSFk9L2gZga2UbTKcA" alt="More icon" data-size="line"></picture> and select **Open in Canvas** in the popup menu.

<figure><picture><source srcset="/files/9EFuBLkeH4pJnjrFUvK1" media="(prefers-color-scheme: dark)"><img src="/files/NiEz9YKAGdbHyjIAFAZV" alt="More popup menu with an arrow pointing to Open in Canvas among options like Remix, Upscale, and Download PNG" width="248"></picture><figcaption></figcaption></figure>

***

## Quick Start Guide

{% stepper %}
{% step %}

### Select a tool from the left-side panel

* Click on **Generate**, **Remix**, **Magic Fill**, **Extend**, or **Text**, depending on the action you want to perform.
  {% endstep %}

{% step %}

### Define the area to work on

* For **Generate**: Select the aspect ratio you want for your images.
* For **Remix**: Position and resize the generation window over the area you wish to remix.
* For **Magic Fill**: Use the masking tools to select areas you want to change, then click Next to adjust the position and size of the generation window. Ensure enough of the underlying image is included so the AI has sufficient context.
* For **Extend**: Position the generation window over the area you wish to expand, including a significant part of the underlying image to maintain visual continuity. Use the masking tools to select areas you want to alter.
* For **Text**: Simply click on the canvas where you want the text to appear. Then adjust the text using the available text options. *(The next steps are irrelevant to the Text function.)*
  {% endstep %}

{% step %}

### Enter Your Text Prompt

* In the prompt box, describe the content you want to generate or the content currently visible in the generation window, and the changes you wish to apply depending on the tool used.
  {% endstep %}

{% step %}

### Adjust options as desired

* Modify settings like **Style**, **Magic Prompt**, **Aspect Ratio**, **Image Weight**, etc., to your liking.
  {% endstep %}

{% step %}

### Initiate the generation process

* Click the action button (**Generate**, **Remix**, **Magic Fill** or **Extend**) to generate your images.
  {% endstep %}

{% step %}

### Review and select generated images

* Generated images will appear on the canvas.
* For **Generate** and **Remix**: Four images will be placed directly on the canvas.
* For **Magic Fill** and **Extend**: One image will be generated where you placed the generation window. Click on the image and use the arrows in the menu below it to toggle between the four generated options.
  {% endstep %}

{% step %}

### Edit and arrange your images

* Use the **Select** tool to move, resize, or arrange images on the canvas as needed. You can repeat the previous steps to perfect your image.
  {% endstep %}

{% step %}

### Download your final composition

* Click the **Download** button on the left-side panel.
* Adjust the download generation window to encompass the area you wish to export.
* Set the desired dimensions manually if necessary, and choose the image format.
* Click **Download** to save your image.
  {% endstep %}
  {% endstepper %}

***

## Canvas Interface Overview

### Left-Side Panel

<figure><picture><source srcset="/files/Az6s4ElH95zrXpiZuiVR" media="(prefers-color-scheme: dark)"><img src="/files/AGxqk5BAnjeEz29bpk4f" alt="Canvas left-side panel with Generate, Magic Fill, Extend, Remix, Select, Hand, Text, Upload, and Download tools" width="80"></picture><figcaption><p>The left-side panel.</p></figcaption></figure>

Located on the left side of **Canvas**, this panel includes:

* **Home icon**: Returns to the Ideogram home page.
* **Generative tools**:
  * **Generate**: Create images using text prompts.
  * **Magic Fill**: Inpainting to add or modify elements within an image.
    * More details and examples here [Magic Fill](/canvas-and-editing/canvas/magic-fill)
  * **Extend**: Outpainting to expand your image beyond its original edges.
    * More details and examples here [Extend](/canvas-and-editing/canvas/extend)
  * **Remix**: Generate images based on a parent image and prompt.
* **Utility tools**:
  * **Select**: Select, move, resize, and arrange images.
  * **Hand**: Pan and navigate around the canvas.
  * **Text**: Write text directly on the canvas
    * More details and examples here [Text Tool](/canvas-and-editing/canvas/text-tool)
  * **Upload**: Import images from your computer.
  * **Download**: Crop and export your final composition.

### The Bottom-Right Panel

<figure><picture><source srcset="/files/3kD6kOoWH5R0zS7VLr8j" media="(prefers-color-scheme: dark)"><img src="/files/bPMka3kLZ545Zj1efzIN" alt="Toolbar with undo and redo arrows, a green saved-status cloud, and zoom controls showing 78%" width="365"></picture><figcaption><p>The bottom-right panel.</p></figcaption></figure>

This panel allows you to:

* **Undo** and **Redo** actions.
* **Check** if the Canvas has been saved successfully.
* **Zoom in** and **Zoom out** of the canvas.

You can zoom using the + and − buttons or select a predefined zoom percentage from the dropdown menu.

<figure><picture><source srcset="/files/VtIeW4LXm0V3HoR1pJrj" media="(prefers-color-scheme: dark)"><img src="/files/rczrlrz9YXq9jSrSLhJW" alt="Zoom dropdown listing 25%, 50%, 78%, 100%, 200%, Fill, and Fit, with 78% checked" width="108"></picture><figcaption><p>Zooming options.</p></figcaption></figure>

### Image Panel

Selecting any image on the canvas will display an image panel below it. The available options will vary depending on the type of image selected.

<div><figure><picture><source srcset="/files/L6MnK7cEQXzzXoaClNvr" media="(prefers-color-scheme: dark)"><img src="/files/6nbJiYUpXdqFs21iOqBx" alt="Image panel with numbered callouts: arrows to switch between images 4/4, and a More button" width="275"></picture><figcaption><p>Panel for generated image set (4 images).</p></figcaption></figure> <figure><picture><source srcset="/files/eYRXrm3CLHIJvdpZ1snb" media="(prefers-color-scheme: dark)"><img src="/files/z8Wn6YH15C2AYcecGiMS" alt="Image panel with numbered callouts for the Duplicate, Remove, and More buttons" width="203"></picture><figcaption><p>Panel for a single image.</p></figcaption></figure></div>

#### For generated image sets (4 images)

1. **Switch** between the four generated images of the set.
2. Access **More** options:

#### For single images

1. **Duplicate** the image.
2. **Remove** the image from the canvas.
3. Access **More** options

When you click **More**, the following menu appears:

<figure><picture><source srcset="/files/ewi7nGxlPkxiip0LGEHs" media="(prefers-color-scheme: dark)"><img src="/files/ES0nwkUfSMrbLoCzNJdD" alt="Menu with options such as Copy image, Retry, Remix, Magic Fill, Upscale, and Remove background, grouped under Edit, Reference, and Manage" width="215"></picture><figcaption><p>More menu.</p></figcaption></figure>

From these menus, you can:

1. **Open/Close image details**
2. **Copy** the image.
3. **Duplicate** the image.
4. **Upscale** the image up to 2x.
5. **Remix** the image.
6. Use **Magic Fill** on selected image.
7. Use **Extend** on selected image.
8. **Remove background** on the image
9. **Arrange** the layer order:
   1. **Bring to front**
   2. **Bring forward**
   3. **Send backward**
   4. **Send to back**
10. **Download** – O*nly for generated images.*
    1. **PNG** – *Plus subscription and higher.*
    2. **JPG**

11. **Remove from canvas**

### Image Details Panel

This panel, located on the right side of the canvas, displays details about the selected image, such as the prompt, size, style used, and more. It also offers various actions that can be performed on the image. This panel has the same functionality as the image details panel available when viewing an image page on the website.

#### How to Open the Image Details Panel

If the right-side panel isn’t visible when an image is selected, you can activate it in the following ways: visible, you can activate it in different ways:

* Click the **Open image details** icon <picture><source srcset="/files/tCvq5G0SbE1kSrt2kNhz" media="(prefers-color-scheme: dark)"><img src="/files/WVou9oHKE6dOtmzYbGVo" alt="Open image details icon" data-size="line"></picture> located at the top-right corner of the canvas.
* Alternatively, click the **More** icon <picture><source srcset="/files/DWOCdWuHaPBzJrjuAqYP" media="(prefers-color-scheme: dark)"><img src="/files/tTYSFk9L2gZga2UbTKcA" alt="More icon" data-size="line"></picture> in the panel below the image and select **Open image details** from the menu.

<figure><picture><source srcset="/files/eZ2zsqpAEb8hHJIEj1Ce" media="(prefers-color-scheme: dark)"><img src="/files/VFM2Mzq85XeEpwOUl23n" alt="Image details panel showing thumbnails of four rabbit images, the prompt, plus model, style, resolution, and seed info" width="368"></picture><figcaption><p>The right-side image details panel.</p></figcaption></figure>

***

## Rendering and Masking Options

Each generative function—**Generate**, **Remix**, **Magic** **Fill**, and **Extend**—offers different options. These options are either **Rendering options** or **Masking** **options**, depending on the selected tool and the progression of its usage.

### Rendering Options

When using a generative function, rendering options appear below the prompt box at the top of the canvas. If they are not visible, click the **Options** icon on the right side of the prompt box to reveal them.

<figure><picture><source srcset="/files/NNpbHgMmBs87J6puObiD" media="(prefers-color-scheme: dark)"><img src="/files/YeFKkDHXTvMFM7xZAn1Q" alt="Prompt box with the slider-style Options icon highlighted between the text field and the Generate button"></picture><figcaption><p>The Options icon, usually located at the right of the Prompt Box.</p></figcaption></figure>

<figure><picture><source srcset="/files/9aRSuymIsDgtKHRQ4Ro0" media="(prefers-color-scheme: dark)"><img src="/files/Su5g6xVbqZOhUEVy5U5S" alt="Rendering options bar with numbered callouts for Private, aspect ratio 1:1, Style, Magic Prompt, and Color settings" width="563"></picture><figcaption><p>Rendering options available.</p></figcaption></figure>

The options are:

1. **Private Generation**: Choose whether to generate images privately or publicly.
2. **Aspect Ratio**: Define the format and dimensions of the image.
3. **Style**: Select the artistic style for the image.
4. **Magic Prompt**: Enhance and optimize your prompt with AI.
5. **Color**: Choose a color palette for your image.

{% hint style="warning" %}
Some rendering options (**Model**, **Rendering**, **Seed number**, and **Negative prompt**) are not yet available when generating an image in Canvas.

Ideogram’s version 2.0 model is used for all image generations, except when using the **Upscale** tool, which utilizes a specialized variant of version 1.0.
{% endhint %}

### Masking Options

When using **Magic Fill** and **Extend**, masking options become available at specific steps in the process.

<figure><picture><source srcset="/files/EceEUASxe2btyoldEo5N" media="(prefers-color-scheme: dark)"><img src="/files/AUl7jL5MZ8SoFKqgv7Dq" alt="Masking toolbar with numbered callouts for select, rectangular, freeform, and brush masks, eraser, invert, and previous mask" width="480"></picture><figcaption><p>The masking option for Magic Fill and Extend.</p></figcaption></figure>

The options are:

1. **Select**: Select, move, resize, and arrange images.
2. **Rectangular mask**: Create a mask from a rectangular shape
3. **Freeform mask**: Create a mask from a freeform shape.
4. **Brush mask**: Create a mask using a brush.
   1. Click the down arrow on the right to reveal a slider for adjusting brush size.
5. **Eraser mode**: The selected tool will erase masked areas.
6. **Invert mask**: Reverses the mask; masked areas become unmasked and vice versa.
7. **Load previous mask**: Restores the last mask used.

{% hint style="warning" %}
If you’re a new user or simply new to Canvas, consider experimenting with the [**Generate**](/using-ideogram/getting-started/generating-images) and [**Remix**](/using-ideogram/features-and-tools/remix) functions outside of Canvas to familiarize yourself with their features. Additionally, explore key features such as [**Private Generations**](/using-ideogram/generation-settings/private-generations), [**Aspect Ratios**](/using-ideogram/generation-settings/aspect-ratio-and-dimensions), [**Style**](/using-ideogram/features-and-tools/reference-features/style-reference/styles-in-older-models), [**Magic Prompt**](/using-ideogram/generation-settings/magic-prompt) and [**Color Palettes**](/using-ideogram/generation-settings/color-palette), as they play an integral role in the generative tools within Canvas.
{% endhint %}

***

## Working with Canvas

### Renaming the Canvas

By default, each new canvas is named “Untitled canvas.” or a name based on the beginning of the prompt from the image opened in **Canvas**. To rename it, click the canvas name at the top-left corner, next to the **Menu** icon <picture><source srcset="/files/h8wszmkuHrm9TqFQfd70" media="(prefers-color-scheme: dark)"><img src="/files/q9A0baWA6z88I5r3MghQ" alt="Menu icon" data-size="line"></picture>, and enter your desired name.

<figure><picture><source srcset="/files/oXuCdhZiFmf0MVhtVikp" media="(prefers-color-scheme: dark)"><img src="/files/JgbsC3xHCpUYVwcUwiw0" alt="Canvas name field next to the Menu icon with the text Untitled canvas selected for editing" width="240"></picture><figcaption></figcaption></figure>

### Managing Canvases

Click the **Menu** icon <picture><source srcset="/files/h8wszmkuHrm9TqFQfd70" media="(prefers-color-scheme: dark)"><img src="/files/q9A0baWA6z88I5r3MghQ" alt="Menu icon" data-size="line"></picture>, to display a list of your recent canvases. Click the icon again to hide the list. From this list, click any canvas name to open it.

<figure><picture><source srcset="/files/XZ90hRsed1fHnytQuWa8" media="(prefers-color-scheme: dark)"><img src="/files/FmZsgmiUpL0XgspjTWBx" alt="Your canvases list grouped by Today, Yesterday, and Previous 7 days, with the current canvas highlighted" width="241"></picture><figcaption></figcaption></figure>

### Uploading External Images

To import an image from your computer, use one of the following methods:

* **Copy and paste**
  * Copy the image to your clipboard (**right-click** and **select Copy**, or press **Ctrl/Cmd+C**).
  * Paste it onto the canvas using **Ctrl/Cmd+V**.
* **Drag and drop**
  * Drag and drop an image from your computer on the **Canvas** window.
* **Upload**
  * Click the **Upload** icon on the left-side panel and select an image from your computer.

***

## Understanding the Generation Window and Image Frames

### Generation Windows

**Generation windows** are bounding boxes used by the **Magic Fill**, **Extend**, **Remix** and **Download** functions to define the size, aspect ratio, and placement of the image to be generated or downloaded.

**Resizing generation windows**:

* **By corners**: Preserves the actual aspect ratio.
* **By sides**: Snaps to the nearest supported [aspect ratio](/using-ideogram/generation-settings/aspect-ratio-and-dimensions#defaults-aspect-ratios-and-sizes).

<figure><img src="/files/R5T0dEinRb2qF6GqoQqe" alt="Empty square generation window with a gradient border and round resize handles on its corners and sides" width="152"><figcaption><p>A generation window</p></figcaption></figure>

### Image Frames

**Image frames** are the containers that hold already generated images. Each generative function produces four images per prompt.

* **Generate** and **Remix**: All four images are placed separately on the canvas, each in its own image frame.
* **Magic Fill** and **Extend**: These tools place one selected image on the canvas, maintaining the size and position of the generation window used.

### Switching Between Generated Images

1\. Make sure the Select tool is active in the left-side panel.

2\. Click on the desired image frame to display a the image panel below it.

3\. Use the arrows in the menu to scroll through the four generated images.

<figure><img src="/files/WOXgyn6oHG6QSwFG2S1m" alt="Selected image frame of a bearded man in glasses, with arrows below showing 1/4 for browsing the generated set" width="262"><figcaption></figcaption></figure>

Image frames can be freely resized and repositioned on the canvas.

***

## How to Download Images

To download your final composite image, use the **Download** function, which works like an adjustable screen capture.

* Click on the **Download** button on the left-side panel.
* Alternatively, if you have activated the **Always show download outline** option, click the download icon at the top left of the inactive download generation window on your canvas.

<figure><img src="/files/8rHJa9aABOtn1xQfINox" alt="Inactive download window outline with the download icon highlighted at its top-left corner" width="237"><figcaption></figcaption></figure>

* Resize and position the download generation window to capture the final image you wish to download.

<figure><img src="/files/DcbKP4gIosWLS3Sa1chl" alt="Dashed download selection framing a kitchen scene of a woman holding coffee while a man chops vegetables" width="563"><figcaption><p>The download context frame placed and resized.</p></figcaption></figure>

* On the left side, near the Download icon, a small panel will appear with the final dimensions of the image. You can adjust the size by manually editing the width and height, then click the arrow next to the Download button to choose the image format (for highest quality PNG downloads, you'll need [Ideogram Basic or above](/plans-and-pricing/available-plans). Finally, click Download to save the image.

<figure><picture><source srcset="/files/gGLqiuvU7Sg9XrA8Ymhl" media="(prefers-color-scheme: dark)"><img src="/files/MxNdDG3ABqmwOFbTvNSM" alt="Download panel with width and height fields, an Always show download outline toggle, and a Download button" width="375"></picture><figcaption><p>Options available when downloading an image.</p></figcaption></figure>

* Click Download to save the image.

Here's the final image.

<figure><img src="/files/TW89USBeKlWJOrgPiL7b" alt="Downloaded result: a woman in a blue shirt drinks coffee at a kitchen counter while a man chops vegetables" width="563"><figcaption></figcaption></figure>

***

## Canvas and Image Sizes

Consider the following aspects regarding image sizes on the canvas:

* **Canvas grid**: The canvas has an underlying pixel grid, visible when zoomed in at 2000% or more.
* **Image placement**: When uploading or generating images, they will at first align with the canvas grid, with one pixel on the image equaling one pixel on the grid.
* **Generation window sizes**: When you use the Remix, Magic Fill, or Extend tool, the generation window will adopt one of the default predefined aspect ratios, each with a fixed pixel size. **The generated image will have this specific size, regardless of how you resize the context frame on the canvas.**
* **Image scaling**: Images retain their original width and height in pixels, even if resized on the canvas.
* **Download dimensions**: The Download tool uses the canvas grid to define the size of the image to be downloaded.

{% hint style="info" %}
The most common aspect ratios and their corresponding sizes can be found in the[Aspect Ratios & Resolutions](/using-ideogram/generation-settings/aspect-ratio-and-dimensions#defaults-aspect-ratios-and-sizes) section of the documentation.
{% endhint %}

### Example

Let's start with an image generated in Ideogram at a 1:1 aspect ratio (1024 x 1024 pixels):

<figure><img src="/files/h6oJYnGLJv9HnQlmJSwm" alt="Generated photo of an elderly woman in a floral dress seated in a wooden chair, her small face and hands slightly distorted" width="375"><figcaption><p>The original image to be modified.</p></figcaption></figure>

Sometimes, faces and hands can be distorted when they are small in size, as seen in the generated image above. In such cases, you can use **Magic Fill** to correct these imperfections.

Here's how to do it:

* Mask the head and hands using **Magic Fill**.
* Resize the generation window to be smaller than the original image but large enough to include a significant portion of the image. This ensures the AI has enough context to analyze the image and accurately interpret the prompt.

{% hint style="info" %}
**Why make the generation window smaller?** Using a smaller generation window gives the AI more pixels relative to the original image, resulting in a higher pixel density for the selected area. This leads to more detailed faces and hands.

However, keep in mind that some of these details or the apparent sharpness may be lost during processing. This happens because everything is interpolated or extrapolated to fit the pixel grid on the canvas when downloading the resulting composite image. More details in this [section below](#a-note-on-final-image-quality).
{% endhint %}

<figure><img src="/files/ck3hscbOg370qKA1tEK4" alt="Pink Magic Fill masks covering the woman&#x27;s face and hands inside a generation window smaller than the image" width="375"><figcaption><p>Masked areas and the small generation window.</p></figcaption></figure>

* Adjust the prompt based on the content of the generation window:\
  `A photo of an elderly woman with white hair wearing a floral dress and a necklace. She is seated in a wooden chair in a dimly lit room. The background reveals lush green plants. The overall ambiance is warm and nostalgic.`
* Click **Magic Fill**.

Here is the final result after downloading the image:

<figure><img src="/files/5xNsWm4IVIxduumF5oRv" alt="Corrected image of the elderly woman with a clear, detailed face and natural-looking hands resting on her lap"><figcaption><p>The resulting image from the Magic Fill.</p></figcaption></figure>

More examples can be found in the [Magic Fill](/canvas-and-editing/canvas/magic-fill) page.

***

## A Note on Final Image Quality

When downloading your composite image, it’s important to understand how scaling and pixel density affect the final output because the final image is based on the canvas’s pixel grid. This means that any images you’ve scaled up or down will not retain their original resolutions in the downloaded image. Enlarged images won’t have extra detail, and reduced images won’t keep their apparent increased sharpness.

### Simple Examples to Illustrate This

#### Example 1: Enlarging a small image or generating in a bigger generation window than the canvas grid

Suppose you place a small photo (say, 200 x 200 pixels) on the canvas and enlarge it to double its size (400 x 400 pixels):

* **On the canvas**: It looks bigger, filling more space.
* **When downloaded**: That part of the image may appear blurry or pixelated because enlarging doesn’t add new details; it just makes the existing ones bigger and less clear. The small photo doesn’t have enough detail to look good at a larger size. Essentially, it **will not** act like the [Upscale](/using-ideogram/features-and-tools/upscale) function does.

#### Example 2: Shrinking a large image or generating in a smaller generation window than the canvas grid

Now, you place a large photo (800 x 800 pixels) and shrink it down to half its size (400 x 400 pixels):

* **On the canvas**: It looks smaller but very clear and possibly sharper than the ones around that were not resized.
* **When downloaded**: This area will loose its sharpness and some details because the grid will have to transform an image from 800 x 800 pixels to 400 x 400 pixels, loosing details in the process.

**In simple terms**: The final image you download captures everything within the download area roughly as it appears when the canvas is viewed at 100% zoom, but the overall resolution is determined by the canvas grid.

**For best results**

* **Avoid excessive resizing**: Don’t enlarge small images too much or shrink large images significantly.
* **Use appropriate generation window sizes**: When generating images, try to use generation windows that are not overly big or small relative to the canvas' pixel grid. Try to reach a good balance when, for example, you are fixing defect part of an image by using a smaller generation window than the original image.


# Extend

Extend, also known as outpainting, lets you expand your image beyond its original edges. It can also modify existing parts of the image, similar to Magic Fill.

## How to Use Extend

{% hint style="info" %}
It is best to review the [Canvas](/canvas-and-editing/canvas/canvas-overview) page beforehand to gain a better understanding of its interface and various elements. This will help you more easily follow the steps in the examples shown below.
{% endhint %}

### Extending an Image

In the example below, the Extend function is used to generate a visual extension and add context that seamlessly blends around the main image.

<figure><img src="/files/EBHxLhOtHNr35iNvK5uu" alt="A young boy in green overalls and a white t-shirt smiling while biting into a chocolate chip cookie" width="375"><figcaption><p>Original image.</p></figcaption></figure>

Here's how to do it:

1. Open or import the image in Canvas.
2. Click the Extend button on the left-side panel.
3. Reposition and resize the Extend generation window around the original image, leaving empty space around it where you want to add to the original image.

<figure><img src="/files/vTJEV6ifes3w1XvU1tbW" alt="Extend frame with the boy&#x27;s photo in the top-left corner and empty pink space to the right and below"><figcaption><p>Placement of the original image within the frame and the empty space left around it.</p></figcaption></figure>

4. Write a detailed prompt containing all visual aspect of the final image you want.

Here's the prompt used: `A photo of a young boy holding a chocolate chip cookie beside a rustic kitchen table with a cookie jar full of cookies, a plate with two cookies and a glass of milk. He is wearing a white t-shirt and green overalls. The background is blurred, but it appears to be an indoor setting with a neutral color palette.`

5. Adjust any additional options, like Style and Magic Prompt, as desired.
6. Click Extend to generate the images.
7. Once the process is complete, you can cycle through the four generated images by selecting the generated image and clicking the left or right arrow in the menu at the bottom of the image.

<figure><picture><source srcset="/files/UyvnhG7Js0TykT815OAu" media="(prefers-color-scheme: dark)"><img src="/files/g0ecC8maYUqExBBbRWKJ" alt="Bottom menu showing image 4 of 4 with left and right arrows to cycle through the generated images" width="278"></picture><figcaption><p>Image selection in the bottom menu.</p></figcaption></figure>

Here's one of the four images that was generated:

<figure><img src="/files/zAFfzKsuGgmrkbyYiym9" alt="Extended result: the boy now beside a rustic table with a plate of cookies, a glass cookie jar and a glass of milk"><figcaption><p>Final image.</p></figcaption></figure>

Here's another example. This time, an image was extended in a panorama style format:

<figure><img src="/files/yFJHAKzcpOliTzRzPsjy" alt="Two deer drinking at the edge of a lake among trees with colorful autumn foliage, in portrait format" width="375"><figcaption><p>Original image.</p></figcaption></figure>

<figure><img src="/files/NoIHAKuKF2CgNXVIWZo3" alt="Wide banner-shaped extend frame with the deer photo placed at the right and empty pink space filling the left"><figcaption><p>The generation window is resized horizontally into a banner-like format, with the image strategically placed for a well-balanced composition.</p></figcaption></figure>

<figure><img src="/files/dRF22R1P3JJVQmY6sh14" alt="Panoramic result: an autumn lakeside landscape generated to the left of the two deer drinking at the shore"><figcaption><p>The final image.</p></figcaption></figure>

***

### Refining While Extending an Image

In this example, two modifications will be done at the same time:

* A man cutting vegetables will be added to the left side of the image.
* The glass of water will be changed into a cup of coffee.

<figure><img src="/files/VzujHQ0DnPVq7Sg2xWuV" alt="A short-haired woman in a blue shirt holding a glass of water at a wooden counter in a white kitchen" width="375"><figcaption><p>The original image to be modified.</p></figcaption></figure>

Here's how to do it:

1. Click the Extend button on the left-side panel.
2. Reposition and resize the Extend generation window to your liking, trying to keep the generation window as small as possible while keeping visual context for the AI to work with.
3. Mask the glass of water with the [Masking Tools](/canvas-and-editing/canvas/canvas-overview#masking-options) to indicate it should be replaced in the generated image.

<figure><img src="/files/dvCwFxrwey7wKNDr4xOM" alt="Extend window overlapping the photo, with the glass of water masked out and empty space added on the left"><figcaption></figcaption></figure>

4. Enter a prompt that describes:
   1. The part overlapping the original image.
   2. What should be generated where the image will be extended.
   3. The changes to be made to the masked areas.

Prompt used: `A photo of a middle-aged woman with short hair holding a cup of hot coffee in a modern, white kitchen with wooden countertops. She is wearing a blue shirt and a necklace. A man is chopping vegetables on the counter beside her.`

<figure><picture><source srcset="/files/Femhw0dE3pIRp07LMogE" media="(prefers-color-scheme: dark)"><img src="/files/nQzhhPqJUvqJirNihAI6" alt="Extend prompt box with the coffee scene prompt typed in and options for aspect ratio, model, Magic Prompt, Style and Color"></picture><figcaption></figcaption></figure>

5. Adjust any additional options as desired.
6. Click Extend to generate the images.
7. Select the image and use the arrows at the bottom to view all four generated options and choose the one you like.

<figure><img src="/files/UXIvfIalCaDBU2OlpCWr" alt="Result: a man chopping vegetables now appears on the left while the woman holds a cup of coffee instead of water"><figcaption><p>The resulting image after extending it on the left and changing a part of the original image.</p></figcaption></figure>

***

## Advanced and Creative Examples

The Extend tool can be used creatively to achieve impressive results. The examples below demonstrate how using the tool in creative ways can lead to surprising outcomes. For example, you can take an image of an object and create a whole environment around it.

{% hint style="warning" %}
The advanced techniques presented below sometimes push the tool to its limits. They are more about creative exploration and achieving good results can be challenging at times. Indeed, many factors influence the final rendering of the image like the prompt, the original image, the options used, etc.

Experimenting with prompts and different options is often essential, but even then, results may vary. If you encounter difficulties, you can ask for help in the [#prompt-w-friend](https://discord.com/channels/1106248220687994911/1145120589955223602) channel on our Discord server. Simply share your prompt, the generated image, and a brief description of the issue. Other users may be able to help you achieve better results.
{% endhint %}

### Generate Context Around an Object

In this example, a whole environment will be created around the image of a wine bottle.

Here's how to do it:

1. Upload or copy/paste your image in Canvas.
2. If possible, use the remove background tool to get a transparent background.
   1. Alternatively, you can mask out the areas around the object manually using the mask tools that will be available in the Extend tool after the next step.
3. Click the Extend tool on the left-side panel.
4. Reposition and resize the Extend generation window to your liking with the object inside the generation window.

<div><figure><img src="/files/xh69wwDUTfXC30HFFwHK" alt="A dark wine bottle with a black label reading Castle Cellars under a gold castle logo, on a plain background" width="375"><figcaption><p>The original wine bottle image.</p></figcaption></figure> <figure><img src="/files/MzHp4MMXzS64C9J4DyvG" alt="The bottle with its background removed, positioned on the left of the extend frame over empty pink space" width="375"><figcaption><p>Background removed and bottle placed in the generation window.</p></figcaption></figure></div>

5. Write a detailed prompt that describe the image to be generated in details. Prompt used: `A bottle of red wine labeled 'CASTLE CELLARS' is in a dimly lit room, featuring a wooden table and a candle. A glass of wine is near the bottle, and a cork is on the wooden surface. In the background, there are red and blue grapes. The label is embossed with intricate designs and the castle logo is prominently displayed in the center.`
6. Select the image and use the arrows at the bottom to view all four generated images and choose the one you like.

<figure><img src="/files/aMg8GO6BIHeEeq5wD6HU" alt="Generated scene: the Castle Cellars bottle on a table with a glass of red wine, a cork, candles and grapes" width="375"><figcaption><p>The final image of the bottle integrated into the decor.</p></figcaption></figure>

### Same Subject in Another Image Style

In the example below, a woman in a photo will be transformed into a caricature.

Here's how:

1. Open, upload or copy/paste your image in Canvas.
   1. It might be a good idea to have a good description of that image. If a prompt or description isn't already available, use the Describe feature to get one provided by the AI. It will be used later.

<figure><img src="/files/9GbyIcxEsh1nsMjCZu9U" alt="Portrait photo of a woman with long wavy light brown hair and round glasses, wearing a white shirt and dark blazer" width="375"><figcaption><p>Original image.</p></figcaption></figure>

2. Click Extend then resize an position the generation window in a way where the original image will be on one side and the other side will be about the same size as the original image.

<figure><img src="/files/PWP6Pdr7ElV4CoO9tiCn" alt="Extend frame covering the portrait on the left, with an equal area of empty pink space on the right"><figcaption><p>The generation window adjusted to overlap the original image and extend on the right side.</p></figcaption></figure>

3. Write a detailed prompt that describe both the original image and the image you want to generate.

Prompt used: `On the left, a woman with long, wavy, light brown hair and glasses. On the right, a hand drawn funny caricature portraying the same woman.`

Style used: General

4. Select the image and use the arrows at the bottom to view all four generated images and choose the one you like.

<figure><img src="/files/pXZ776uLcHqBCYw431tD" alt="Hand-drawn caricature of the same woman with an exaggerated smile, round glasses and long wavy hair" width="375"><figcaption><p>Final image as caricature.</p></figcaption></figure>

Here are other examples that were generated with the same technique, simply by changing the last part of the prompt and using appropriate style options.

<div><figure><img src="/files/FwiQI0JCxfni8utznATG" alt="Cartoon of the woman as a schoolgirl in a navy blazer, plaid skirt, knee socks and red bow, arms crossed"><figcaption><p>... a cartoon character showing the same woman as if she was a schoolgirl. <strong>Style used: General</strong></p></figcaption></figure> <figure><img src="/files/fMD5pU7QUS3B0meEoRkU" alt="3D chibi figure of the woman with an oversized head, big eyes, round glasses and a mustard hoodie on a cobblestone street"><figcaption><p>... a 3D character depicting the same woman as a chibi character. <strong>Style used: 3D</strong></p></figcaption></figure></div>

<div><figure><img src="/files/B2beHwAwzHBoqu153l9E" alt="Black and white coloring book page of the woman as a mermaid surrounded by fish and seaweed"><figcaption><p>... a kid's coloring book page showing the same woman as if she was a mermaid. <strong>Style used: Realistic</strong></p></figcaption></figure> <figure><img src="/files/43m92uk7lm3jzntAe6Va" alt="Pop art portrait of the woman with halftone shading, pink and purple hair, red lips and a teal background"><figcaption><p>... a pop art poster depicting the same woman as a pop art comic character. <strong>Style used: Design</strong></p></figcaption></figure></div>

***

## Tips and Tricks for Best Results

Achieving great results with **Magic Fill** and **Extend**, especially with advanced techniques, takes a mix of creativity, experimentation, and a bit of patience. Here are some key factors that can impact the final outcome:

* **Craft precise and detailed prompts** – Clarity in wording helps the AI understand what to generate.
* **Experiment with synonyms and rephrase** - Changing a few words or testing different ways of expressing the same idea in a prompt can make big difference.
* **Start with a high-quality image** – The better the input, the better the output.
* **Consider the complexity of the image** – Simpler modifications often yield more accurate results.
* **Optimize the generation window size** – Keeping it as small as possible while including enough context leads to sharper and more realistic outcomes.
* **Manage your expectations** – AI-generated results can vary, so refining your approach and testing different options is key to success.

By experimenting with different approaches, adjusting prompts, and fine-tuning generation settings, you can push the boundaries of what's possible and create stunning images.


# Generate & Remix

## Generate

The **Generate** function in **Canvas** works just like it does in the standard website UI. You provide a detailed description of what you want to see, adjust some options, and the AI generates four images based on your input.

<figure><picture><source srcset="/files/hMgfQsJ8R3RFwZboLMCG" media="(prefers-color-scheme: dark)"><img src="/files/q2lywuaG4621ujE5n2hs" alt="Generate prompt box with a description of an elder man and options for visibility, aspect ratio, Style, Magic Prompt and Color"></picture><figcaption><p>The available options when using Generate in Canvas.</p></figcaption></figure>

<figure><img src="/files/0o8EbdEUphdY9UtfkLKP" alt="Four generated variations of a thoughtful grey-haired man with a beard and glasses, side by side on the canvas"><figcaption><p>The four generated images will appear directly on the canvas.</p></figcaption></figure>

## Remix

The **Remix** function in **Canvas** is similar to the standard Remix but offers more flexibility. You can select a specific portion of an image or composition using the generation window and remix just that area.

#### Example

Suppose you want to create a close-up of a particular image, such as the face of a thinking man.

* Click the **Select** tool on the left-side panel.
* Use the generation window to adjust the bounding box around the part of the image you want to remix. You can change the size and aspect ratio.

<figure><img src="/files/NhEi0QGpKJhvADfOdNKq" alt="Generation window with corner handles drawn around the man&#x27;s face to select the area to remix" width="375"><figcaption><p>You can make a selection using the generation window.</p></figcaption></figure>

* Enter a prompt that describes the desired result and adjust the options to your liking. Modify the Image Weight slider as needed.

<figure><picture><source srcset="/files/GTCU5WfTnFqg638hpG8u" media="(prefers-color-scheme: dark)"><img src="/files/9MUO4ZApNqbaHA8WOdwR" alt="Remix prompt box with the elder man prompt entered, an Image Weight of 50 and the usual generation options"></picture><figcaption><p>The available options when using Generate in Canvas.</p></figcaption></figure>

* Click **Remix**. Four images will be generated on the canvas, placed below the existing images.

<figure><img src="/files/BLKqAsU1QYZht7h59Feo" alt="Original portrait at the top of the canvas with four remixed close-up variations of the man&#x27;s face placed below"><figcaption><p>The four generated images will appear directly on the canvas.</p></figcaption></figure>


# Magic Fill

Magic Fill, also known as inpainting, allows you to modify a part of an image while keeping the rest intact.

Using Magic Fill is a simple two-step process:

1. Create a mask using the [**Masking Tools**](/canvas-and-editing/canvas/canvas-overview#masking-options) over the areas you want to modify.
2. Adjust the generation window and available options in the **Prompt box**, then click **Magic Fill**.

## How to Use Magic Fill

### Replacing and Adding an Element

In the example below, the glass of water will be replaced by a glass of milk while a watch will be added to her left wrist.

<figure><img src="/files/VzujHQ0DnPVq7Sg2xWuV" alt="Photo of a short-haired woman in a blue shirt holding a glass of water in a white kitchen, no watch on her wrist" width="375"><figcaption><p>The original image to be modified.</p></figcaption></figure>

Here’s how:

1. Click the Magic Fill button on the left-side panel.
2. Using the [**Masking Tools**](/canvas-and-editing/canvas/canvas-overview#masking-options)**,** Mask the hand holding the glass of water and the area where the watch should be placed.

<figure><img src="/files/YTPhkc1pmWJ6CFQFty5G" alt="Same photo with pink-purple gradient masks painted over the glass of water and over her left wrist" width="375"><figcaption><p>The masked <strong>areas</strong> of the image.</p></figcaption></figure>

3. Click Next to access the Magic Fill options at the top of the canvas.
4. Adjust the generation window to include both masked areas and some surrounding image content for context. In this case, the whole image area was used.
5. Enter a prompt describing the scene and the desired modifications. In this example:\
   `A photo of a middle-aged woman with short hair holding a glass of milk in a modern, white kitchen with wooden countertops. She is wearing a blue shirt, a necklace and a watch...`

<figure><picture><source srcset="/files/HY3E3WZHLL5R2oVGRi9Z" media="(prefers-color-scheme: dark)"><img src="/files/FXoKtcvICOkiAZOKJx9V" alt="Magic Fill prompt box with the milk and watch prompt entered, plus aspect ratio, model, style and Magic Fill button controls"></picture><figcaption></figcaption></figure>

* Adjust additional options as desired.
* Click Magic Fill to generate the images.
* Select the image and use the arrows at the bottom to view all generated images.

<figure><img src="/files/EHOWTN3pio7XdJexuWvA" alt="Generated result selected on the canvas: the woman now holds a glass of milk and wears a watch, with 1 of 4 arrows below" width="375"><figcaption><p>The four generated images.</p></figcaption></figure>

***

### Adding Elements

In the example below, an image of a rabbit was generated first in Ideogram as a starting image. Using Magic Fill, a basket of carrots is added in the background, and a carrot is placed in front of the rabbit.

<div><figure><img src="/files/IUdPcZqWOPFx3Y1HReHa" alt="Photo of a brown rabbit sitting on grass in a garden with white flowers behind it"><figcaption><p>Starting image.</p></figcaption></figure> <figure><img src="/files/yWkxxoaghuW6N8f9tniu" alt="Rabbit photo with a pink-purple gradient mask painted over the background and foreground left of the rabbit"><figcaption><p>Masked areas.</p></figcaption></figure> <figure><img src="/files/u41k1pbmPmusgrAiprDc" alt="Same rabbit with a wicker basket of carrots added behind it and a large carrot lying in the grass in front"><figcaption><p>Resulting Magic Fill image.</p></figcaption></figure></div>

Original prompt: `Photo of a rabbit in a beautiful garden.`

Magic Fill prompt: `Photo of a rabbit in a beautiful garden. There is a basket with carrots in the background and a big carrot in front of the rabbit.`

***

### Making Variations on an Element

Magic Fill can also be used to create variations of specific details while keeping other elements unchanged

For example, a woman’s hair color can be altered without modifying her face or the rest of the image.

The prompt used to generate the original image was modified each time in Magic Fill to request a different hair color.

Original prompt: ` A close-up three-quarter shot of a young woman with a sharp,`` `` `**`platinum blonde`**` `` ``pixie cut. She has icy blue eyes and a hit of a playful smirk. She has metallic earrings on her ears. The background is blurred and hints at a sleek, futuristic setting. She gazes directly at the camera with confidence. `

<div><figure><img src="/files/PvNbLmB0fJgS9LtNHn6Y" alt="Close-up portrait of a young woman with a platinum blonde pixie cut, icy blue eyes and metallic earrings"><figcaption><p>Starting image.</p></figcaption></figure> <figure><img src="/files/bgjx9usYnmzPmCcW6nqJ" alt="The same portrait with a pink-purple gradient mask painted over all of her hair"><figcaption><p>The masked area drawn over her hair.</p></figcaption></figure> <figure><img src="/files/arJClRiDTmsvFxy9EJ5T" alt="The same portrait with the pixie cut recolored, shown here in deep red, while her face stays unchanged"><figcaption><p>Results using different colors in the prompt.</p></figcaption></figure></div>

***

### Fixing Parts of an Image

Magic Fill is great for refining AI-generated images where small details like faces and hands may appear distorted due to the limited number of pixels.

Here’s how to easily fix those issues using Magic Fill.

Below is an image generated with Ideogram v2.0 using a 1:1 aspect ratio (1024 × 1024 pixels). The original prompt was: `A dynamic photo of a family standing on the lawn in front of a well-maintained house. The sky is clear with scattered clouds. Overlaying the top of the image, there's a text that reads 'Welcome' in a curvy font. The family consists of four members in that order: a young boy, a father, a mother and a teenager girl. The house in the background has a classic design with a gabled roof.`

<figure><img src="/files/aUJTE1GeqvGfbSfQ48vo" alt="Family of four standing on a lawn in front of a house under a blue sky, with the word Welcome in curvy script across the top"><figcaption><p>Original image generated with a 1:1 aspect ratio (1024 × 1024 pixels).</p></figcaption></figure>

Notice how the faces and hands appear very small in relation to the whole image. Because of this, the AI had difficulty rendering them correctly.

<div><figure><img src="/files/8aYmfp9HwZeIWyoKRG1b" alt="Zoomed-in crop of the father and mother showing their slightly distorted faces"><figcaption><p>400% zoomed-in detailed view.</p></figcaption></figure> <figure><img src="/files/iUo4smQdm4mUm6Vfjcxy" alt="Zoomed-in crop of the young boy and the father, their joined hands rendered with distorted fingers"><figcaption><p>400% zoomed-in detailed view.</p></figcaption></figure> <figure><img src="/files/wffNPj2EYj5R2oLCzHMd" alt="Zoomed-in crop of the mother and teenage daughter with imperfect facial details"><figcaption><p>400% zoomed-in detailed view.</p></figcaption></figure></div>

To fix this:

* Mask the areas that need correction.
* Adjust the generation window to be as small as possible, covering all masked areas while keeping some unmasked visual references to help the AI understand the context.

{% hint style="info" %}
Because the aspect ratio dictates the dimensions (in pixels) of the generated image, it can be leveraged to improve pixel density in specific areas. This technique is particularly useful for fixing small details that were not properly rendered in the original image.
{% endhint %}

In the example below, the generation window boundaries has a custom aspect ratio of 17:14, thus a dimension of 1088 × 986 pixels. The AI will have more pixels to work with for generating the faces and hands in masked areas.

The prompt was also simplified to reflect only the content within the generation window: `A dynamic photo of a family standing on the lawn in front of a well-maintained house. The family consists of four members in that order: a young boy, a father, a mother and a teenager girl.`

<figure><img src="/files/YkauI9QfIi7fBZPVDxjm" alt="Family image with pink masks over each face and hand, a 1088 px generation window drawn tightly around the family"><figcaption><p>Masked areas to be generated. The generation window is kept as small as possible to achieve greater pixel density.</p></figcaption></figure>

The AI generated the updated image directly over the original, modifying only the masked parts while leaving the rest intact.

<figure><img src="/files/lHf8KJtmHekTn83yPJg3" alt="Regenerated family image on the canvas with corrected faces, generation window still visible and 3 of 4 arrows below"><figcaption></figcaption></figure>

While the faces now look significantly better, there is still room for improvement—particularly for the father holding his son’s hand. To refine this further:

* Mask that specific part of the image again.
* Resize the generation window to be even smaller.
* Ensure the young boy is included in the generation window to provide the AI with proper proportions and context.

This time, the generation window was set to a 1:1 aspect ratio, meaning the newly generated section had a resolution of 1024 × 1024 pixels.

<div><figure><img src="/files/ISDoqCqdyGJCE59DPPKv" alt="Zoomed-in crop of the boy holding his father&#x27;s hand, the fingers still slightly misshapen"><figcaption><p>The hands still require some adjustment.</p></figcaption></figure> <figure><img src="/files/xo2Oxb38vrgc5sfuFQlf" alt="Small pink mask over the joined hands with a compact 1:1 generation window drawn around the boy and father"><figcaption><p>The masked area and the small generation window.</p></figcaption></figure></div>

The final image below was downloaded using the Download feature. While the downloaded image retained a 1024 × 1024 resolution, areas with a higher pixel density were downscaled but still preserved the improvements made.

For more details on resolution and pixel density in Canvas, refer to the last two sections of the [Canvas documentation](/canvas-and-editing/canvas/canvas-overview#canvas-and-image-sizes).

<figure><img src="/files/TxZjMi93MdOoKzYQNTTz" alt="Final Welcome family image with all faces and hands rendered cleanly"><figcaption><p>The final image.</p></figcaption></figure>

{% hint style="info" %}
**Getting even better results**

To further enhance image quality, consider using the Upscale feature before attempting any fixes. This will provide the AI with up to twice as many pixels to work with for the same selected area.

Keep in mind:

• The generation window has a fixed number of pixels based on its aspect ratio.

• If you upscale a 1:1 image (e.g., from 1024 × 1024 to 2048 × 2048), then use Magic Fill at a 1:1 aspect ratio (which generates a 1024 × 1024 image), it’s best to keep the generation window under half the size—both horizontally and vertically—of the upscaled image for optimal results.
{% endhint %}

***

## Advanced and Creative Examples

Magic Fill can be used creatively to achieve impressive results. The examples below demonstrate how pushing the limits of the tool can lead to surprising outcomes. For example, you can take an image of a product and seamlessly integrate it into another existing image.

{% hint style="warning" %}
The advanced techniques presented below sometimes push the tool to its limits. They are more about creative exploration and achieving good results can be challenging at times. Indeed, many factors influence the final rendering of the image like the prompt, the original image, the options used, etc.

Experimenting with prompts and different options is often essential, but even then, results may vary. If you encounter difficulties, you can ask for help in the [#prompt-w-friend](https://discord.com/channels/1106248220687994911/1145120589955223602) channel on our Discord server. Simply share your prompt, the generated image, and a brief description of the issue. Other users may be able to help you achieve better results.
{% endhint %}

### Inserting an Item from One Image into Another

In the example below, there is a photo of a decorative pillow with a geometric pattern and an image of a loveseat with some pillows in a living room. The goal is to modify the loveseat pillows so they match the design of the patterned pillow.

<div><figure><img src="/files/FNAwCJG87ZIhv1PMF0Dw" alt="Olive green decorative pillow with a symmetrical geometric pattern of white lines, on a white background"><figcaption></figcaption></figure> <figure><img src="/files/cli3MzgsKHrkxTPBXSA5" alt="Curved olive loveseat with two plain pillows in a modern living room with a palm plant"><figcaption></figcaption></figure></div>

1. Obtain a good description of both images.
   1. These descriptions will later be merged and optimized into a single prompt.
   2. If the image was generated directly in Ideogram, you can reuse the original prompt.
   3. If not, it is strongly recommended to use the Describe feature to generate an accurate description.
2. Place the two images side by side and resize one if necessary.
3. Click Magic Fill and mask the pillows in the loveseat image.
4. Click Next and adjust the generation window to cover:
   1. The entire pillow with the geometric pattern image.
   2. The masked area and a sufficient portion of the loveseat image to provide proper context.

<figure><img src="/files/PCtyrBxsyMd24IpzrsOp" alt="Canvas with the patterned pillow image on the left, both loveseat pillows masked in pink, and the generation window spanning both"><figcaption><p>The masked pillow on the right and the generation window.</p></figcaption></figure>

5. Merge and optimize the descriptions of both images:
   1. Description of the patterned pillow: `A decorative pillow with a geometric pattern. The primary color of the pillow is a soft and dark olive green, and the pattern consists of intertwined white lines forming intricate designs. The design appears symmetrical, with two mirrored patterns on either side of the pillow. The pillow is on a white background.`
   2. Prompt used to generate the loveseat image: `A close-up view of a cozy loveseat, without any pillow, in a modern living room. There are a few soft and dark olive green accents.`
   3. Merged and optimized prompt: **`On the left`**` , a decorative pillow with a geometric pattern. The primary color of the pillow is a soft and dark olive green, and the pattern consists of intertwined white lines forming intricate designs. The design appears symmetrical, with two mirrored patterns on either side of the pillow.`` `` `**`On the right`**`, a close-up view of a cozy loveseat with two pillows like the one on the left.`

{% hint style="info" %}
**Why optimize the prompt?**

* The revised prompt removes unnecessary details and focuses on the most relevant elements for the AI.
* The pillow description is detailed since it is the main element being generated.
* The background context remains slightly less detailed, as long as it provides enough visual reference.
  {% endhint %}

6. Adjust other options such as Style and Magic Prompt (it is recommended not to use Magic Prompt, as it might alter your optimized prompt)
7. Click Magic Fill and wait for the generation to complete.
8. Once the image is generated, click on it to cycle through the four generated variations using the arrows at the bottom.

<figure><img src="/files/W2SHNpqDKqIeRgXJbYwp" alt="Generated result with the loveseat pillows now showing the geometric pattern, 4 of 4 arrows beneath the selection"><figcaption><p>The generated image includes the pillow and the area selected by the generation window.</p></figcaption></figure>

9. Download the final image:
   1. Click the Download tool on the left-side panel.
   2. Select the desired area to be included in the final image.
   3. Click Download.

<figure><img src="/files/eGcRjv6xcNGhD65DfpHc" alt="Download panel with width and height fields set to 1024 and a dashed selection box drawn around the loveseat"><figcaption><p>The bounding box indicates the area that will be downloaded.</p></figcaption></figure>

Below is a comparison of the image before and after the transformation.

<div><figure><img src="/files/cli3MzgsKHrkxTPBXSA5" alt="Loveseat with the original plain pillows"><figcaption><p>Before</p></figcaption></figure> <figure><img src="/files/Ytq5KhflgSbuJv9YWTpZ" alt="Loveseat with both pillows now matching the geometric pattern design"><figcaption><p>After</p></figcaption></figure></div>

***

### Integrate Text and Logos in Images

It’s easy to overlay text on an image using the Text tool in Canvas, but seamlessly integrating text into the natural elements of an image can be more challenging.

In the example below, the goal is to make it look as if a message is handwritten in the sand on a beach.

Once a beach image is selected, the Text tool is used to choose a suitable font and position the text where it should appear in the final image.

<div><figure><img src="/files/0Wf4i2sXleUAhq2R5G5f" alt="Bird&#x27;s-eye photo of undisturbed sand at the waterline scattered with seashells and driftwood"><figcaption><p>The original image.</p></figcaption></figure> <figure><img src="/files/WKHa6SUkqHC32vuN0sC9" alt="Beach photo with the handwritten-style text Time for a little Vacation? overlaid in white across the sand"><figcaption><p>Positioning the text on the image.</p></figcaption></figure></div>

At this point, the text itself cannot be used directly to create the writing effect in the sand. Instead, follow these steps before proceeding to Magic Fill:

1. Move the text aside and make it completely black.
2. Use Remix on the text, setting the image weight to 100.\
   \&#xNAN;*This is necessary because a text box cannot be used directly in this technique—it must first be converted into an image.*
3. Place the newly created image near the beach image.

Now, apply the same technique used in the first example:

* Mask the area where the text should appear in the beach image.
* Adjust the Magic Fill generation window to include both the masked area and the black text image, ensuring the AI understands the reference.

Here's the prompt that was used:

**`On the left`**` , a text saying "Time for a little vacation?".`` `` `**`On the right`**`, the same text in the same style, roughly written by hand in the sand of an undisturbed sandy beach with seashells and other objects.`

<figure><img src="/files/PCVYOjsSz4FBQfa33VKO" alt="Generation window spanning the black text image on the left and a large pink masked area on the sand to the right"><figcaption><p>The rendered text on the left and the masked area on the right, both encompassed within the generation window.</p></figcaption></figure>

<figure><img src="/files/nZsylYTFw6WeFmVpfIMJ" alt="Beach photo where Time for a little Vacation? now appears carved into the sand among the shells"><figcaption><p>Final image with the text written in the sand.</p></figcaption></figure>

{% hint style="warning" %}
**Important notes**

The final image may appear more blurry or pixelated compared to the original. This happens because the Magic Fill-generated section is often about twice the size of the original image.

**Why does this happen?**

The total number of pixels remains constant for any aspect ratio, regardless of the generation window size on the canvas. This is a current limitation of this technique.

However, to achieve the best possible results, consider the following:

* Minimize the generation window
  * Keep it as small as possible while maintaining enough visual context for the AI.
* Reduce the size of the reference text or object
  * The AI can work with a smaller image as long as the prompt description is detailed enough.
  * Reducing the reference image by half often works just as well while helping shrink the generation window.
* Use the Upscale feature on the final image
  * Upscale makes the image larger and sharper.
  * Don’t forget to provide a detailed prompt when using Upscale for the best results.
    {% endhint %}

Here’s another example where text was integrated as embroidery on a baseball cap using the same technique.

<figure><img src="/files/vWYlIbaD59lWRJPku4Vq" alt="The word Baseball in bold black script lettering on a white background" width="375"><figcaption><p>The word ‘Baseball’ in Lobster font and rendered using Remix.</p></figcaption></figure>

<div><figure><img src="/files/rluL76j6mORaIKaw0iIn" alt="Plain beige baseball cap sitting on a wooden table in front of a blurred brick wall"><figcaption><p>Original baseball cap image.</p></figcaption></figure> <figure><img src="/files/ovrbl4R3ICa04IgejDUg" alt="The same cap with the word Baseball embroidered in red script across the front"><figcaption><p>Result after Magic Fill.</p></figcaption></figure></div>

Here's the prompt that was used: **`On the right`**` , the word "Baseball" written in a bold script font.`` `` `**`On the left`**`, the same word and font style than the one on the right but embroidered in red on the front of a baseball cap.`

Finally, using the same technique, it’s easy to integrate a logo onto an object.

<figure><img src="/files/Hy7HSHTZMvYymrK8B1K1" alt="Iron Helm Beer logo: a knight&#x27;s helmet on a dark red and white shield emblem" width="375"><figcaption><p>The original logo.</p></figcaption></figure>

<div><figure><img src="/files/bzHMrrO7akdm3pJx7Bqi" alt="Tall unbranded glass of beer with a foamy head on a bar counter next to two salted pretzels"><figcaption><p>The logo must be integrated into the glass.</p></figcaption></figure> <figure><img src="/files/iGCJhNrtCGsdzPDnP9nN" alt="The same glass of beer now bearing the Iron Helm Beer logo with realistic reflections"><figcaption><p>The final result. Notice the reflections on the logo.</p></figcaption></figure></div>

Here's the prompt used for the example above: **`On the left`**` , logo for a brand of beer named "Iron Helm". At the center of the logo is a detailed illustration of a knight's helmet, which appears to be made of metal with rivets and a nose guard. The helmet is depicted in a frontal view. The logo is enclosed within a shield-like emblem, which is predominantly dark red and white.`` `` `**`On the right`**`, the exact same logo on a glass of beer.`

***

### Product Placement

In this example, a perfume bottle from a photo will be integrated into two different scenes:

1. A studio photography setup.
2. An image where a woman holds the bottle.

The original image of the perfume bottle was generated in Ideogram, but any image could be used. There is no need to remove the background, as long as the image isn’t cluttered with other objects.

<figure><img src="/files/hB5vmL18oyHNpRvTrVGH" alt="Faceted blue perfume bottle with a silver cap, black neck and the word AZURE on the body and neck, on a plain background" width="375"><figcaption><p>Original image to be integrated, generated with Ideogram.</p></figcaption></figure>

#### Integrating the perfume bottle into a studio setup

Using the same technique as described in the previous examples:

* An area was masked where the bottle should be integrated.
* A part of a plate was also masked, allowing the AI to transform it into a more suitable pedestal, which it successfully did.

The perfume bottle image was placed on the left side of the studio setup image, and the generation window was made as small as possible while keeping some context.

Prompt used: **`To the left`**` , a perfume bottle for women named 'Azure' stands out prominently. The bottle has a gem-like, faceted design, predominantly blue with a silver cap and a black neck. The word 'AZURE' is prominently displayed on both the bottle and the neck.`` `` `**`On the right`**`, a close-up view of the same bottle is captured, placed atop a short white pedestal in a studio photography setup.`

<figure><img src="/files/9Fo3RDWApIsS6Hs7slz9" alt="Azure bottle image on the left and studio scene on the right with pink masks over the placement area and part of the plate"><figcaption><p>Masked areas and generation window size</p></figcaption></figure>

<div><figure><img src="/files/wXx1ktF6gKPOR3oi6HeT" alt="Empty studio scene with a white column, paper fans, blue satin fabric and a round white plate in front"><figcaption><p>Original image where the perfume bottle will be integrated</p></figcaption></figure> <figure><img src="/files/pxNxc6CLbonLrFt0SJ02" alt="Studio scene with the blue Azure bottle sitting on a white pedestal, matching the scene&#x27;s lighting"><figcaption><p>Final image. Note the subtle shadow and reflection.</p></figcaption></figure></div>

#### Integrating the perfume bottle into a lifestyle scene

For the next integration, an image of a woman holding a perfume bottle was generated in Ideogram. The goal was to create a suitable scene for integration.

As before:

* The perfume bottle image was placed to the left of the woman’s image.
* The affected areas (her hands and the existing bottle) were masked.
* The generation window was made as small as possible while keeping enough context for the AI, including part of the face and the base of the hands.

Prompt used: **`On the left`**` , a woman’s perfume bottle named 'Azure' features a unique, faceted design. The bottle is predominantly blue, with a silver cap and a black neck. The word 'AZURE' is prominently displayed on both the bottle and the neck.`` `` `**`On the right`**`, a chic woman holds the very same bottle of perfume.`

<figure><img src="/files/gkRqJlKg0OGxI7dbYTMH" alt="Azure bottle image on the left and the woman&#x27;s photo on the right with a pink mask covering her hands and the bottle she holds"><figcaption><p>Masked areas and generation window size.</p></figcaption></figure>

<div><figure><img src="/files/8t2JGQyqAEm2Si6WPFx8" alt="Blonde woman in a dark blazer holding a round peach-colored perfume bottle in front of a blue velvet backdrop"><figcaption><p>Original image where the perfume bottle will be integrated</p></figcaption></figure> <figure><img src="/files/BNbS8aiJqmY800i9ym8r" alt="The same woman now holding the blue faceted Azure bottle, its lighting matching the scene"><figcaption><p>Final image with the integrated bottle. Note how the AI adjusted the bottle to match the lighting conditions.</p></figcaption></figure></div>

***

## Tips and Tricks for Best Results

Achieving great results with **Magic Fill** and **Extend**, especially with advanced techniques, takes a mix of creativity, experimentation, and a bit of patience. Here are some key factors that can impact the final outcome:

* **Craft precise and detailed prompts** – Clarity in wording helps the AI understand what to generate.
* **Experiment with synonyms and rephrase** - Changing a few words or testing different ways of expressing the same idea in a prompt can make big difference.
* **Start with a high-quality image** – The better the input, the better the output.
* **Consider the complexity of the image** – Simpler modifications often yield more accurate results.
* **Optimize the generation window size** – Keeping it as small as possible while including enough context leads to sharper and more realistic outcomes.
* **Manage your expectations** – AI-generated results can vary, so refining your approach and testing different options is key to success.

By experimenting with different approaches, adjusting prompts, and fine-tuning generation settings, you can push the boundaries of what's possible and create stunning images.


# Text Tool

Part of the [Canvas](/canvas-and-editing/canvas/canvas-overview) feature, feature, the text tool adds text to an image or a composition on the canvas. Depending on how you use the feature—by writing, remixing, etc.—it might be really useful to:

1. Write formatted text the way you want, without any errors.
2. Get a specific typography style.
3. Replace/add text when it is not possible to do so via a prompt.
4. Add text in Ideogram rather than having to switch to another third-party app.
5. And more...

## Writing Text

1. While in Canvas, click the **Text tool** icon in the left-side panel.

<figure><picture><source srcset="/files/UY8foBGX4RPEXXKCxK8O" media="(prefers-color-scheme: dark)"><img src="/files/8HSo9b6HlMOldVPl2N17" alt="Text tool icon, a letter T, in the left-side panel" width="96"></picture><figcaption></figcaption></figure>

2. Click on the canvas to place the text at that position. A text box will then be placed on the canvas with a placeholder text already selected.

<figure><img src="/files/WxyobsSrLyjgBkl0ocrO" alt="New text box on the canvas with resize handles and the placeholder text Edit Text pre-selected" width="375"><figcaption></figcaption></figure>

3. Type in the text you want to write.

## Text Options

When the text box is selected you get access to different options in the right-side panel.

<figure><picture><source srcset="/files/inR9qFyaujfK1htERnuB" media="(prefers-color-scheme: dark)"><img src="/files/BwmliW54eNHvUnIsI9lU" alt="Text panel with font, size and weight menus, bold, italic and alignment buttons, a color picker and arrange options" width="366"></picture><figcaption></figcaption></figure>

These options will enable you to:

* Select the font you want from a pop-up menu.
* Adjust the size of the text.
* Choose the font weight if different weights are available.
* Apply bold and italic text formatting.
* Align the text.
* Choose or change the color of the text.
* Arrange the text box relative to other elements: Bring to front/forward, Send to back/backward.

Most of these options can be applied to the whole text box at once or to specific words or letters.

<figure><img src="/files/OrKSDtYaUkovKr6Q3md2" alt="The phrase What will you create? with each word in a different color and the word create in bold red"><figcaption><p>Example of different colors and font weight applied on text.</p></figcaption></figure>

## Example

Of course, it would be easy to add text to an image using the Text tool. However, let’s explore a way to use it more creatively.

1. Generate or upload an image in [Canvas](/canvas-and-editing/canvas/canvas-overview). It’s important to have either the prompt used to generate the image or to run the Describe function on an uploaded image to get a suitable starting prompt.

<figure><img src="/files/7jP9H0Exze2cWf83EB8J" alt="A plain dark blue baseball cap lying on a light wooden surface"><figcaption></figcaption></figure>

2. With the Type tool, write the text you want to appear. Choose your preferred font and adjust the size and color to your liking.

<figure><img src="/files/58YcDQHwiC06zYHUtEp6" alt="Selected text box with the word Baseball in tan script placed over the front of the plain cap"><figcaption></figcaption></figure>

3. Use the Remix tool and adjust the generation window exactly over the originale image and text.

Here are the settings used to create the two images below:

**Prompt**: *A photo of a plain, dull dark blue baseball cap. The text: "Baseball" is embroidered in tan color on the front. The cap is placed on a wooden surface. The background is clean and neutral.*\
**Image weight**: 60-70/100 (your value may vary)\
**Style**: General\
**Magic Prompt**: Off\
**Color**: Auto

<div><figure><img src="/files/cMz3POccSZqCWKj0dEaY" alt="Remixed cap with the word Baseball appearing embroidered in tan thread across the front"><figcaption></figcaption></figure> <figure><img src="/files/dTj2eFnyf7wA2S0SWHkG" alt="Second remixed cap with the Baseball lettering stitched in cream thread with a slightly raised look"><figcaption></figcaption></figure></div>

Because this technique uses Remix, the generated image is expected to be slightly different from the original. However, it has the advantage of maintaining a font style very similar to the original without requiring a detailed description. Additionally, it realistically makes the design appear embroidered on the baseball cap.


# Editor

With Ideogram’s Editor feature, you can modify an image as you see fit, including cropping, resizing, tweaking, and making adjustments that will be considered along with your prompt the next time you remix it. You can even use it to design, from scratch, the visual composition of the image you want to achieve.

## How to Access the Feature

While browsing images or viewing image in details, click the **More** icon <picture><source srcset="/files/DWOCdWuHaPBzJrjuAqYP" media="(prefers-color-scheme: dark)"><img src="/files/j1PqVesQERW9Wl6jRRLr" alt="More options icon" data-size="line"></picture> and select **Edit in Editor**.

<figure><picture><source srcset="/files/KC0tWDd126l2MT9ghbT6" media="(prefers-color-scheme: dark)"><img src="/files/6gAs1tY75O2hsCOWR15v" alt="More menu listing options such as Remix, Describe, and Upscale, with an arrow pointing to Edit in Editor" width="248"></picture><figcaption></figcaption></figure>

Alternatively, when using **Remix** or **Upscale**, click the tab the bottom of the prompt box, hover your mouse on the image. then click the **Editor** icon <picture><source srcset="/files/9TLVxmtrtNkLpetWDS0J" media="(prefers-color-scheme: dark)"><img src="/files/78TsXFBrkxQE8Uh4vY2m" alt="Editor pencil icon" data-size="line"></picture> in the popup menu.

<figure><picture><source srcset="/files/tSBs3CjzbQEFiFBFLODm" media="(prefers-color-scheme: dark)"><img src="/files/w6YkPR5EUEKFOuZuy6pF" alt="Remix panel showing a kitten image thumbnail with an arrow pointing to the pencil icon in its hover popup menu" width="375"></picture><figcaption><p>Location of the Editor icon.</p></figcaption></figure>

## The Different Tools Available

In the Editor, you have various tools available to you.

### Top Toolbar

<figure><picture><source srcset="/files/ELUYRxbI16nex9RwZcq0" media="(prefers-color-scheme: dark)"><img src="/files/s1SanRlmoIhwyNtuY5ID" alt="Toolbar numbered 1 to 7: crop, zoom, and drawing tools, thickness slider, preset thicknesses, eyedropper, and color selector" width="563"></picture><figcaption><p>The top toolbar of the Editor</p></figcaption></figure>

1. **Crop Tool**: Used to resize, enlarge, or reduce an image, or to change its aspect ratio.
2. **Zoom Tool**: Used to zoom in and position the image so you’re more comfortable making modifications. This tool does not alter the image in any way.
3. **Drawing Tool**: Use this tool to draw within the image.
4. **Pen Thickness**: Set the thickness of the drawing tool using the slider or by entering a number between 1 and 100.
5. **Predefined Thickness**: Provides 4 predefined drawing tool thicknesses for easy access.
6. **Eyedropper**: This tool lets you select the drawing tool color directly from the existing image. You can also activate this tool by control-clicking (CTRL-click on PC) or by two-finger tapping on the image.
7. **Color Selector**: Use this tool to manually select the desired color.

### Bottom Toolbar

<figure><picture><source srcset="/files/bzbMqjDN8v4aSUDSvBWy" media="(prefers-color-scheme: dark)"><img src="/files/EaHPhTzMvHLfBOQQSXss" alt="Toolbar numbered 1 to 4: undo and redo arrows, Cancel link, Private/Public toggle, and Save button" width="563"></picture><figcaption><p>The bottom toolbar of the Editor</p></figcaption></figure>

1. **Undo/Redo**: Reverse the last action or reapply the last undone action.
2. **Cancel**: Exit the Editor without saving. You will return to the prompt area.
3. **Private/Public**: Choose whether your drawing should be private or public. Private edits are available only to Ideogram Plus subscribers and above.
4. **Save**: Save your changes and return to the prompt area.

### The Crop Tool

When you select the Crop Tool, a different toolbar will appear at the bottom.

<figure><picture><source srcset="/files/kL5KLtc18Lhp6kd6tSlM" media="(prefers-color-scheme: dark)"><img src="/files/ITsPpxNmIw7YHvTl1xAN" alt="Crop toolbar numbered 1 to 4: aspect ratio presets 9:16, 1:1, and 16:9, zoom controls at 100%, Cancel link, and Crop button" width="563"></picture><figcaption><p>The bottom toolbar when using the Crop Tool</p></figcaption></figure>

1. **Aspect Ratios**: Choose the aspect ratio for your image. You can click on the down arrow on the right to see all the available aspect ratios.
2. **Zoom**: Visualize the percentage of magnification for the image. You can use the + and - buttons to magnify or reduce the image (or pinch to adjust on mobile) to your liking.
3. **Cancel**: Use this option if you want to leave the Crop Tool without saving.
4. **Crop**: When you are ready to crop your image, save it and return to the Editor.

## Examples

### Draw an Image from Scratch

You can use the editor to create any image from scratch and let Ideogram generate an enhanced version based on your drawing and prompt.

<figure><img src="/files/kki7NcxLcl9My3yY77K3" alt="Simple flat sketch of a green frog on a grey road, with an orange hill, dark red sky, and yellow sun"><figcaption><p>Basic drawing representing the subject, colour and composition of the elements of the prompt.</p></figcaption></figure>

Once the drawing is complete and saved, simply run a remix on it using a suitable prompt to describe what you want in the final image.

**Prompt:** *Illustration of a frog on a country road at sunset.*\
**Model**: Ideogram version 2.0\
**Remixed image weight** of 45/100\
**Magic Prompt**: Off\
**Style**: General\
**Rendering**: Default

Result:

<figure><img src="/files/icKrbf8ddILVHgpkaHuf" alt="Polished illustration of a spotted green frog sitting on a country road at sunset, with fences and fields on either side"><figcaption></figcaption></figure>

### Remove Unwanted Elements

You can remove unwanted elements from the image by using the pen tool and selecting the background color. In this example, the placeholder text on the menu design was removed, leaving space for a blank copywriting area.

<div><figure><img src="/files/tdqcYYDygWxDdtvlxgwV" alt="Sushi restaurant menu design with illustrated plates of sushi and placeholder text listing dishes"><figcaption></figcaption></figure> <figure><img src="/files/uvgqgYjOI2pwtkLXxkQL" alt="The same sushi menu with the placeholder text erased, leaving blank space beside the illustrated plates"><figcaption></figcaption></figure></div>

In this case, the little spots around the pets were removed and a little patch of gold/brown removed from the dog's fur.

<div><figure><img src="/files/hQwJXr4BMufuZfnC7jK7" alt="T-shirt design of a grey tabby cat nose to nose with a tricolor dog on black, with faint specks around the pair"><figcaption></figcaption></figure> <figure><img src="/files/ZK5tk9ZQqRrJwGZdCnzD" alt="The cleaned-up cat and dog design with the stray specks and the discolored patch on the dog&#x27;s fur removed"><figcaption></figcaption></figure></div>


# Image Upload

Available to users on the Ideogram Plus plan and higher, the Image Upload feature allows you to upload your own images to Ideogram and use them in various ways.

## Uploading an Image

You can upload an image by simply pasting it into the prompt area or by clicking on the **Image upload** icon <picture><source srcset="/files/DGpBbiV2nCXSrblsIpjs" media="(prefers-color-scheme: dark)"><img src="/files/pS5s4cg4RQ63N5aYEEkF" alt="Image upload icon" data-size="line"></picture> located on the right side of the prompt box. You can also upload images in **Canvas** as described [here](/canvas-and-editing/canvas/canvas-overview#uploading-external-images).

<figure><picture><source srcset="/files/LSGlDvbPvkdVp7OGf6OI" media="(prefers-color-scheme: dark)"><img src="/files/oieZSF31DSSCmMUFTvQO" alt="Prompt box with an arrow pointing to the camera-style upload icon beside the Generate button"></picture><figcaption><p>Prompt box and location of the upload icon.</p></figcaption></figure>

Choose the image you'd like to upload.

<figure><picture><source srcset="/files/EfkObWN3b6cX3RGwj1a4" media="(prefers-color-scheme: dark)"><img src="/files/XrtKO71BqkDBjxIDMtku" alt="macOS file picker with a file named My image.png selected and Cancel and Open buttons below" width="563"></picture><figcaption><p>Use your file browser to select an image.</p></figcaption></figure>

{% hint style="info" %}
Uploaded images are private and can be found in your Library where uploaded and private images are available.
{% endhint %}

You will then be presented with the actions currently supported for your account, plan, and selected image:

1. [**Describe**](/using-ideogram/features-and-tools/describe): This option will use AI to generate a description of your image and use it as a prompt without retaining the original image.
2. [**Remix**](/using-ideogram/features-and-tools/remix): This option will also describe the uploaded image but will retain the image as a base for generating the new one.
3. [**Upscale**](/using-ideogram/features-and-tools/upscale): This option is used to enhance your image to a higher resolution.
4. **Style reference**: Use the image as a style reference when generating images.
5. **Character Reference**: Use the image as a character reference where supported.
6. Open in [**Canvas**](/canvas-and-editing/canvas/canvas-overview): Open image in Canvas. You can alternatively click on the down arrow to:
   1. Select [**Magic Fill**](/canvas-and-editing/canvas/magic-fill) to set-up Magic Fill with the image in Canvas.
   2. Select [**Extend**](/canvas-and-editing/canvas/extend) to use Extend with the image in Canvas.
7. [**Remove BG**](/using-ideogram/features-and-tools/replace-or-remove-background): This option will remove the background from the main subject of the image.
8. [**Replace BG**](/using-ideogram/features-and-tools/replace-or-remove-background): This option will generate a replacement background from a prompt where supported.

<figure><picture><source srcset="/files/kuRusgDEt2sURISV1vmg" media="(prefers-color-scheme: dark)"><img src="/files/UIcEx6Oc0VK99oC55wMf" alt="Uploaded abstract painting of horizon stripes with buttons for Describe, Remix, Upscale, Style reference, Open in Canvas, and Remove bg" width="563"></picture><figcaption></figcaption></figure>

In this example, we will choose the **Remix** option.

Selecting the [**Remix**](/using-ideogram/features-and-tools/remix) option keeps the image in the prompt area, allowing it to be used as a base for the next remixed image. Additionally, the AI automatically provides a description of your image by using the [**Describe**](/using-ideogram/features-and-tools/describe) function, which can serve as the starting point for your prompt.

<figure><picture><source srcset="/files/HNDY8cKCtpXeUVI6rxyh" media="(prefers-color-scheme: dark)"><img src="/files/m9WWxbj37gn3aP1Sqsr8" alt="Prompt box with an AI-written description of the landscape painting and a Remix chip at weight 60 showing the image thumbnail"></picture><figcaption><p>The prompt box once you have chosen and ajusted the Remix option.</p></figcaption></figure>

{% hint style="info" %}
Please note a notification at the top of the prompt might appear when your image doesn't have a dimension similar to a default aspect ratio. It will indicate that your image will be automatically cropped to the nearest supported aspect ratio in Ideogram. If you wish to adjust the image manually before remixing, consider using the [Editor](/canvas-and-editing/editor).
{% endhint %}

Once you have adjusted all the parameters and the prompt to your liking, simply press the "Remix" button to generate the image.

In this example, the prompt was modified to reflect the desired image and used in conjunction with the [Magic Prompt](/using-ideogram/generation-settings/magic-prompt) feature to produce the result shown in the image below.

<figure><picture><source srcset="/files/bTnyrYhqLK1cJcSmf9ew" media="(prefers-color-scheme: dark)"><img src="/files/dGsmBDxH6snDx6wLIrdH" alt="Details view of a generated abstract impasto painting of a sailboat at dawn, with its prompt and the uploaded image as remix parent"></picture><figcaption><p>This is the result of the uploaded image and the prompt mixed together.</p></figcaption></figure>

The following examples demonstrate how image prompting can influence the position and style of text in the final generation.

<table data-card-size="large" data-view="cards"><thead><tr><th></th><th></th><th></th></tr></thead><tbody><tr><td><strong>Original image</strong></td><td><img src="/files/Xvep1CZ6AoNvD5m6gNJm" alt="Orange road sign on a desert highway reading Road Work Next 5 Miles" data-size="original"></td><td>This is the original image that was uploaded as the basis for the remixes presented in the next three images. Note that these images maintain visual consistency with the original, while adhering to their respective prompts.</td></tr><tr><td><strong>Output A</strong></td><td><img src="/files/ONMJnWKaMbdzl2lgVNCW" alt="Gridlocked dystopian city street beneath an LED billboard reading Road Rage Next 5 Hours" data-size="original"></td><td>[Traffic Havoc] A dystopian cityscape, gridlocked streets with a foreboding road sign declaring "Road Rage - Next 5 hours." Agitated drivers amidst polluted air, inspired by the cyberpunk style. Stark neon lights, dark atmosphere, and a gritty, ultra-realistic portrayal., typography, photo, cinematic</td></tr><tr><td><strong>Output B</strong></td><td><img src="/files/ec8zObQ8VSRy4RPjwhL3" alt="Rain-soaked neon-lit street crowded with cars under a yellow sign reading Road Rage Next 5 Hours" data-size="original"></td><td>[Rush Hour Havoc] Overcrowded urban road, perpetual traffic, ominous "Road Rage - Next 5 hours" sign. Infused with cyberpunk aesthetics, neon-lit surroundings, rain-soaked streets, a Blade Runner vibe, intense lighting, gritty realism, sharp details., typography, photo, cinematic</td></tr><tr><td><strong>Output C</strong></td><td><img src="/files/AFoMDQ4L78Qe2kHIornK" alt="Countryside roadside sign under a vast cloudy sky reading Road is yours Next 5 Hours" data-size="original"></td><td>[Timeless Journey] Expansive countryside, a winding road leading into the unknown. The road sign, "Road is yours - Next 5 hours," under a vast sky. An homage to the simplicity of Grant Wood's style, subtle realism, muted color palette, capturing the essence of a timeless and leisurely journey., typography, photo, cinematic</td></tr></tbody></table>


# Community and Social


# Creator Titles

Top users on Ideogram are awarded titles to recognize their work. Current titles include:

1. Elite Creator
2. Top Creator
3. Leading Creator

Titles are awarded to users based on [a number of metrics](#metrics-used). In order to be eligible for a title, you must have logged in recently, and produced images that align with our [<mark style="color:blue;">Terms of Service</mark>](https://ideogram.ai/legal/tos).

When a user has a title, their profile image will be outlined with the colour (gold, silver or bronze) and the title will be displayed in their profile.

<table data-view="cards"><thead><tr><th></th><th></th><th></th></tr></thead><tbody><tr><td><picture><source srcset="/files/XXhI8BSODAI1ZudHKuUf" media="(prefers-color-scheme: dark)"><img src="/files/5eyTEUuifwqKmGTtKwCj" alt="Profile picture outlined with a gold ring for the Elite Creator title" data-size="original"></picture></td><td><picture><source srcset="/files/W4bRbaE64qOjQZeZtHOM" media="(prefers-color-scheme: dark)"><img src="/files/yxOb9TGlJb62uvjQoBXv" alt="Elite Creator badge with a gold ribbon icon" data-size="original"></picture></td><td></td></tr><tr><td><picture><source srcset="/files/hZHFywJb4BHTG1l8AW2M" media="(prefers-color-scheme: dark)"><img src="/files/wbEuNzFYOiQpb21W3teL" alt="Profile picture outlined with a silver ring for the Top Creator title" data-size="original"></picture></td><td><picture><source srcset="/files/5EcZAr5EbWAAuVKduiSu" media="(prefers-color-scheme: dark)"><img src="/files/mY1vInrXsSvgq9ptl8T7" alt="Top Creator badge with a silver ribbon icon" data-size="original"></picture></td><td></td></tr><tr><td><picture><source srcset="/files/tdqUYdFSXHY4VL0t6qkn" media="(prefers-color-scheme: dark)"><img src="/files/T3IdhZ6StCYnfRXAKiIN" alt="Profile picture outlined with a bronze ring for the Leading Creator title" data-size="original"></picture></td><td><picture><source srcset="/files/7xZ8HEjg1VvuJJACWT3k" media="(prefers-color-scheme: dark)"><img src="/files/JSWBYIpVxIl2qQ4csSh4" alt="Leading Creator badge with a bronze ribbon icon" data-size="original"></picture></td><td></td></tr></tbody></table>

### Metrics Used

The metrics used to determine how titles are awarded include, but are not limited to:

* Total number of generations created
* Total number of distinct users that liked your generations
* Total number of followers
* Total number of times your generations have been remixed by other users

These metrics are computed on a weekly basis, and titles are assigned to the top users in each category for one week.

### Perks

By default, users on the free plan have 10 [Slow credits](/plans-and-pricing/available-plans#slow-credits) per week. When you have a title, this number increases:

<table><thead><tr><th>Title</th><th>Number of Slow credits / Week</th><th data-hidden>Number of Generations</th><th data-hidden></th></tr></thead><tbody><tr><td>Elite Creator</td><td>500</td><td></td><td></td></tr><tr><td>Top Creator</td><td>200</td><td></td><td></td></tr><tr><td>Leading Creator</td><td>100</td><td></td><td></td></tr></tbody></table>

{% hint style="warning" %}
The [Slow credits](/plans-and-pricing/available-plans#slow-credits) associated with users who have earned a Creator title reset every Saturday at 00:00 UTC (overnight from Friday to Saturday).
{% endhint %}

{% hint style="info" %}
If you have a Plus plan and up, these titles won't matter much, as you already have an unlimited number of standard generations.
{% endhint %}


# Following Another User


# Muting Other Users

We're committed to making Ideogram a safe and relaxing experience for everyone. If you don't want to see someone's images and notifications in your feed, you can mute them. They will not be notified that they have been muted by you.

## Muting a Creator

There are three methods to access this feature:

1. **When viewing a user profile page.**

When you're on a user's profile page, click the menu icon <picture><source srcset="/files/DWOCdWuHaPBzJrjuAqYP" media="(prefers-color-scheme: dark)"><img src="/files/j1PqVesQERW9Wl6jRRLr" alt="Menu icon" data-size="line"></picture> , then then click "Mute creator" within the menu.

<figure><picture><source srcset="/files/zof2Shrl42HA0M2uhv82" media="(prefers-color-scheme: dark)"><img src="/files/hcRtZDoiIuy1oLXIzRU2" alt="Profile header with the three-dot menu open and the Mute creator option highlighted above Report creator" width="563"></picture><figcaption><p>User profile page</p></figcaption></figure>

2. **When browsing or viewing a specific image.**

Click the More icon <picture><source srcset="/files/DWOCdWuHaPBzJrjuAqYP" media="(prefers-color-scheme: dark)"><img src="/files/j1PqVesQERW9Wl6jRRLr" alt="More icon" data-size="line"></picture> then select **Mute creator**.

<figure><picture><source srcset="/files/XVr9Q9zgS1TWuVeIxR5S" media="(prefers-color-scheme: dark)"><img src="/files/4JoQW2GdFjbYF6UxRIl7" alt="Image options menu listing Remix, Upscale and other actions, with Mute creator highlighted at the bottom" width="248"></picture><figcaption></figcaption></figure>

## Unmuting a Creator

To unmute a creator or to manage mute users, simply click on the Settings menu <picture><source srcset="/files/h8wszmkuHrm9TqFQfd70" media="(prefers-color-scheme: dark)"><img src="/files/q9A0baWA6z88I5r3MghQ" alt="Settings menu icon" data-size="line"></picture> located at the bottom of the left-side panel on desktop computers or the bottom right side on mobile then select "Manage muted users".

<figure><picture><source srcset="/files/Ho0BBBt42xCTSIu8g8Od" media="(prefers-color-scheme: dark)"><img src="/files/KkeVEJTNYq8kJ251fySX" alt="Account settings menu with a red arrow pointing to the Manage muted users option" width="272"></picture><figcaption></figcaption></figure>

In the modal window, simply users by clicking the "Unmute" button.

<figure><picture><source srcset="/files/Ap9uEONTvJMLPOxnWEkT" media="(prefers-color-scheme: dark)"><img src="/files/rQCOBU0ZZHD6hdqNXYtq" alt="Muted creators dialog listing muted users with their mute dates and an Unmute button beside each name" width="563"></picture><figcaption></figcaption></figure>


# Discord

Ideogram has an official Discord server where you can connect with other creators, share your work, ask questions, and talk directly with the Ideogram team.

Whether you're just getting started or a long-time user, the server is a great place to get help, stay up to date, and be part of the Ideogram community.

<figure><img src="/files/WNd4wK8z45N0RyLzjWJZ" alt="Retro typographic poster reading Done is better than perfect in cream, yellow, and red letters on black"><figcaption></figcaption></figure>

## Joining the Server

To join, visit [**discord.gg/ideogram**](https://discord.gg/ideogram) and connect with your Discord account. No invitation is required — the server is open to everyone.

If you don't have a Discord account yet, you can create one for free at [discord.com](https://discord.com).

## What You Can Do

* **Get help** — Ask questions and get answers from other Ideogram users and the Ideogram team.
* **Share your work** — Post your creations, get feedback, and see what others are making.
* **Talk to staff** — The Ideogram team is active on the server and available for questions and feedback.
* **Stay informed** — Be the first to hear about new features, model releases, and announcements.

We look forward to seeing you there :sunglasses:!


# Available Plans

Get more out of Ideogram

Last verified: June 2, 2026 by docs audit handoff.

For current plan names, prices, included credits, top-up options, billing cadence, and feature availability, use the live pricing page: [ideogram.ai/pricing](https://ideogram.ai/pricing).

This page gives a stable overview of how plans and credits work. Pricing and credit amounts can change, so do not rely on static tables in docs for purchase decisions.

## Plans

Ideogram offers free and paid plan options. Paid plans can unlock additional capabilities such as more generation capacity, priority processing, private generation, uploads, advanced tools, team administration, and batch generation, depending on the plan and current product rollout.

Team plan details are covered in [Team Plan](/plans-and-pricing/team-plan). API access is billed and managed separately from normal Ideogram subscriptions; see [Ideogram API](/plans-and-pricing/ideogram-api).

## Credit System

Ideogram uses credits for image generation and some tools. Credit usage can depend on:

* selected model;
* render speed;
* number of output images;
* resolution or size tier;
* workflow or tool used.

For model-specific or endpoint-specific credit costs, use current product pricing, generated pricing data, or owner-verified cost data.

{% hint style="info" %}
**Credit usage:** Reference and Edit image tools use **priority credits** on paid plans — they don't run in the slow queue. On the Free plan, these tools run using **Slow credits**.
{% endhint %}

## Priority and Slow Credits

Priority credits are processed ahead of slow-queue generations. Slow credits or slow queue access can be available according to your plan and current product policy.

If your priority credits run out, Ideogram may move eligible generations to the slow queue or require a top-up, upgrade, or later retry depending on your plan and current product state.

## Top-Up Credits

Top-up availability, pack sizes, purchase limits, rollover behavior, and prices should be verified in the live product before publication. Use [ideogram.ai/pricing](https://ideogram.ai/pricing) for current top-up information.

## Billing and Legal Terms

Subscription management, cancellation, renewal, refunds, and billing behavior are governed by the current checkout flow and Ideogram legal terms.

* Pricing: [ideogram.ai/pricing](https://ideogram.ai/pricing)
* Terms of Service: [ideogram.ai/legal/tos](https://ideogram.ai/legal/tos)
* Account settings: [Account Settings](/using-ideogram/account-settings)


# Billing & Subscriptions

Your Ideogram subscription is managed from one place: click your profile picture and select **Manage Subscription**, or visit [ideogram.ai/pricing](https://ideogram.ai/pricing) while signed in. This opens the plans page; the **Manage billing** button at the top right opens the billing portal, where subscription, payment, and invoice controls live.

<figure><img src="/files/vkFvRQuLr5cTsE2L2Rk2" alt="Ideogram profile picture menu open, with the Manage subscription option highlighted"><figcaption><p>Open the profile picture menu and select <strong>Manage subscription</strong>.</p></figcaption></figure>

From there you can:

* [Cancel your subscription](/plans-and-pricing/billing-and-subscriptions/cancelling-your-subscription)
* [Check your renewal date and billing cycle](/plans-and-pricing/billing-and-subscriptions/renewals-and-billing-cycles)
* [Switch to a different plan](/plans-and-pricing/billing-and-subscriptions/switching-or-downgrading-plans)
* [Download invoices and update billing details](/plans-and-pricing/billing-and-subscriptions/invoices-receipts-and-tax-details)
* Update your payment method

{% hint style="info" %}
Your subscription is tied to the specific account you were signed into when you subscribed. If you sign in with a different method (for example Google instead of Apple, or another email address), you will be in a different account and your subscription will not appear there. See [Troubleshooting Billing Issues](/plans-and-pricing/billing-and-subscriptions/troubleshooting-billing-issues).
{% endhint %}

For a comparison of what each plan includes, see [Available Plans](/plans-and-pricing/available-plans) and the live pricing page at [ideogram.ai/pricing](https://ideogram.ai/pricing). Refund eligibility is covered in [Refunds](/plans-and-pricing/billing-and-subscriptions/refunds).


# Cancelling Your Subscription

You can cancel your Ideogram subscription at any time from the billing management screen. Cancelling stops future renewal charges — it does not end your current paid period early.

{% hint style="warning" %}
**Cancel at least 5 days before your renewal date.** Per Ideogram's [Terms of Service](https://ideogram.ai/legal/tos), cancellations must be made five (5) days before the subscription renewal date. If you cancel closer to the renewal date, the next charge may still be processed.
{% endhint %}

## How to cancel

1. Make sure you are signed in to the account that holds the subscription. If you don't see a paid plan on your account, check whether you subscribed under a different sign-in method or email — see [Troubleshooting Billing Issues](/plans-and-pricing/billing-and-subscriptions/troubleshooting-billing-issues).
2. Click your profile picture and select **Manage Subscription**, or open [ideogram.ai/pricing](https://ideogram.ai/pricing).
3. Click **Manage billing** at the top right of the plans page. This opens the billing portal.

<figure><img src="/files/MKu1WPwrzanGYcdZXoln" alt="Ideogram plans page with the Manage billing button at the top right highlighted"><figcaption><p><strong>Manage billing</strong> opens the billing portal.</p></figcaption></figure>

4. In the billing portal, click **Cancel subscription** next to your current subscription.

<figure><img src="/files/Tt6JLFGLPcJEBemGGE5d" alt="Billing portal showing the current subscription, payment method, billing information, and invoice history, with the Cancel subscription button highlighted"><figcaption><p>The <strong>Cancel subscription</strong> button in the billing portal.</p></figcaption></figure>

5. Optionally tell us why you're leaving, then click **Continue to cancellation**.

<figure><img src="/files/djYbufFRIE2poiPRTDvg" alt="Cancel your subscription dialog with a reason dropdown and feedback field, with the Continue to cancellation button highlighted"><figcaption><p>Choose a reason (optional) and continue.</p></figcaption></figure>

6. Review the confirmation page — it shows the date your access ends — and click **Cancel subscription** to confirm.

<figure><img src="/files/7CazcAwp2WVBmmtczsLz" alt="Confirm cancellation page stating the subscription remains available until the end of the billing period, with the Cancel subscription button highlighted"><figcaption><p>Your plan stays active until the end of the period you already paid for.</p></figcaption></figure>

## What happens after you cancel

* You keep your plan benefits until the end of the period you have already paid for. Payments are non-refundable and there are no credits for partially used periods — see [Refunds](/plans-and-pricing/billing-and-subscriptions/refunds).
* When the paid period ends, your account moves to the free plan.
* Existing private images remain private. Creating new private images may require an eligible paid plan — see [Private Generations](/using-ideogram/generation-settings/private-generations).

## Monthly and annual plans

The cancellation steps are the same for monthly and annual billing. In both cases, cancelling stops the next renewal; your access continues until the end of the current billing period. Annual subscribers keep access until the end of the prepaid year.

## Confirming your cancellation

After cancelling, the billing portal shows a **Cancels** badge on your subscription and the date your service ends. If you don't see this, the cancellation did not complete — try again or contact <support@ideogram.ai>.

<figure><img src="/files/Q8QThrIFN8398BD98oCx" alt="Billing portal after cancelling, showing a Cancels badge, the service end date, and a Don&#x27;t cancel subscription button"><figcaption><p>A completed cancellation shows the end date — and can be undone.</p></figcaption></figure>

## Changed your mind?

As long as your paid period hasn't ended yet, you can undo a cancellation: open the billing portal again and click **Don't cancel subscription**. Your plan resumes and will renew as before.


# Renewals and Billing Cycles

Ideogram subscriptions renew automatically at the billing frequency you chose when subscribing — monthly or annual. Your payment method is charged on each renewal date until you cancel.

## Finding your next renewal date

1. Click your profile picture and select **Manage Subscription**, or open [ideogram.ai/pricing](https://ideogram.ai/pricing).
2. Click **Manage billing** at the top right of the plans page. The billing portal shows your current plan, billing frequency, and next billing date.

<figure><img src="/files/YcwrDbgasOWMzB10FjzL" alt="Billing portal with the line reading Your next billing date is August 6, 2026 highlighted"><figcaption><p>Your next billing date is shown under your current subscription.</p></figcaption></figure>

## Avoiding an unwanted renewal

* Cancel **at least 5 days before your renewal date** — per the [Terms of Service](https://ideogram.ai/legal/tos), cancellations must be made five (5) days ahead of renewal to take effect for that period. See [Cancelling Your Subscription](/plans-and-pricing/billing-and-subscriptions/cancelling-your-subscription).
* Cancelling early does not shorten your access: you keep your plan benefits until the end of the period you already paid for. There is no reason to wait until the last day.
* Annual plans renew once a year, which makes the renewal easy to forget. If you don't plan to continue, cancel ahead of time — renewal payments are non-refundable (see [Refunds](/plans-and-pricing/billing-and-subscriptions/refunds)).

## Invoices for renewal charges

Every charge has a corresponding invoice available in billing management. See [Invoices, Receipts, and Tax Details](/plans-and-pricing/billing-and-subscriptions/invoices-receipts-and-tax-details).


# Refunds

Subscription payments are non-refundable, and there are no credits for partially used billing periods. Refund eligibility is governed by Ideogram's [Terms of Service](https://ideogram.ai/legal/tos).

If you no longer want your subscription, [cancel it](/plans-and-pricing/billing-and-subscriptions/cancelling-your-subscription) — you keep your plan benefits until the end of the period you already paid for, and you won't be charged again.

## Billing errors

If you believe a charge is a billing error — for example, you were charged twice for the same billing period — contact <support@ideogram.ai> with:

* the email address of your Ideogram account (include any other email addresses you may have signed up with);
* the date and amount of the charge;
* the invoice number or a copy of the receipt (see [Invoices, Receipts, and Tax Details](/plans-and-pricing/billing-and-subscriptions/invoices-receipts-and-tax-details)).

## Charged after cancelling?

If you cancelled but were still charged, the most common causes are a subscription on a different account or a cancellation made less than 5 days before the renewal date. Work through [Troubleshooting Billing Issues](/plans-and-pricing/billing-and-subscriptions/troubleshooting-billing-issues) first — it resolves most cases.


# Switching or Downgrading Plans

You can move between Ideogram plans without cancelling and resubscribing.

## How to switch plans

1. Click your profile picture and select **Manage Subscription**, or open [ideogram.ai/pricing](https://ideogram.ai/pricing). The plans page shows all available plans.
2. Use the **Monthly / Annually** toggle to pick your billing frequency.
3. Click the button on the plan you want — **Upgrade plan**, **Modify plan**, or **Downgrade plan** depending on where it sits relative to your current plan — and confirm.

<figure><img src="/files/s6UwHmVv3PaMQVGoaEYa" alt="Ideogram plans page showing Free, Plus, and Pro plans with the Downgrade plan, Modify plan, and Upgrade plan buttons and the monthly or annual billing toggle highlighted"><figcaption><p>Pick a billing frequency, then choose the plan to switch to.</p></figcaption></figure>

## When the change takes effect

* **Upgrades apply immediately.** You get the higher plan's benefits right away and are charged the prorated difference for the remainder of your current billing period.
* **Downgrades apply at your next renewal.** You keep your current plan until the end of the period you already paid for; there is no refund or credit for the difference. From the renewal date onward you are billed for the lower plan.

While a downgrade is pending, your billing screen shows the upcoming plan change. You can cancel the pending downgrade any time before it takes effect and stay on your current plan.

## Check the billing frequency before you confirm

Each plan is available with monthly or annual billing, and the checkout shows both. Double-check that you selected the plan **and** the billing frequency you intended — for example, annual Plus and monthly Pro can have similar checkout prices but are very different commitments. Payments are non-refundable once made (see [Refunds](/plans-and-pricing/billing-and-subscriptions/refunds)).

## Changes that aren't self-serve

* **Annual to monthly billing** on the same plan can't be changed from the billing screen. Contact <support@ideogram.ai>.
* **Team plans** can't be downgraded to an individual plan (Basic, Plus, or Pro) from the billing screen. Contact <support@ideogram.ai>.

For what each plan includes, see [Available Plans](/plans-and-pricing/available-plans) and [ideogram.ai/pricing](https://ideogram.ai/pricing).


# Invoices, Receipts, and Tax Details

Every subscription charge has an invoice you can view and download yourself — you don't need to contact support for a copy.

## Downloading an invoice

1. Click your profile picture and select **Manage Subscription**, or open [ideogram.ai/pricing](https://ideogram.ai/pricing).
2. Click **Manage billing** at the top right of the plans page. This opens the billing portal.
3. Under **Invoice history**, click the charge you need, then use **Download invoice** or **Download receipt**.

<figure><img src="/files/Dk9G4BlxLhCQH3zes7YH" alt="Invoice detail page showing charge amount, invoice number, payment date, and payment method, with the Download invoice and Download receipt buttons highlighted"><figcaption><p>Every charge has a downloadable invoice and receipt.</p></figcaption></figure>

## Adding company details or a VAT / tax ID

If you need invoices to show a company name, billing address, or tax ID:

1. Open **Manage billing** as above, then click **Update information** under Billing information.
2. Fill in the details you need on the invoice. The **Tax ID** field supports the tax and VAT ID formats of most countries, and you can add more than one ID.
3. Click **Save**.

<figure><img src="/files/JNy4XNK4HECycxghZFDC" alt="Billing information form with name, email, address, and phone fields, and the Tax ID section highlighted"><figcaption><p>Add a company name, address, and tax or VAT IDs to your billing information.</p></figcaption></figure>

Updated billing details appear on invoices issued after the change. If you need details corrected on an invoice that was already issued, contact <support@ideogram.ai> with the invoice number and the exact details to add.


# Troubleshooting Billing Issues

## "I cancelled, but I was still charged"

Work through these checks in order — the first one resolves most cases.

### 1. The subscription may be on a different account

Signing in with a different method creates a **separate Ideogram account**: Google, Apple, and email sign-ins with different addresses are all distinct accounts, each with its own subscription. A common symptom is signing in and unexpectedly seeing a free plan — that usually means you're in a different account than the one you subscribed with.

* Check which email address received the charge receipt — that's the account that holds the subscription.
* Sign in with that email or sign-in method, then open **Manage Subscription** to confirm the subscription is there and cancel it.

### 2. The cancellation may have been inside the 5-day window

Per the [Terms of Service](https://ideogram.ai/legal/tos), cancellations must be made at least **5 days before the renewal date**. If you cancelled closer to renewal than that, the charge for the new period may still have been processed. Contact <support@ideogram.ai> with the date you cancelled and the date of the charge.

### 3. The cancellation may not have completed

A completed cancellation shows on the billing management screen as a cancelled plan with an access end date. If your plan still shows as active with a next renewal date, the cancellation didn't go through — cancel again following [Cancelling Your Subscription](/plans-and-pricing/billing-and-subscriptions/cancelling-your-subscription).

## "My payment failed"

If a renewal charge fails (expired card, insufficient funds, or a decline):

1. Open **Manage Subscription** → **Manage billing** and update your payment method.
2. Failed charges are retried automatically over the following days, so updating your payment method is usually enough.
3. If your plan benefits don't return after the payment succeeds, contact <support@ideogram.ai>.

## Contacting support about billing

To resolve a billing issue in one round-trip, email <support@ideogram.ai> with:

* the email address of your Ideogram account — plus any other addresses or sign-in methods you may have used;
* the date and amount of the charge;
* the invoice number or receipt (see [Invoices, Receipts, and Tax Details](/plans-and-pricing/billing-and-subscriptions/invoices-receipts-and-tax-details));
* for cancellation issues: the date you cancelled.


# Team Plan

The Team plan is for organizations or groups that want centralized plan administration, billing, and member access.

For current pricing, seat minimums, included credits, and plan availability, see [ideogram.ai/pricing](https://ideogram.ai/pricing).

## Accessing the Team Page

1. Click the workspace switcher at the top left of the sidebar and select your team.
2. Open the switcher again and select **Manage team**.

<figure><img src="/files/MzDs6qGqBqhP6DBaPz2x" alt="Ideogram home page with the workspace switcher open at the top left and the Manage team option highlighted"><figcaption><p>Switch to your team workspace, then select <strong>Manage team</strong>.</p></figcaption></figure>

The Team page shows a billing summary — next billing date, billed member count, and projected total — and the member list.

<figure><img src="/files/O8nRQCtv35HSokaGgwy2" alt="Team page showing the billing summary with next billing date, billed members, and projected total, with the Manage billing and Invite members buttons highlighted"><figcaption><p>The Team page: billing summary, <strong>Manage billing</strong>, and <strong>Invite members</strong>.</p></figcaption></figure>

## Team Owner and Billing

The Team owner manages the Team subscription. Owner/admin capabilities can include:

* managing Team billing and subscription settings;
* inviting members;
* removing members;
* reviewing seat count and seat-related billing;
* purchasing or assigning top-up credits where available;
* updating team name or icon where supported.

Seat changes can affect billing. Review the confirmation screen in-product before adding or removing members.

**Manage billing** on the Team page opens the billing portal. The Team subscription is billed per seat — the subscription line shows the seat quantity (for example, ×2) — and the portal shows your next billing date, estimated payment, payment method, billing information, and invoices. Cancelling, renewing, and downloading invoices work the same way as for personal subscriptions; see [Billing & Subscriptions](/plans-and-pricing/billing-and-subscriptions).

<figure><img src="/files/SXnABiTW34tjcpB0yIfm" alt="Billing portal showing the Ideogram Team yearly subscription with a seat quantity of two highlighted, along with payment method, billing information, and invoice history"><figcaption><p>The Team subscription in the billing portal, billed per seat.</p></figcaption></figure>

### Renaming your team

Click the **⋯** menu next to the team name at the top of the Team page and select **Rename**.

<figure><img src="/files/Zo4bLOw6qUEgXsOWoHTH" alt="Team page with the menu next to the team name open and the Rename option highlighted"><figcaption><p>Rename your team from the <strong>⋯</strong> menu.</p></figcaption></figure>

## Inviting Members

Team owners can invite members from the Team page:

1. Click **Invite members** in the Members section.
2. Enter one or more usernames or email addresses.
3. Click **Invite**.

<figure><img src="/files/CJDgSJmhlkaql39LdAae" alt="Invite members dialog with a field for usernames or email addresses and the Invite button highlighted"><figcaption><p>Invite by username or email. Users are added and billed to your plan when they join.</p></figcaption></figure>

When a user accepts an invitation, they gain access to Team plan benefits according to their role and the current Team subscription. As the dialog notes, users are added — and billed to your plan — when they join your team, so adding a member can add a paid seat.

## Removing Members

Team owners can remove members from the Team page. Removing a member can affect that user's access to Team plan benefits and may not refund unused seat time or credits. Review the in-product confirmation before completing the removal.

## Team Members

Team members use Team access according to the active Team subscription and their role. Members may be able to switch between personal and team contexts when both are available.

## Topping Up Member Credits

Team owners can buy priority-credit top-ups for a member from the Team page:

1. Click the **⋯** menu at the end of the member's row and select **Top up credits**.

<figure><img src="/files/QmXSPgv6HsMA1QROCObh" alt="Team page member row with the row menu open and the Top up credits option highlighted"><figcaption><p>Each member row has a <strong>Top up credits</strong> action.</p></figcaption></figure>

2. Choose a quantity and confirm the purchase.

<figure><img src="/files/GufVr4U3fG7x5OYAVDXk" alt="Top up your priority credits dialog with a quantity selector and the add credits button highlighted"><figcaption><p>Top-up credits are used when monthly priority credits run out.</p></figcaption></figure>

As the dialog notes, the top-up balance is used when the member's monthly priority credits run out; unused top-up credits carry over month to month while the subscription is active and expire a year from purchase.

## Private Generation

The Team plan can include private generation where supported. Private images follow the same private-generation behavior described in [Private Generations](/using-ideogram/generation-settings/private-generations). Do not assume private images are shared with the whole team unless the product explicitly shows a shared/team workspace for that image.

## Batch Generation

Batch Generation is available on Team where supported. See [Batch Generation](/using-ideogram/features-and-tools/batch-generation) for upload limits and template columns.


# Ideogram API

The Ideogram API lets developers integrate Ideogram image generation and editing capabilities into applications and production workflows.

Ideogram 4.0 is available for API workflows where supported by the public developer docs. API workflows can include image generation, editing, upscaling, and other visual workflows such as background removal or remixing where those endpoints are available.

For exact endpoint names, request schemas, examples, model values, and model-specific availability, use [developer.ideogram.ai](https://developer.ideogram.ai).

* Developer docs: [developer.ideogram.ai](https://developer.ideogram.ai)
* API pricing: [ideogram.ai/features/api-pricing](https://ideogram.ai/features/api-pricing)
* API agreement: [ideogram.ai/legal/api-tos](https://ideogram.ai/legal/api-tos)
* API status: [status.ideogram.ai](https://status.ideogram.ai/)

Ideogram user subscriptions and API accounts are separate, with separate payment and billing setup.

To try the API from your browser without writing any code, use the [Playground](/plans-and-pricing/ideogram-api/playground) in the API Dashboard.

## Setup

1. Log in to Ideogram.
2. Open the API Dashboard or [ideogram.ai/manage-api](https://ideogram.ai/manage-api).
3. Accept the [Developer API Agreement](https://ideogram.ai/legal/api-tos).
4. Add payment information.
5. Create an API key.
6. Use [developer.ideogram.ai](https://developer.ideogram.ai) for endpoint details, request schemas, examples, and model availability.

## API Keys

Create and manage API keys from the API Dashboard. Store new keys immediately; full key values are only shown at creation time.

All keys created for an API account draw from that API account's billing and credit balance. Keep keys private, rotate them when needed, and delete keys that should no longer have access.

## Billing

API billing uses the API account payment and credit setup, not your normal Ideogram subscription plan. Use the API Dashboard to add payment information, review balance controls, and manage API billing settings.

For current API pricing and billing details, use [ideogram.ai/features/api-pricing](https://ideogram.ai/features/api-pricing).

## Developer Docs

Use [developer.ideogram.ai](https://developer.ideogram.ai) for public endpoint documentation, schemas, examples, and SDK guidance. GitBook product docs should link to the developer docs rather than manually duplicating endpoint lists.

For enterprise or production use cases such as private workflows, API scale, custom branded models, or production support, contact Ideogram through the public pricing or sales channels.


# Playground

The **Playground** section of the [API Dashboard](/using-ideogram/ui-overview/pages-ui/api-dashboard) sidebar (Generate, Remix, Remove background) lets you run real API requests from the browser — no code required. It's the quickest way to try an endpoint, see the exact cURL command for a request, and inspect the raw JSON response before writing your integration. Playground requests use your API key and consume API credits like any other API call.

Each Playground page starts with an **API key** field: paste an existing key or click **New key** to create one. The key is kept in memory only and must be re-entered after a page refresh. For full request and response schemas, see [developer.ideogram.ai](https://developer.ideogram.ai).

## Generate

The Generate page builds a text-to-image request. Write your prompt in the **Text prompt** tab, then set the resolution, rendering speed, and whether to opt the request into post-generation copyright detection. Each form field is labeled with its API parameter name (for example `resolution`, `rendering_speed`), and the **cURL request** block below the form updates live as you change settings — copy it to reproduce the same request from your terminal.

<figure><img src="/files/TudOLgjIZBq1wAuEWEWj" alt="Playground Generate page with the Text prompt and JSON prompt tabs and the Generate button highlighted, showing prompt, resolution, and rendering speed fields above a live cURL request preview"><figcaption><p>The Generate form. The cURL block mirrors your current settings; click <strong>Generate</strong> to run the request.</p></figcaption></figure>

Switch to the **JSON prompt** tab to describe the image as structured JSON instead of free text — useful for precise control over scene, subject, and style attributes. See [JSON Prompting](/using-ideogram/getting-started/prompting-guide/4.-json-prompting-ideogram-4.0) for how to structure these prompts.

<figure><img src="/files/ra8jYTiHqYjTzEambhOz" alt="Playground Generate page with the JSON prompt tab highlighted, showing a structured JSON prompt in the editor and the corresponding cURL request below"><figcaption><p>The <strong>JSON prompt</strong> tab accepts a structured prompt in place of free text.</p></figcaption></figure>

When the request completes, the **Output** panel on the right shows the generated image alongside the full JSON response — including the image URL, resolution, seed, and safety fields your integration will receive.

<figure><img src="/files/CrYH0XYpU8vBXBTVaiOB" alt="Playground Generate output panel showing a generated image of a cat next to the raw JSON API response with resolution, seed, and style fields"><figcaption><p>The Output panel: the generated image plus the raw JSON response.</p></figcaption></figure>

## Remix

The Remix page reworks an existing image with a prompt. Upload an **initial image** (PNG, JPEG, or WebP), describe the change in the **Prompt** field, and set the **image weight** — higher values stay closer to the original image, lower values give the prompt more influence. Resolution, rendering speed, and copyright detection work the same as on Generate.

<figure><img src="/files/8AvAA6AKAYbxm5UfBcRn" alt="Playground Remix page with the initial image upload area and the Remix button highlighted, showing prompt, image weight slider, resolution, and rendering speed fields with a cURL request preview"><figcaption><p>The Remix form: upload an initial image, add a prompt, and balance the two with <strong>image weight</strong>.</p></figcaption></figure>

For example, starting from this photo as the initial image:

<figure><img src="/files/ITo3ZGSR4IWArVlQL3ZI" alt="Photo of a wild turkey standing on a lawn, used as the initial image for the Remix example"><figcaption><p>The initial image uploaded in this example.</p></figcaption></figure>

With the prompt "Restyle this image as a vibrant watercolor painting," the Output panel shows the remixed result and its JSON response, so you can compare it against the original and adjust the image weight or prompt.

<figure><img src="/files/DNR0S9RKc5dsukxBMvfS" alt="Playground Remix output panel showing a watercolor-style remixed image of a turkey next to the raw JSON API response"><figcaption><p>The Remix result: the photo restyled as a watercolor painting, with the raw response alongside.</p></figcaption></figure>

## Remove background

The Remove background page takes a single image upload (PNG, JPEG, or WebP) and returns it with the background removed — there are no other parameters. The cURL block shows the equivalent command for your own scripts.

<figure><img src="/files/MSsCdFO4wTMsaDco6WYA" alt="Playground Remove background page with the Remove background button highlighted, showing an image upload area and the cURL request preview"><figcaption><p>Remove background: upload an image and run — no other settings.</p></figcaption></figure>

The Output panel shows the cut-out result on a transparent background, and the JSON response includes the URL for downloading it. Here the background of the turkey photo from the Remix example has been removed.

<figure><img src="/files/yTTAqh6803GST1PQbkOy" alt="Playground Remove background output panel showing the turkey cut out from its background next to the raw JSON API response"><figcaption><p>The result: the subject isolated from its background, with the raw response alongside.</p></figcaption></figure>


# Support

## For Product-Related Questions:

The fastest way for you to get help is joining our Discord community and posting your question in the #support channel, which is monitored by our community moderators and staff members.

We also have a #prompt-w-friends and other community channels where you can get tips from other Ideogram creators on generating the perfect image.

## For Billing and Subscription Inquiries:

If you have a problem with your account or need assistance with payment-related issues, please send us an email at <support@ideogram.ai>. We will get back to you as soon as possible.


# Company

Ideogram (pronounced "eye-diogram") is a new AI company on a mission to help people become more creative. The company is developing state-of-the-art AI tools that will make creative expression more accessible, fun, and efficient. It's pushing the limits of what’s possible with AI, with a focus on creativity and a high standard for trust and safety.

<figure><img src="/files/6GgFViysaAGFECVDLrBE" alt="Colorful floral illustration with the words Help people become more creative on a black background" width="375"><figcaption></figcaption></figure>

We believe everyone has an innate desire to create and share their creations with each other. To this end, we invite dreamers from all backgrounds to join and collectively shape a more creative future.


---

[Next Page](/llms-full.txt/1)